

In this project, we are going to see the entire workflow of how the application is released and what are the various steps to automate these tasks. We are going to use SonarQube, Argo CD and Kubernetes in this project.
Workflow explanation

Continuous Integration -
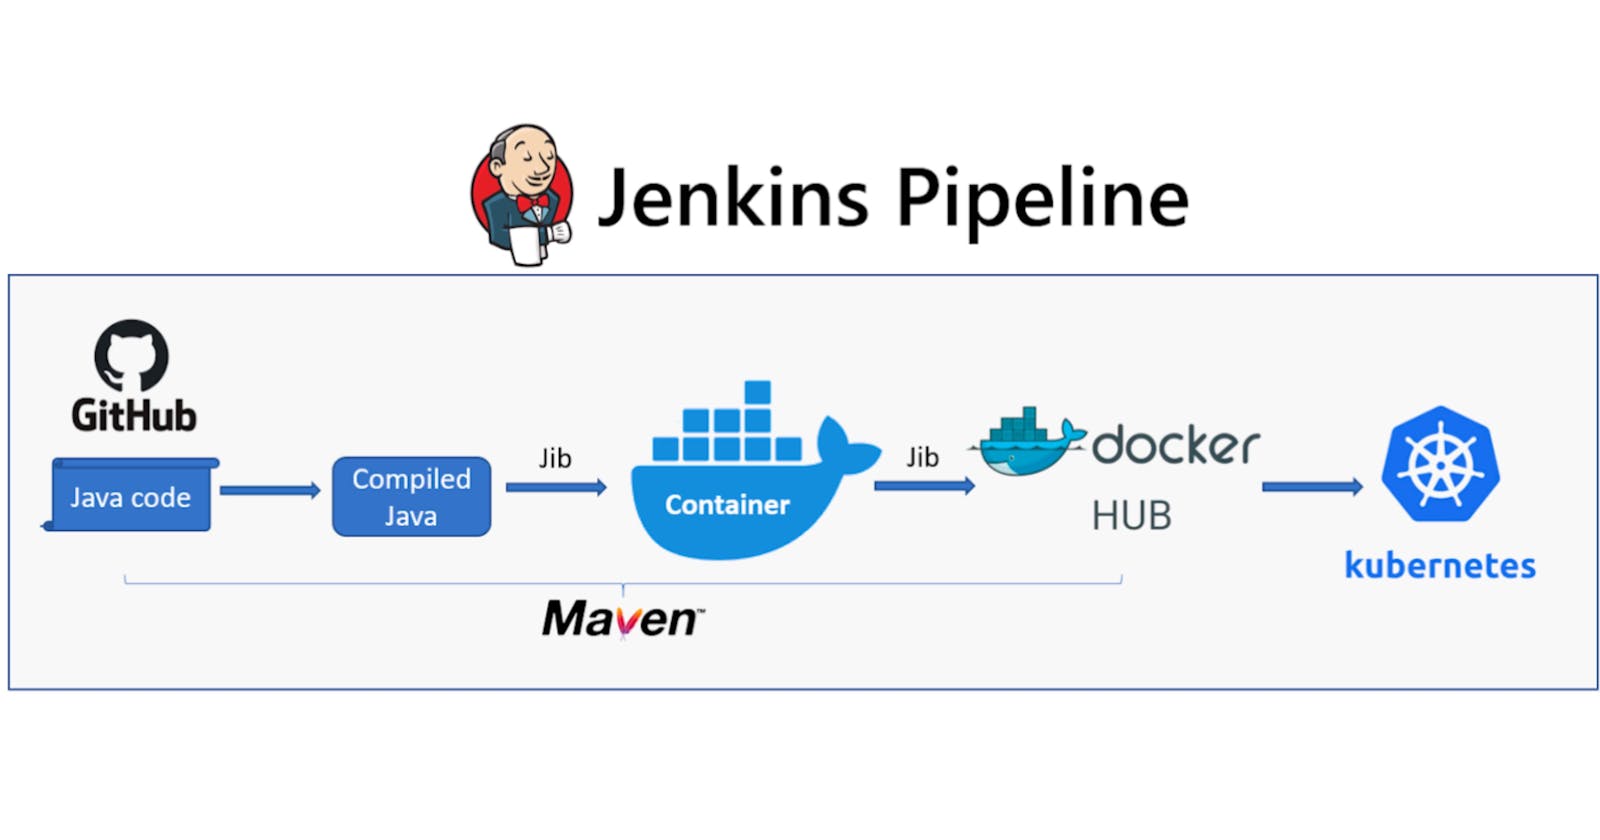
Suppose an organization stores Java code in a git repository when a developer raises a pull request to the repository it will trigger the Jenkins pipeline.
Github can connect to Jenkins in multiple ways as it can continuously pull or configure some build triggers in Jenkins but the most efficient way is to use webhooks.
What is GitHub Webhooks - Git sends a notification/trigger to your Jenkins, whenever Developers commit something into the repository.
So when Jenkins is trigged by webhook then it will pull the code from the source code repository and start triggering Jenkins pipeline with Jenkinsfile.
With the help of Jenkins, you can perform a set of actions using Jenkinsfile, these set of actions will be anything depending upon your project but in this project, our actions will be to install Maven
What is Maven - The tool allows developers to build and document the application.
We can also use the docker agent when you use the docker agent you don't have to worry about the installation it will build the application and terminate after creating an image of that build.
In the build, it will start executing unit tests and perform static code analysis if both tests are successful then after that it will move to the next step if the build is unsuccessful then you can set an email alert by installing an email plugin it will notify if the build is unsuccessful.
After the successful build stage, the next step will be to integrate with code scanning tools like Sonarqube which check for any security vulnerability if there is any then it will send an email notification.
What is sonarqube - It is a tool for continuous inspection of code quality. It does static code analysis and provides a detailed report of bugs, code smells, vulnerabilities and code duplications.
When there is no security valunarabilty after scanning the code with Sonarqube then it will move to the next step, The next step will be the creation of a docker image you can create a docker image by using build commands and after that, you can send this docket image to a container registry, container registry can be anything like docker hub, ECR.
Above all steps are part of Continuous integration after the end of the continuous integration we have a docker image ready
Continuous delivery -
After our docker image was pushed to the container registry like ECR then the next step will be to create a Kubernetes cluster.
But first, we will create another git repository similar to the source code which will have an application manifest.
What is Kubernetes manifest - K8s manifest files are YAML or JSON files that describe the desired state of K8s objects, such as pods, services, deployments, and so on. These files are used to create, update, or delete resources in a K8s cluster.
In the Kubernetes cluster, there are two GitOps tools the first one is the Argo image updater and Argo CD both are Kubernetes controllers.
what is Argo Image Updater - It will check for new versions of the container images that are deployed with your Kubernetes cluster and automatically update them to their latest version using Argo CD.
What is ArgoCD - Argo CD is a Kubernetes controller, responsible for continuously monitoring all running applications and comparing their live state to the desired state specified in the Git repository.
The Argo Image Updater will continuously look for the image registry if there is any new image is created it will pick the image and it will update the image in another git repository and another git repository is made for the image manifest.
Once the GitHub repository is updated with the new helm chart, pod.yml or deployment.yml another Kubernetes tool Argo CD will take the image and deploy it in the Kubernetes cluster.
This is the entire process of Continuous integration and continuous delivery

Let's see this complete workflow in Practical step-by-step -
Continuous integration steps
Prerequisites
An AWS account
AWS CLI installed
Your AWS credentials are configured locally with your access keys and a default region
Create an EC2 instance in AWS
Login/sign-up to your AWS console and search for EC2 and open it.
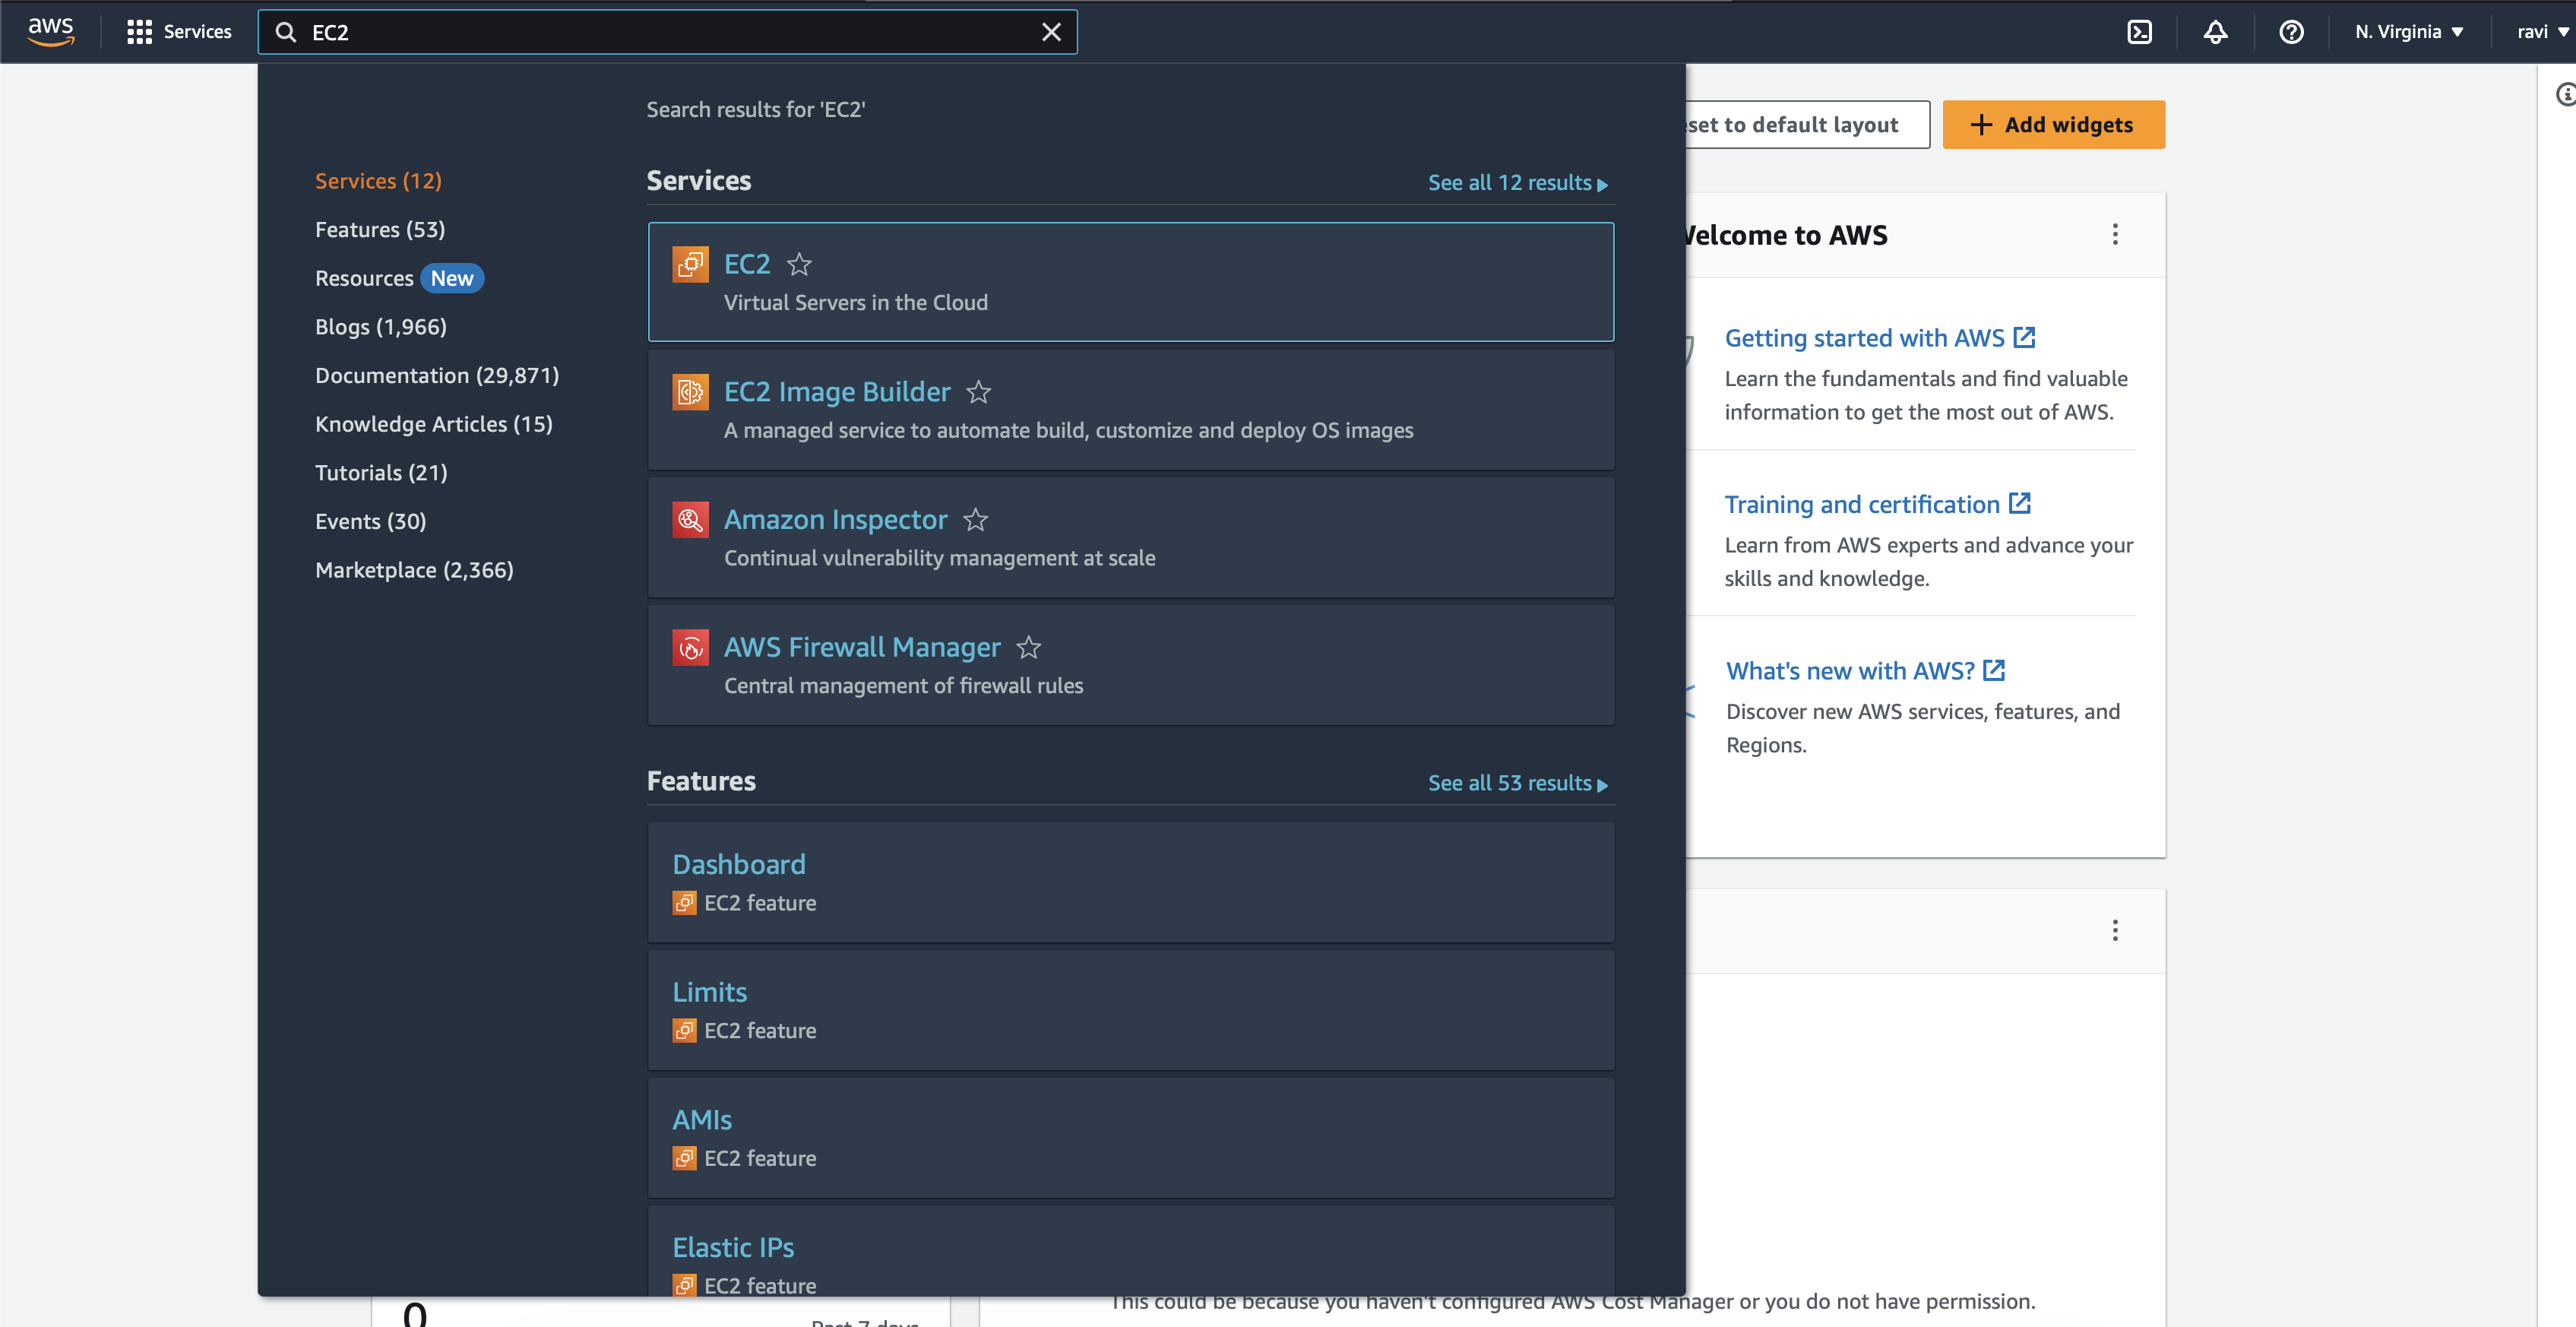
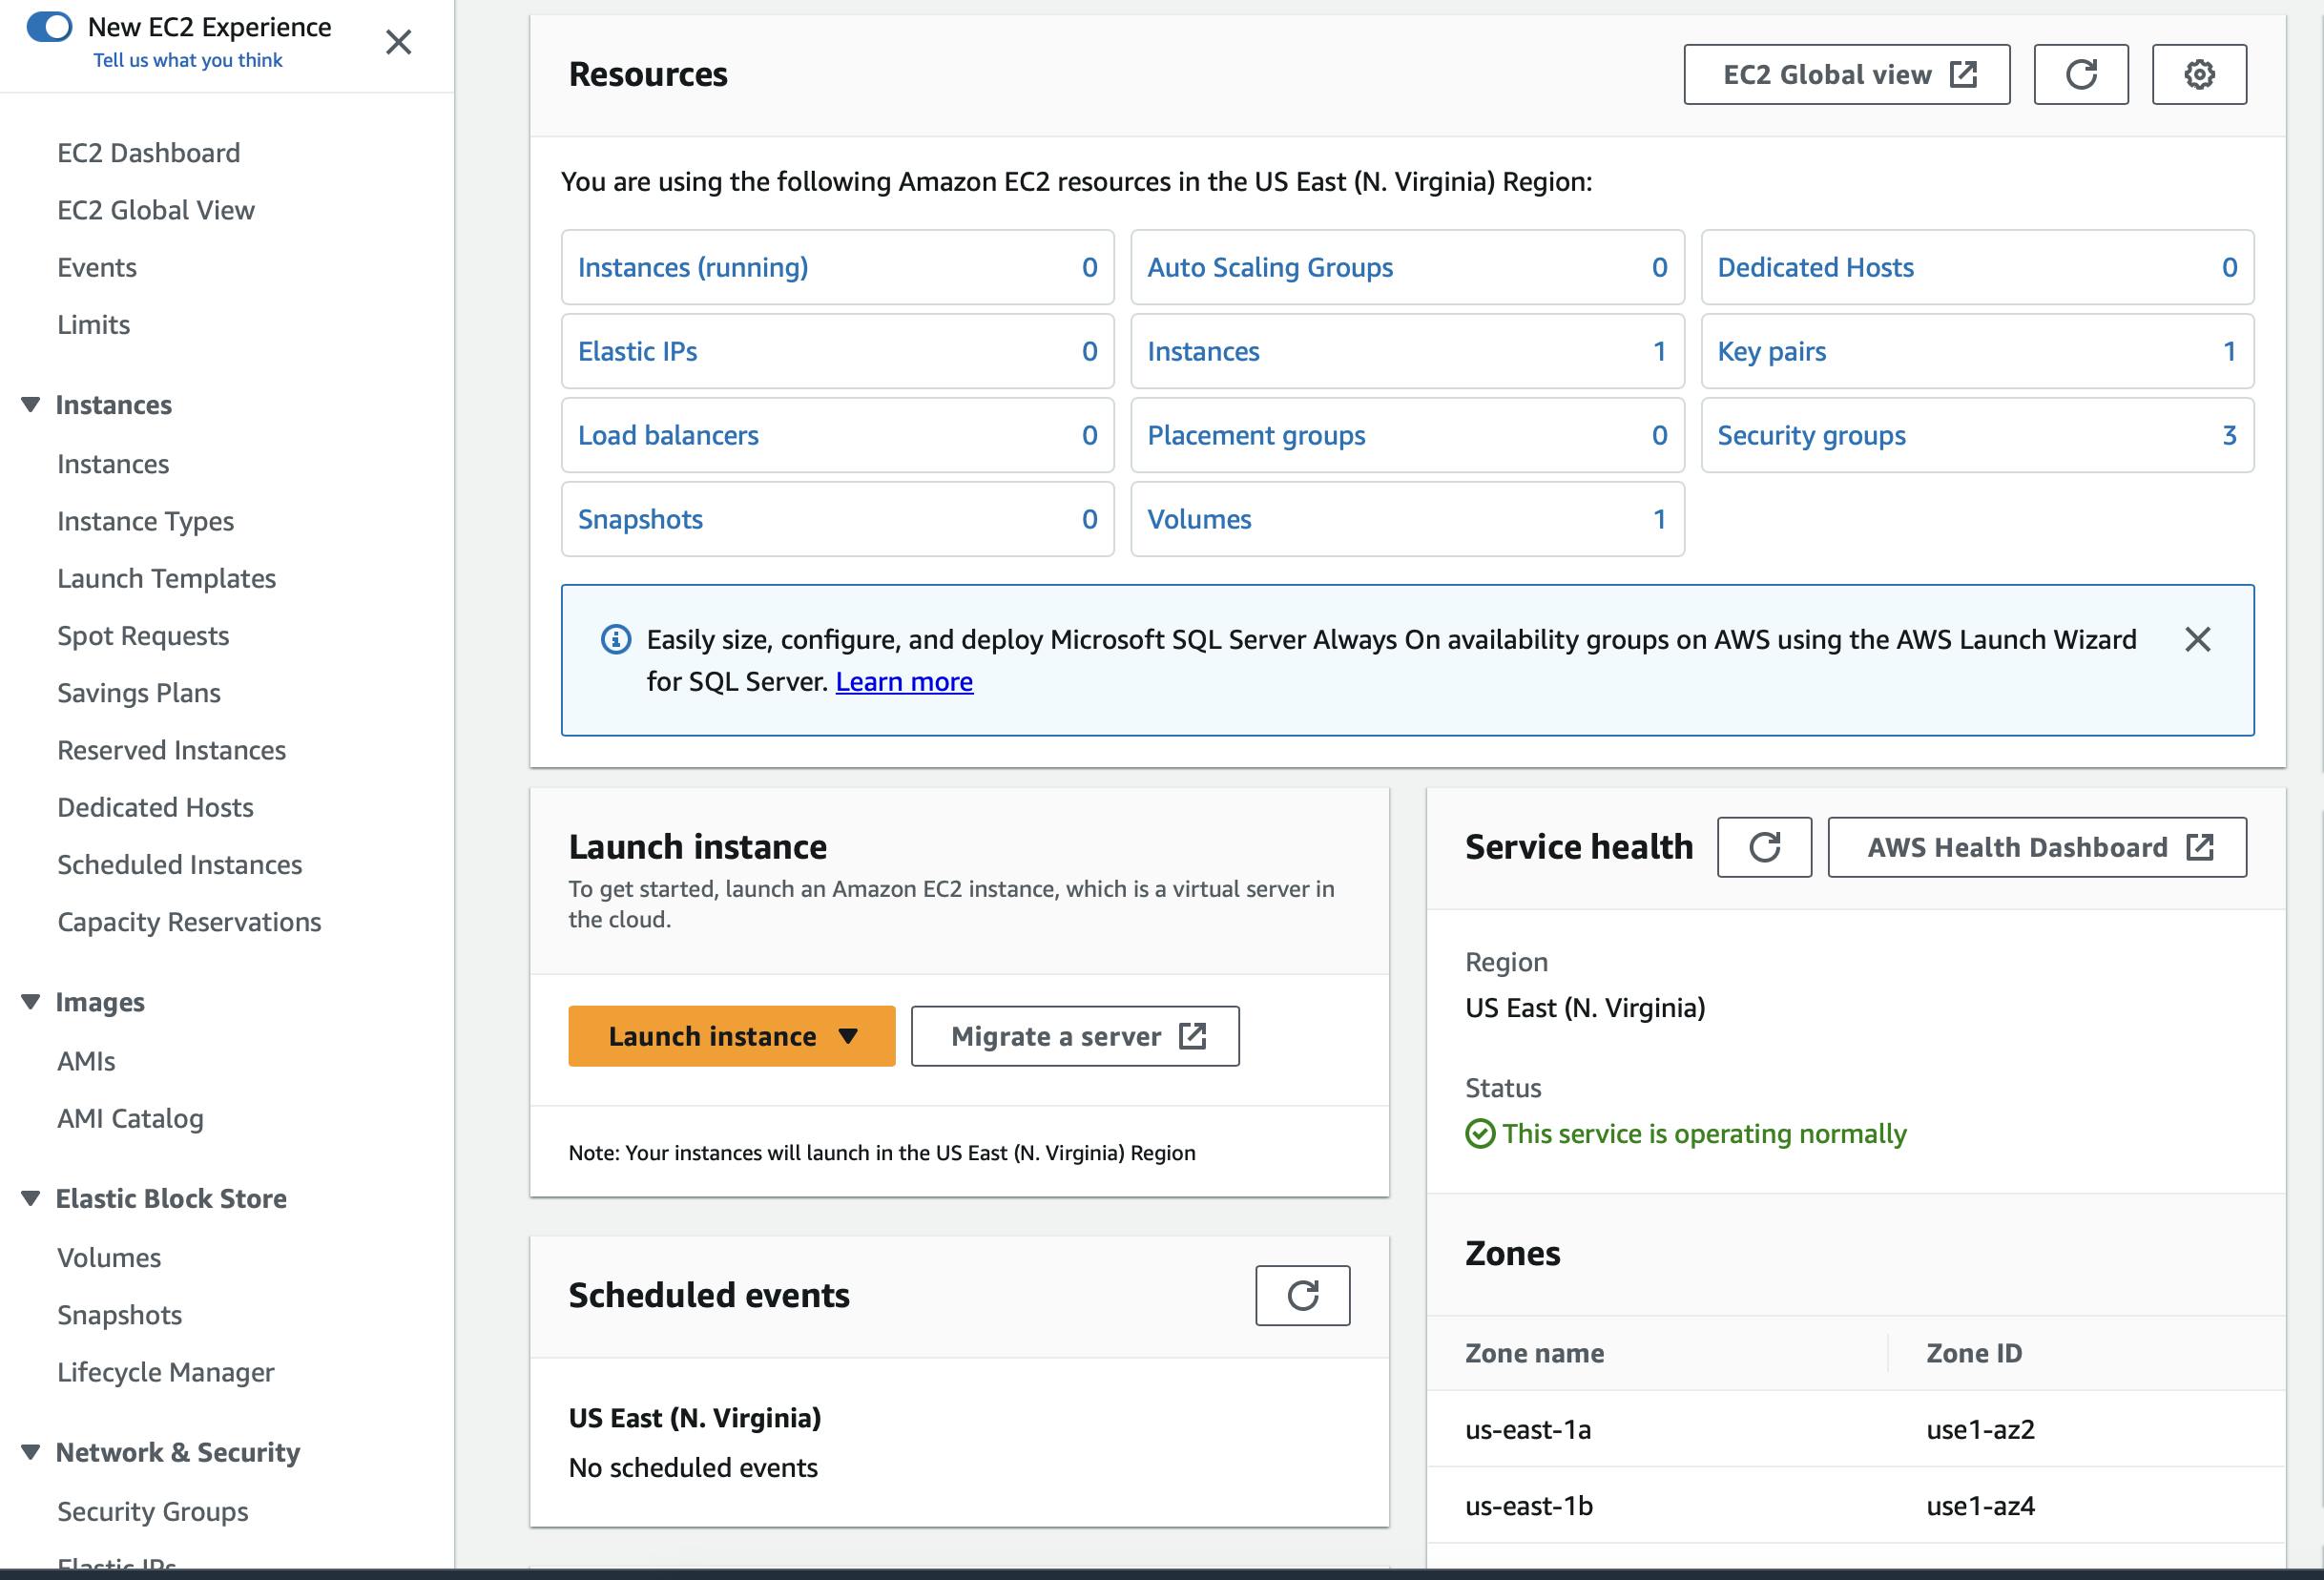
You will be landed in the Dashboard of EC2, now click on the launch instance button.
Give a name to your instance and select the Ubuntu server

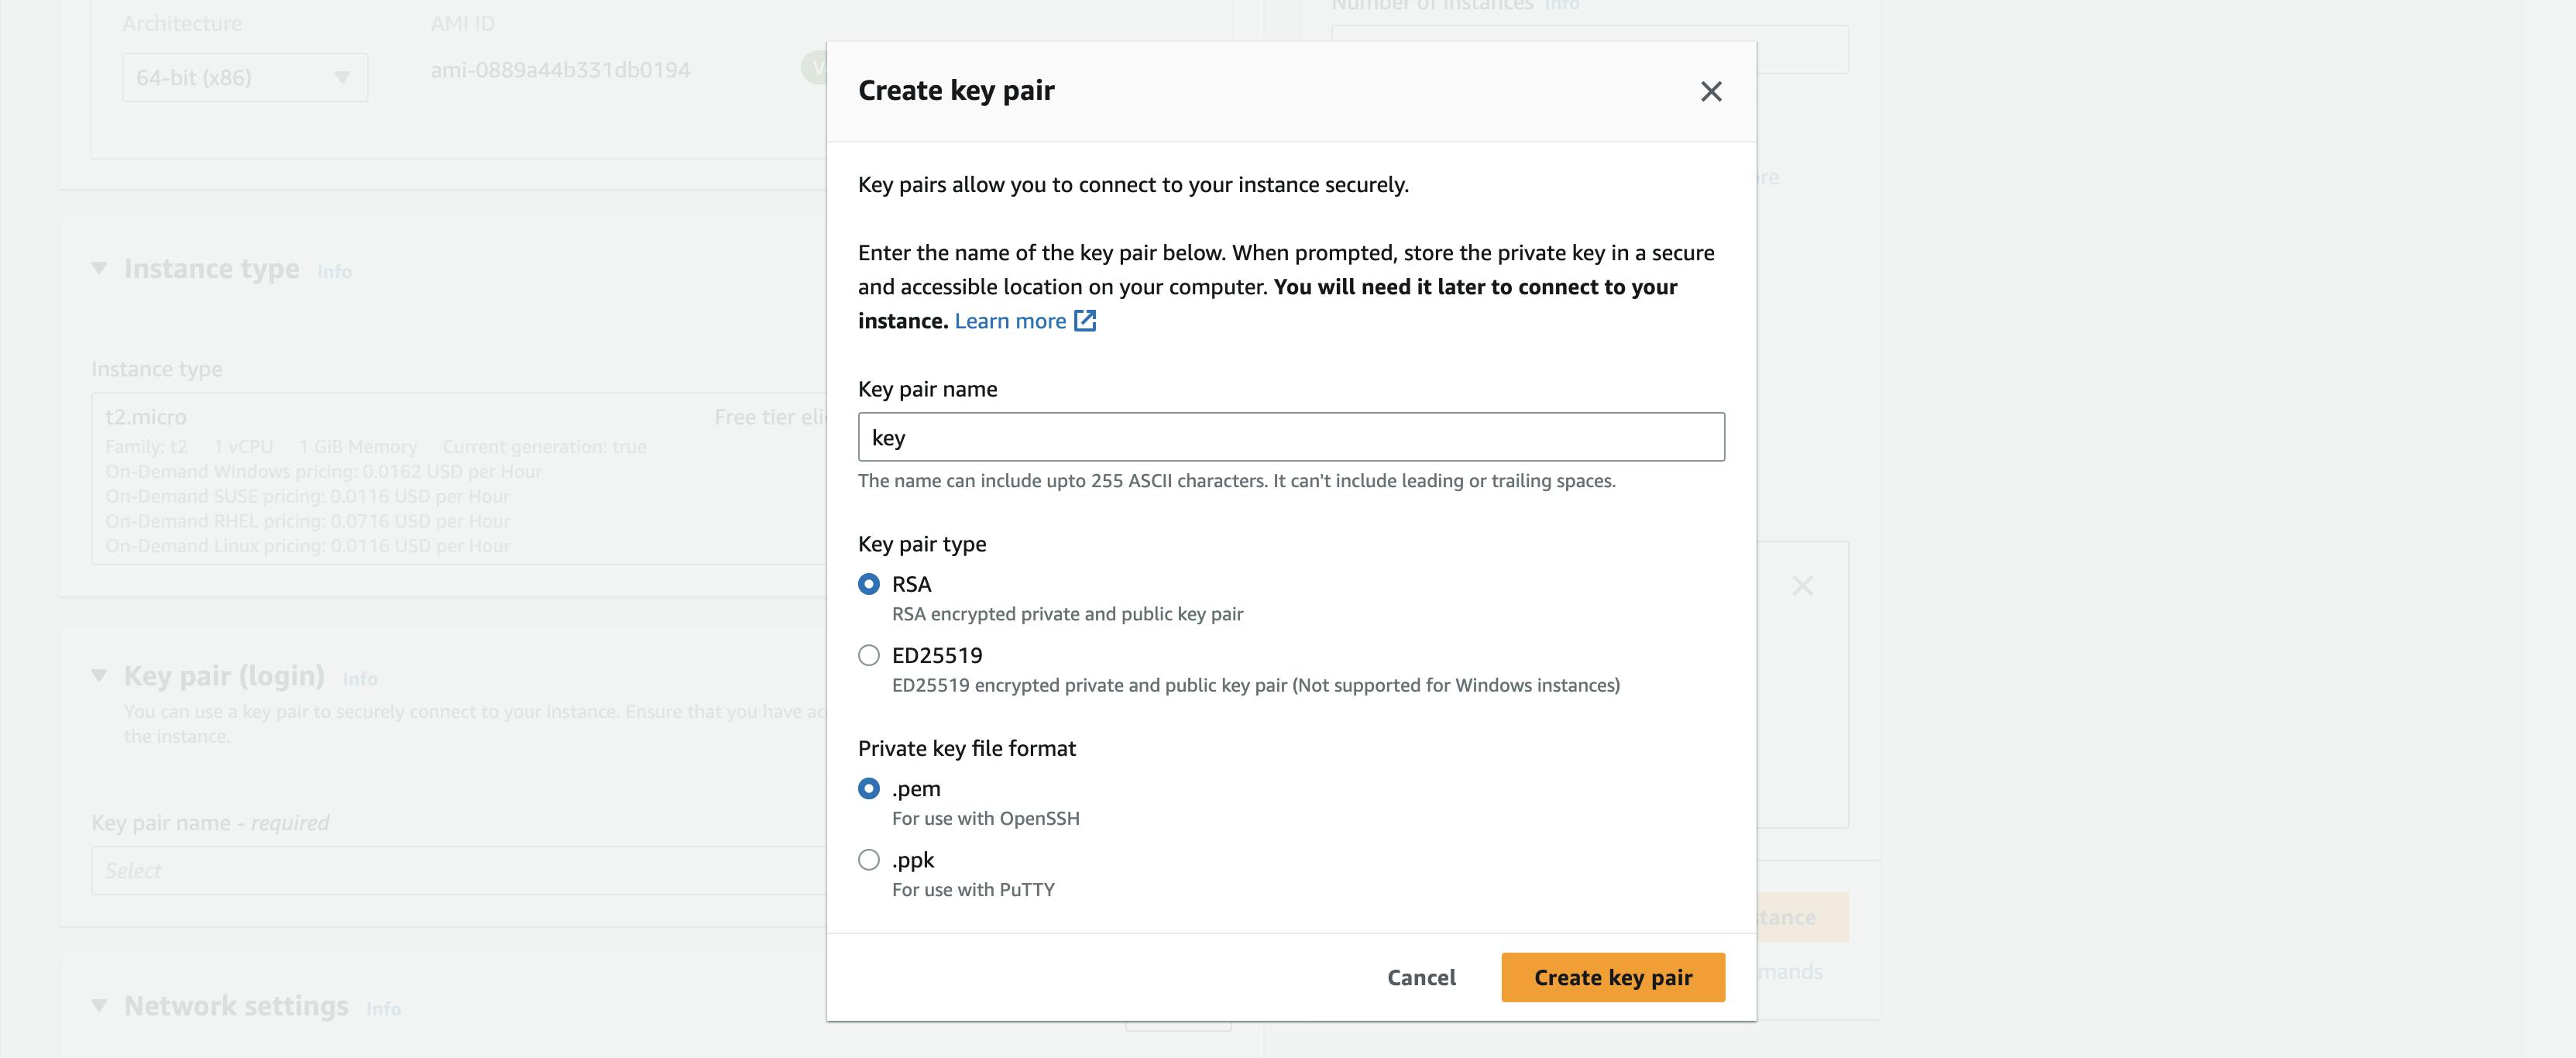
Now important part select the instance type as T2 large because you get 2 CPUs and 8 GB memory which is enough to run this heavy project. Select your key pair if you don't have a keypair then click on Create new key pair.
Note - you will be charged approx. half dollar per hour so make sure to stop/terminate the instance once you complete the project.
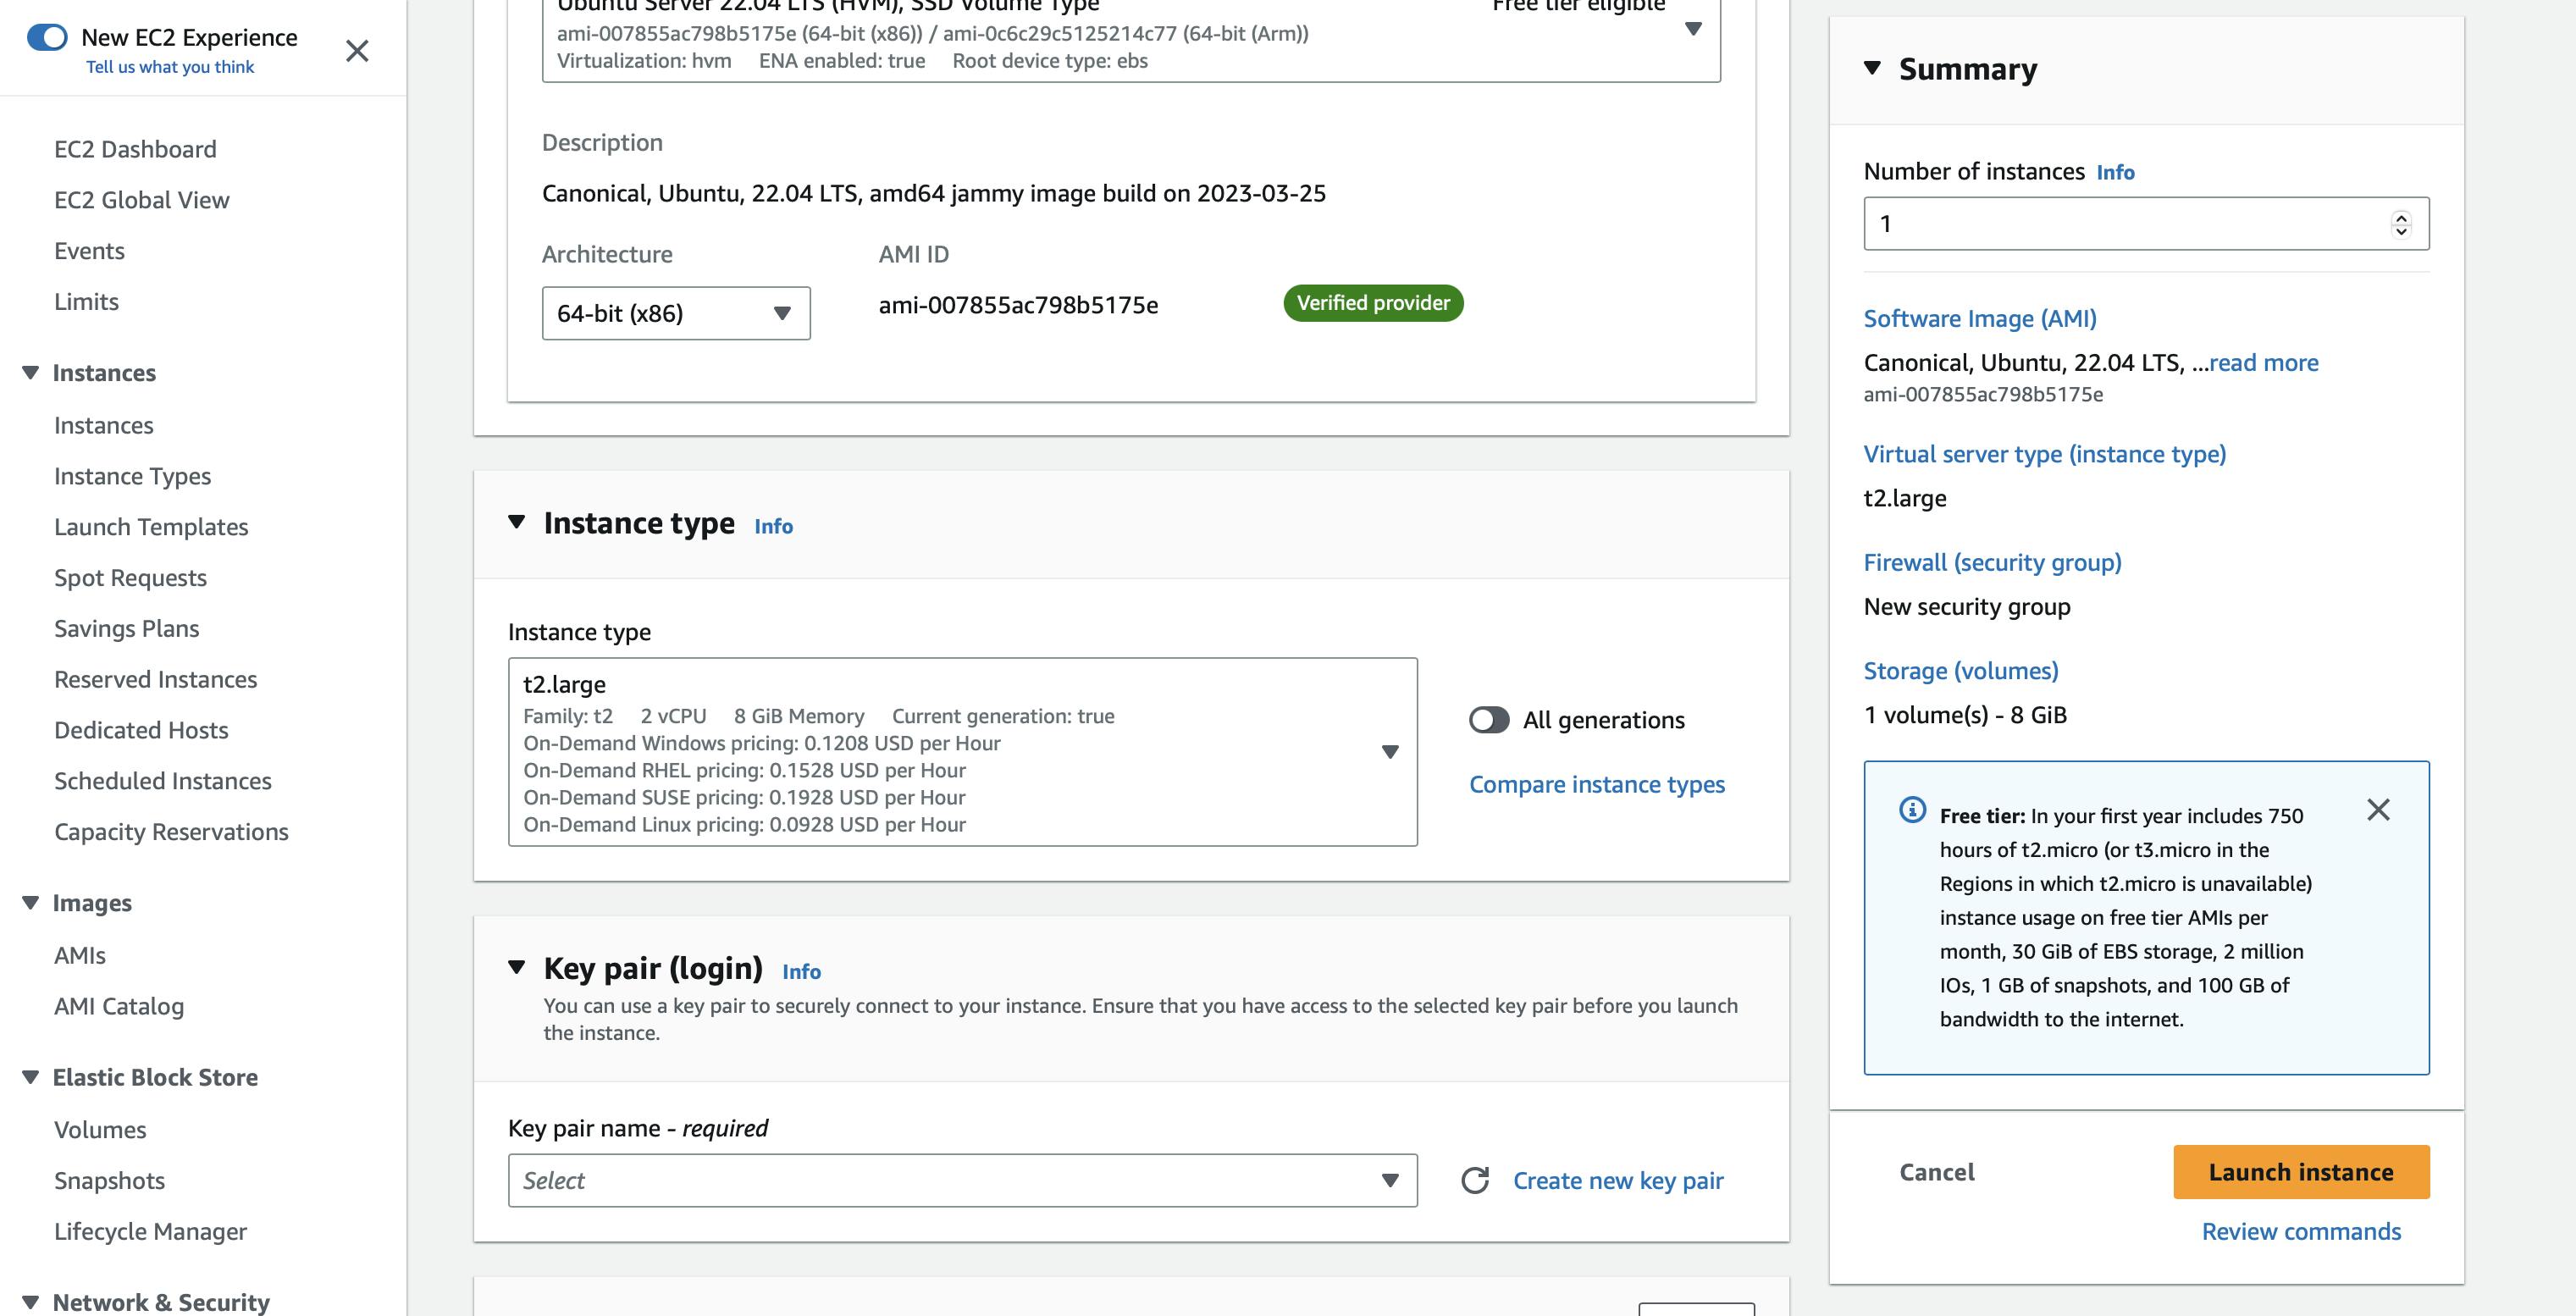
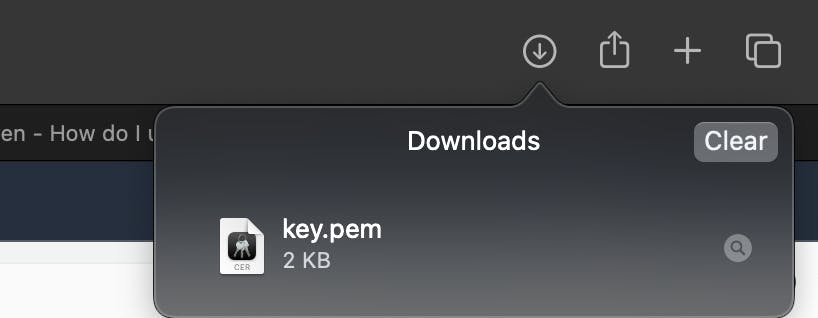
After when you click on Create key pair give a name to your key pair and click on Create key pair and the key pair will be downloaded to your download folder
Now skip all other things and click on the launch instance button and the instance will be successfully launched now click on the instance id which is written in blue color.

Copy the public IPv4 address. all done ubuntu instance is created successfully. now we are going to see How to connect to the AWS Ubuntu instance from your terminal.
Connect EC2 instance to your terminal?
Go to your local machine and open the terminal and change the directory folder where the key pair is downloaded
chmod 600 /Users/Device_name/Downloads/your_pemfile
Now run this command to log in to your Ubuntu terminal (check the path of your download folder)
ssh -i /Users/Device_name/Downloads/pemfile ubuntu@Your_public_ip_adderess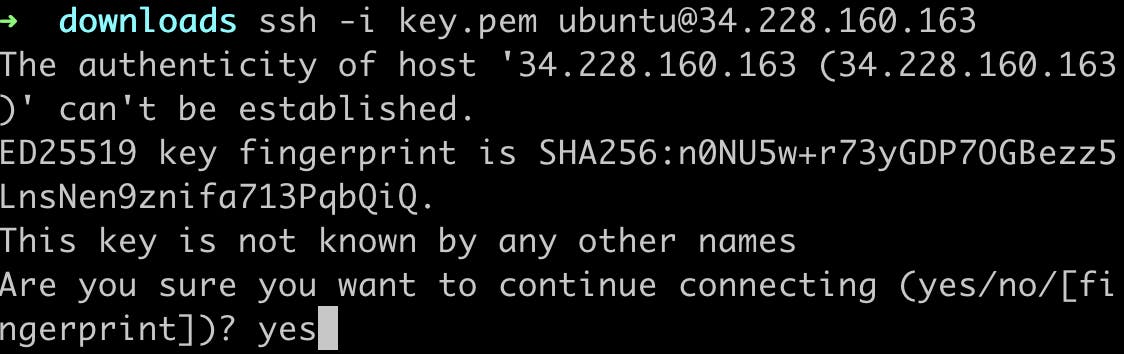

You will be successfully logged into your ec2 instance.
Steps to install Jenkins in your EC2 instance
Jenkins is a JAVA-based application so for that you need to download Jdk
  sudo apt update
  sudo apt install openjdk-11-jre
To check whether JAVA is installed or not for that use
java --versionTo install Jenkins use this command
  curl -fsSL https://pkg.jenkins.io/debian/jenkins.io-2023.key | sudo tee \
    /usr/share/keyrings/jenkins-keyring.asc > /dev/null
  echo deb [signed-by=/usr/share/keyrings/jenkins-keyring.asc] \
    https://pkg.jenkins.io/debian binary/ | sudo tee \
    /etc/apt/sources.list.d/jenkins.list > /dev/null
  sudo apt-get update
  sudo apt-get install jenkins
By default your AWS EC2 instance will not receive traffic from the external world this is because inbound traffic rules are blocked by default so if you want to access any application like Jenkins is an application which is by default running in port 8080 to see where Jenkins is running use this command
ps -ef | grep jenkins
In AWS port 8080 is blocked for that you have to set inbound rules
To set inbound rules go to your EC2 instance in the AWS console and you will see the security tab click on the default security group
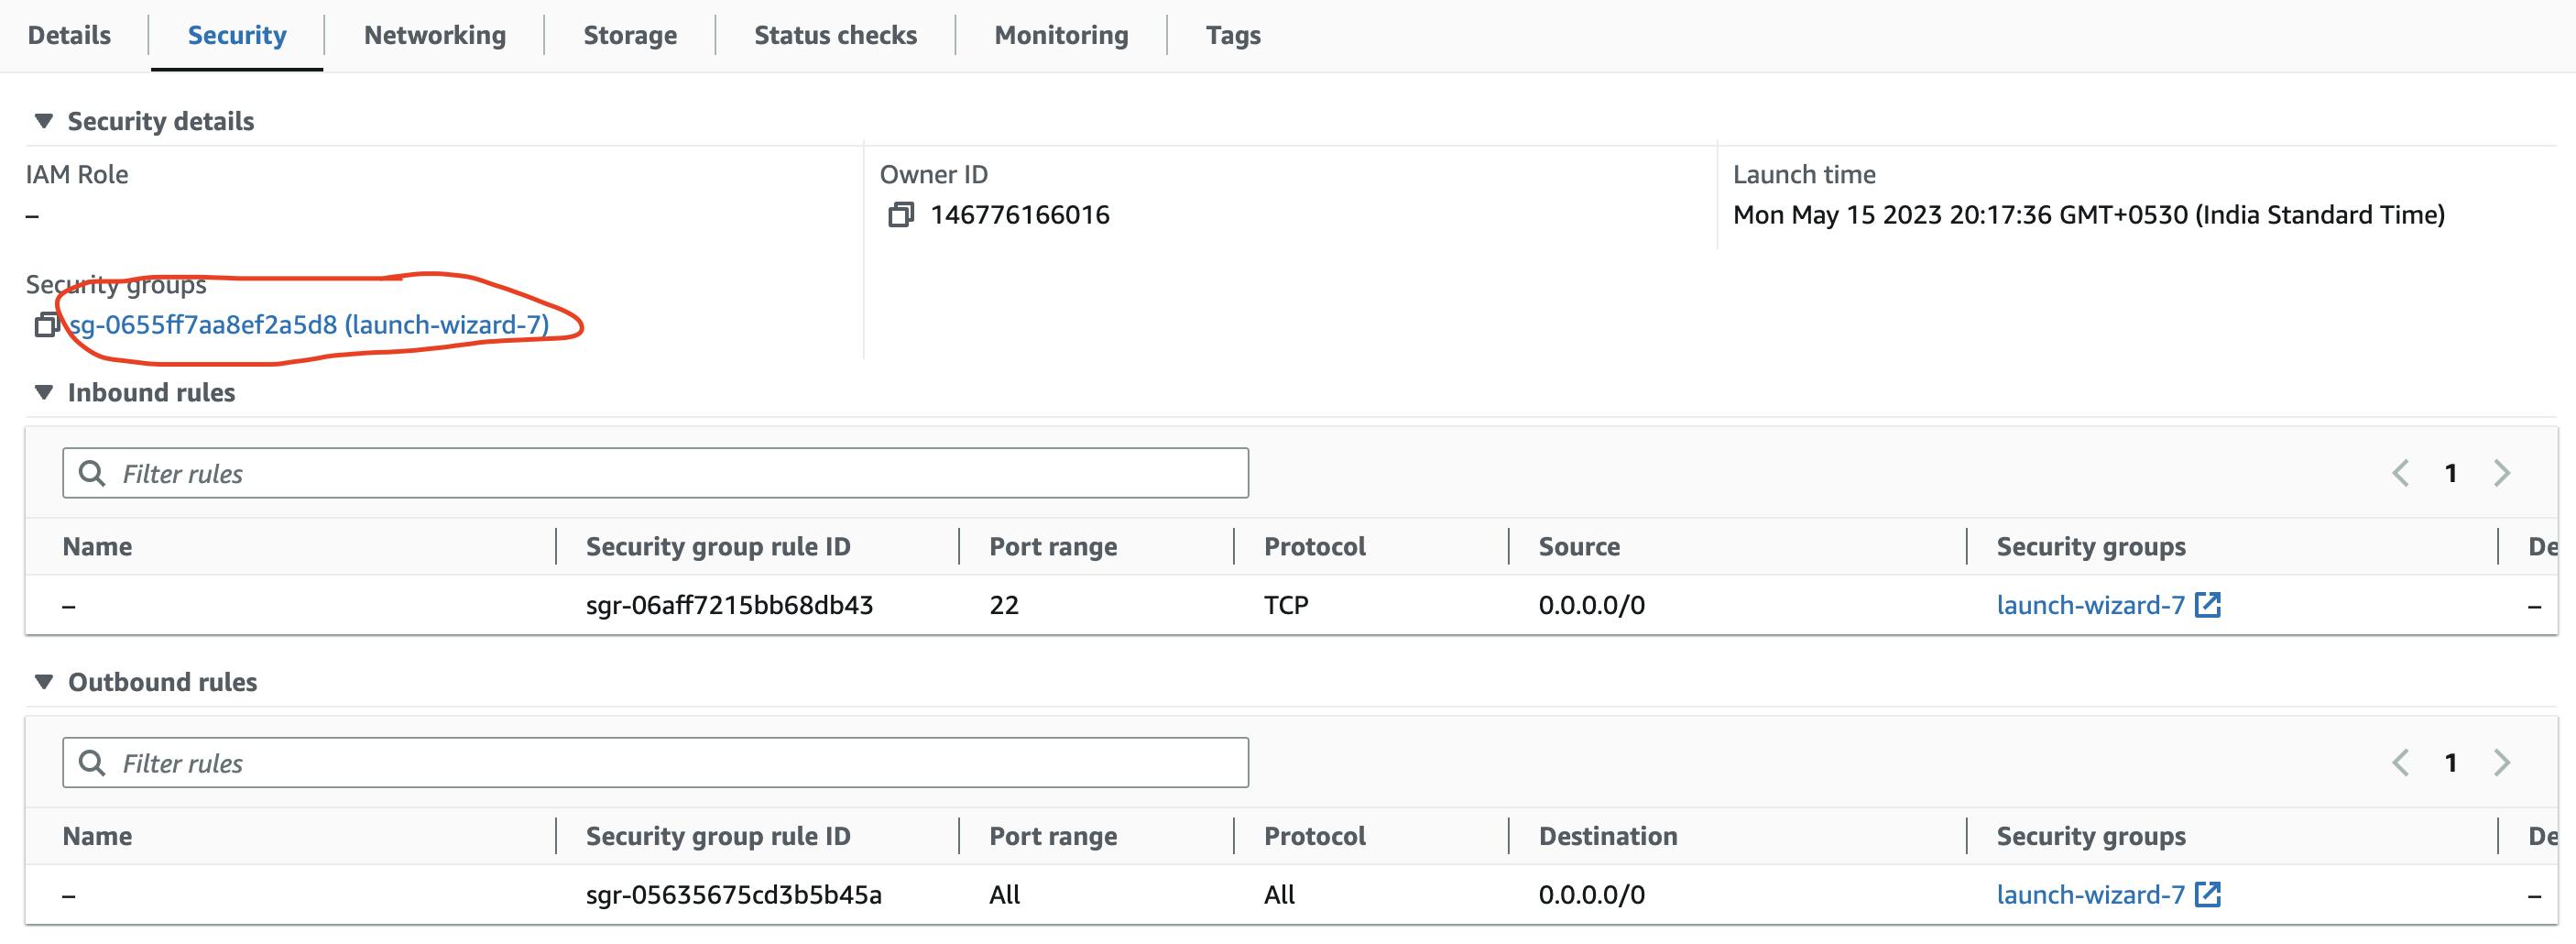
edit inbound rules rules

Click on add rules set type as all traffic and source as Anywhere IPv4 and save the rules

Now you can access Jenkins on port 8080 for that open your browser and copy the public IP address of your EC2 instance followed by 8080
http://Your-public-IP:8080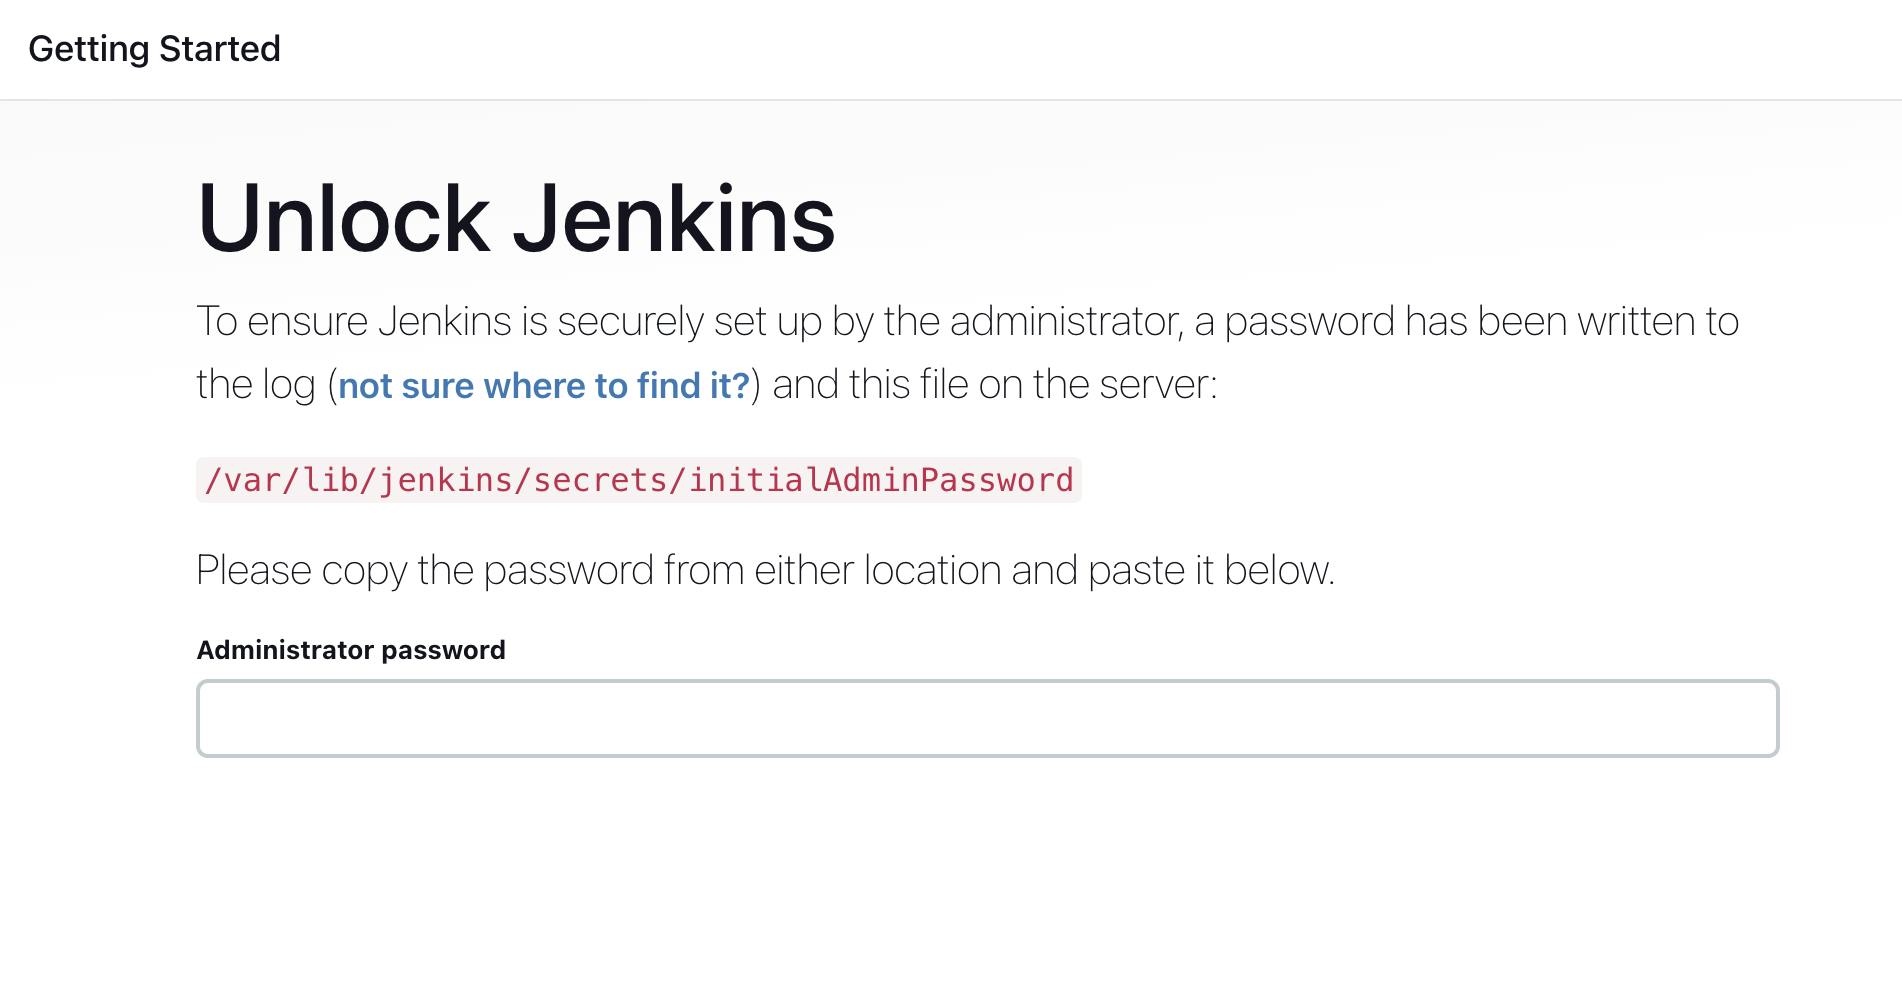
you will be redirected to the Jenkins login page but first, you have to unlock Jenkins for that run this command in your terminal
sudo cat /var/lib/jenkins/secrets/initialAdminPasswordIt will output a password just copy that password and paste it and click on the continue button you will be redirected to the setup page
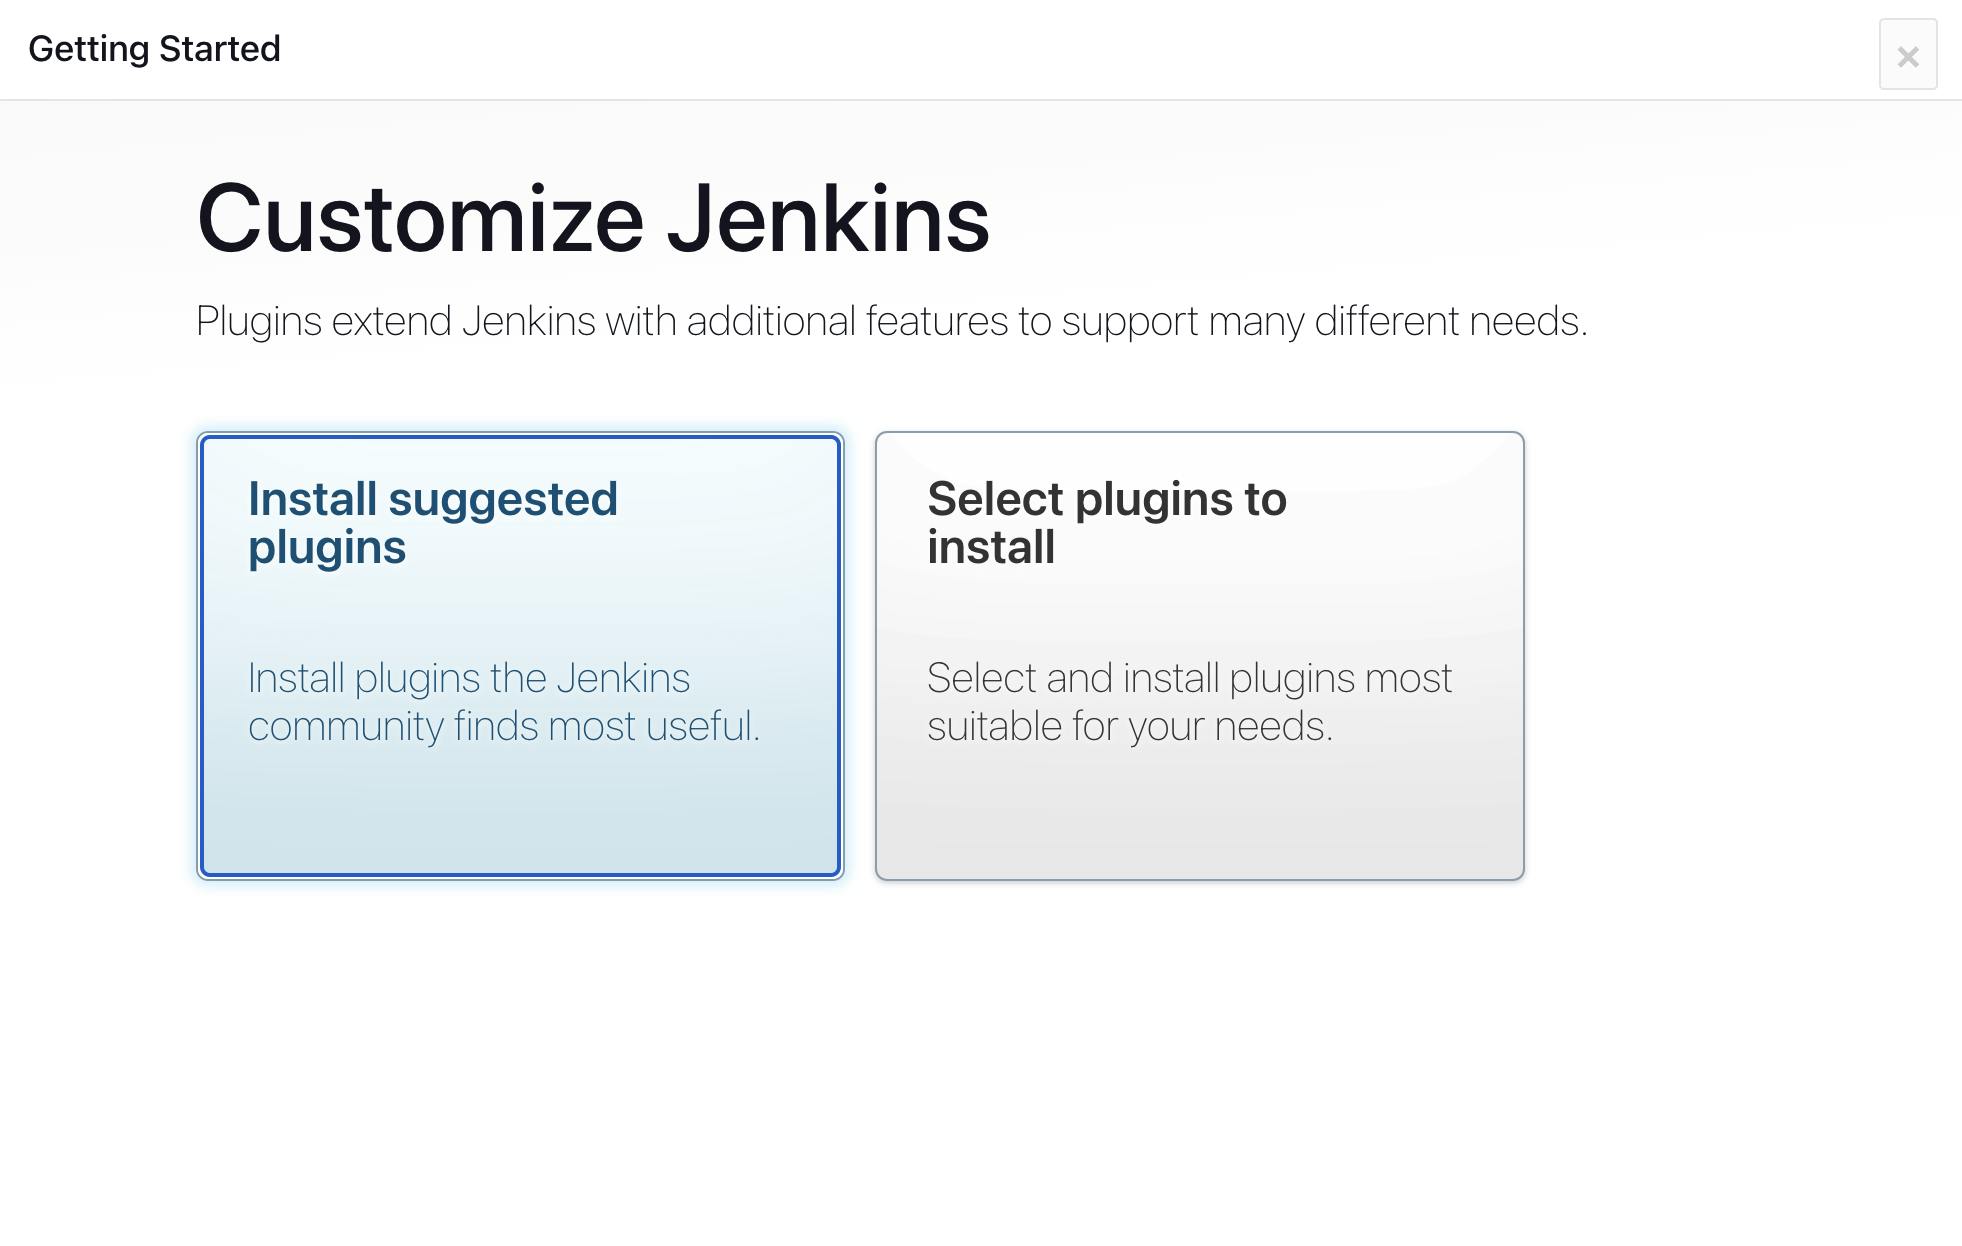
Click on Install suggested plugins and it will start installing plugins after that you have to create your first admin user id
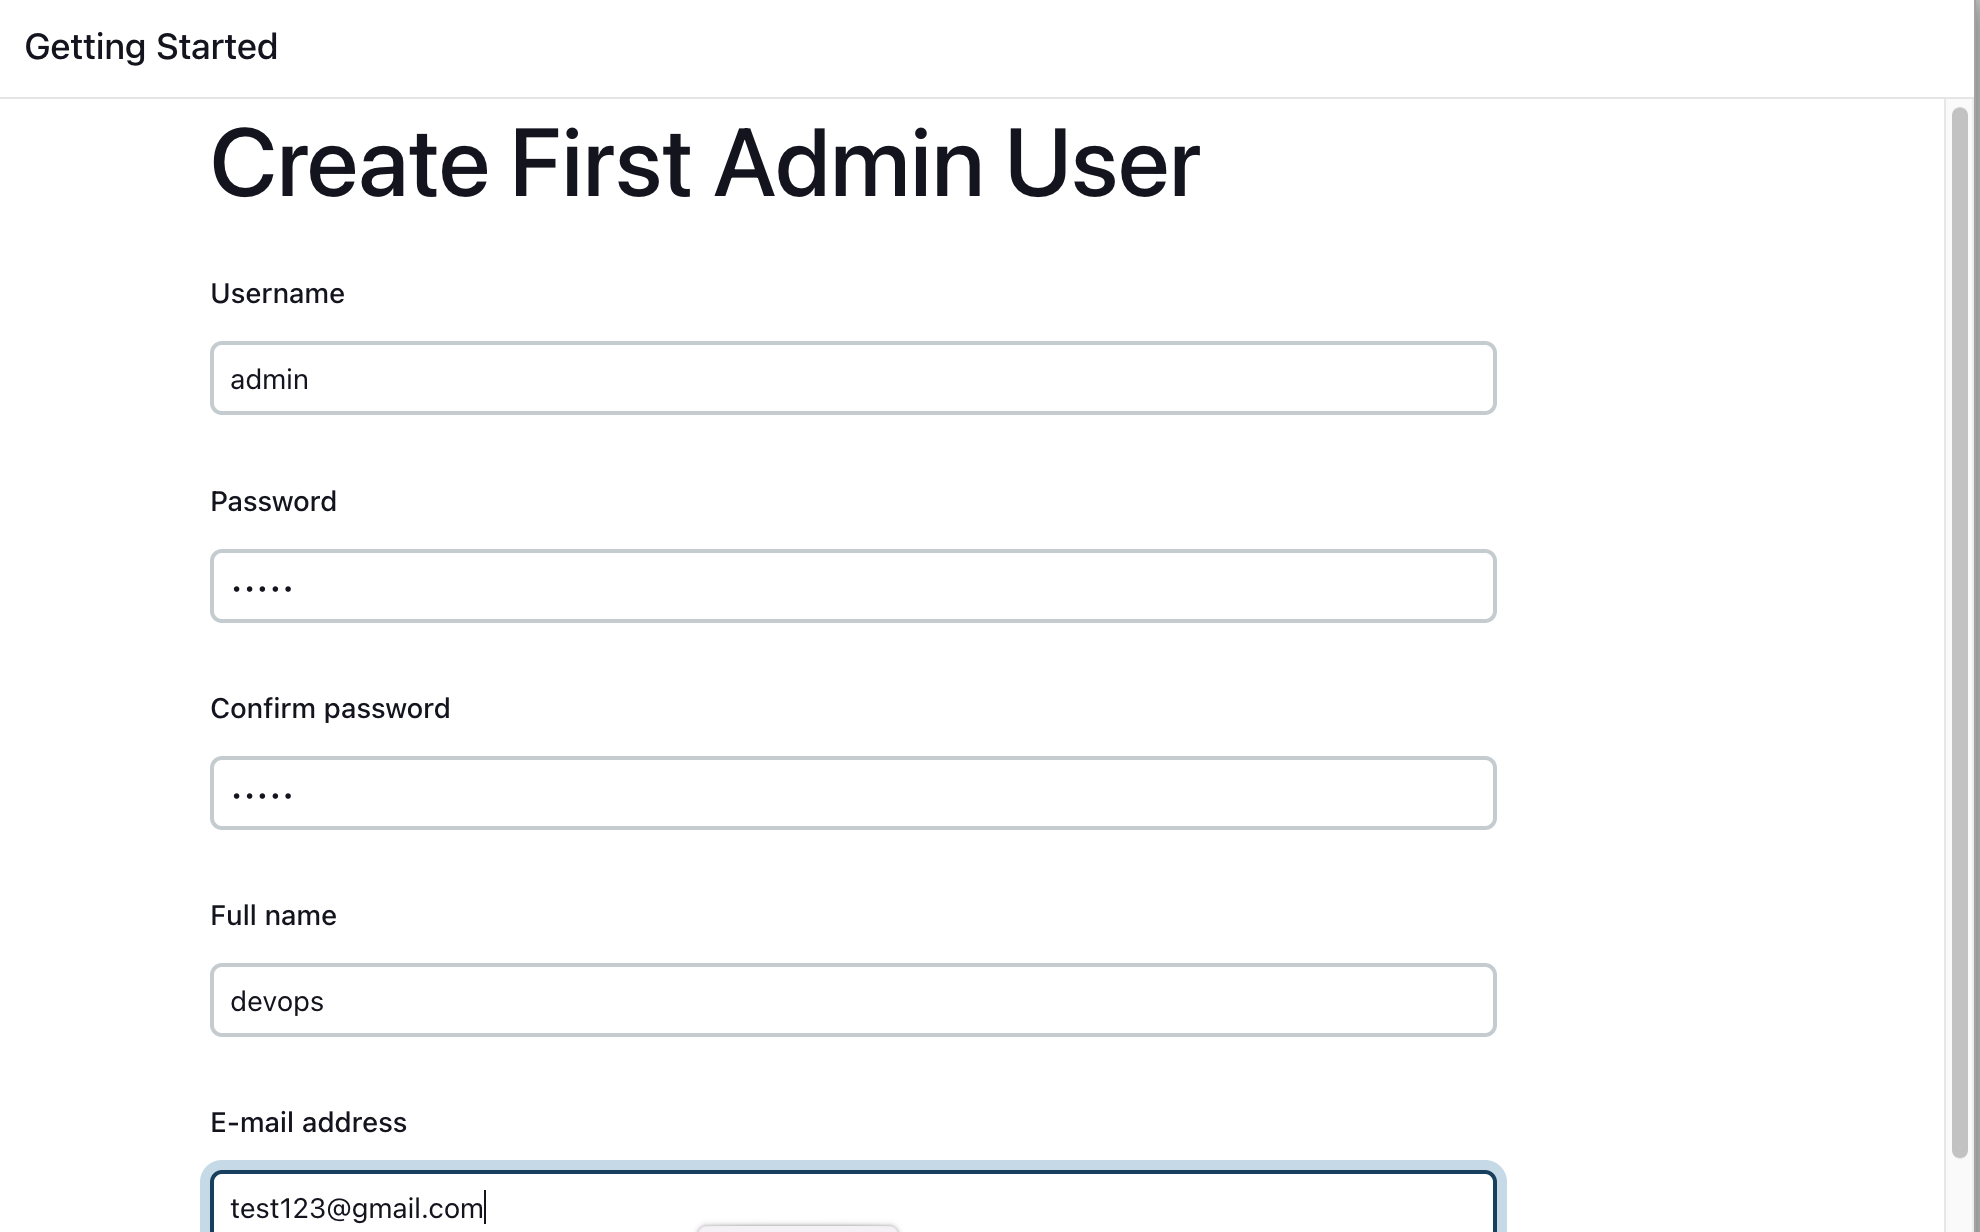
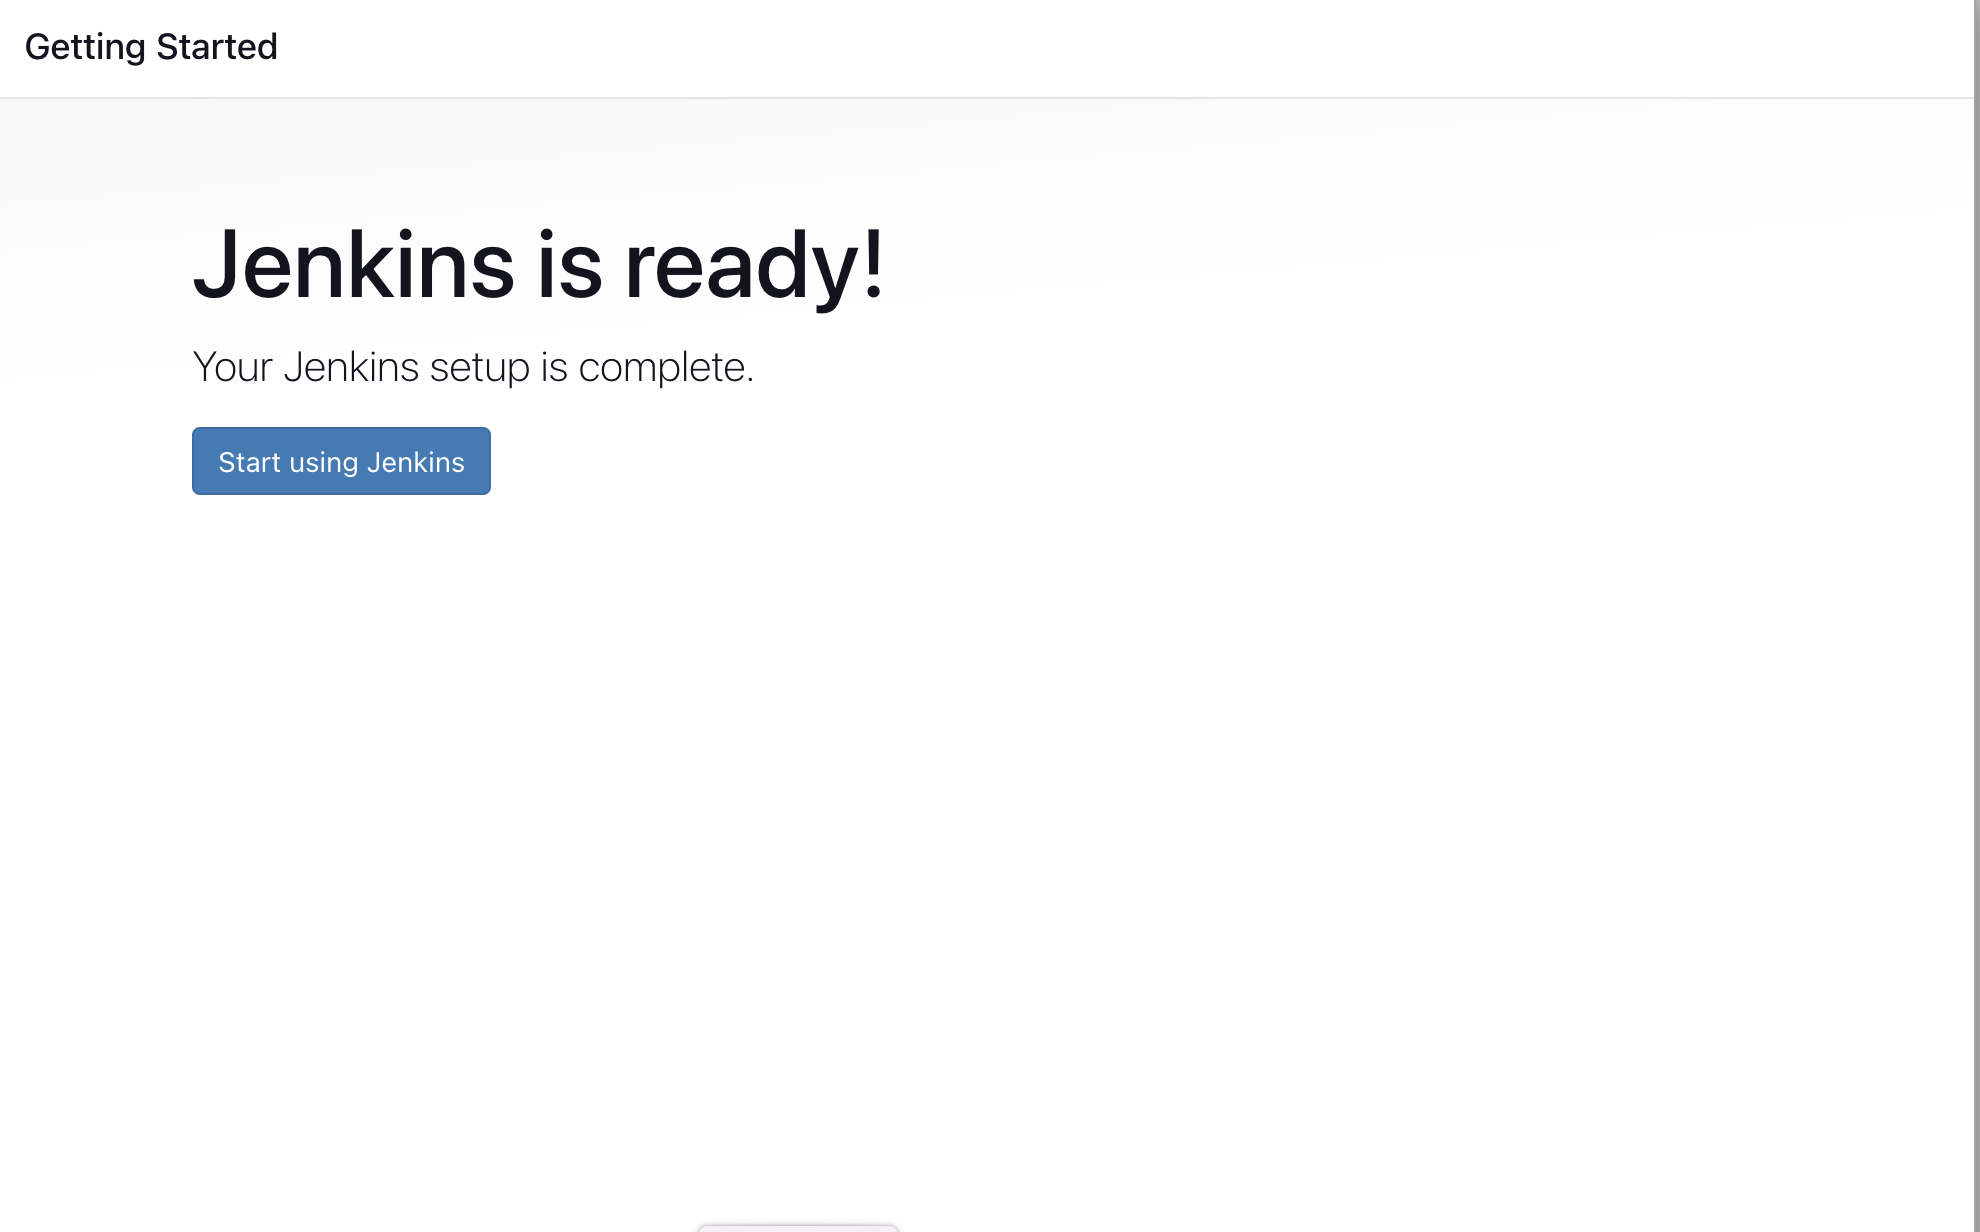
After that click on save and finish and finally just click on Start Jenkins
Now you need to install the docker pipeline and sonarqube scanner plugin from the Jenkins dashboard for that go to manage Jenkins and click on the plugins

now in plugins search for the docker pipeline plugin and sonarqube scanner plugin install it
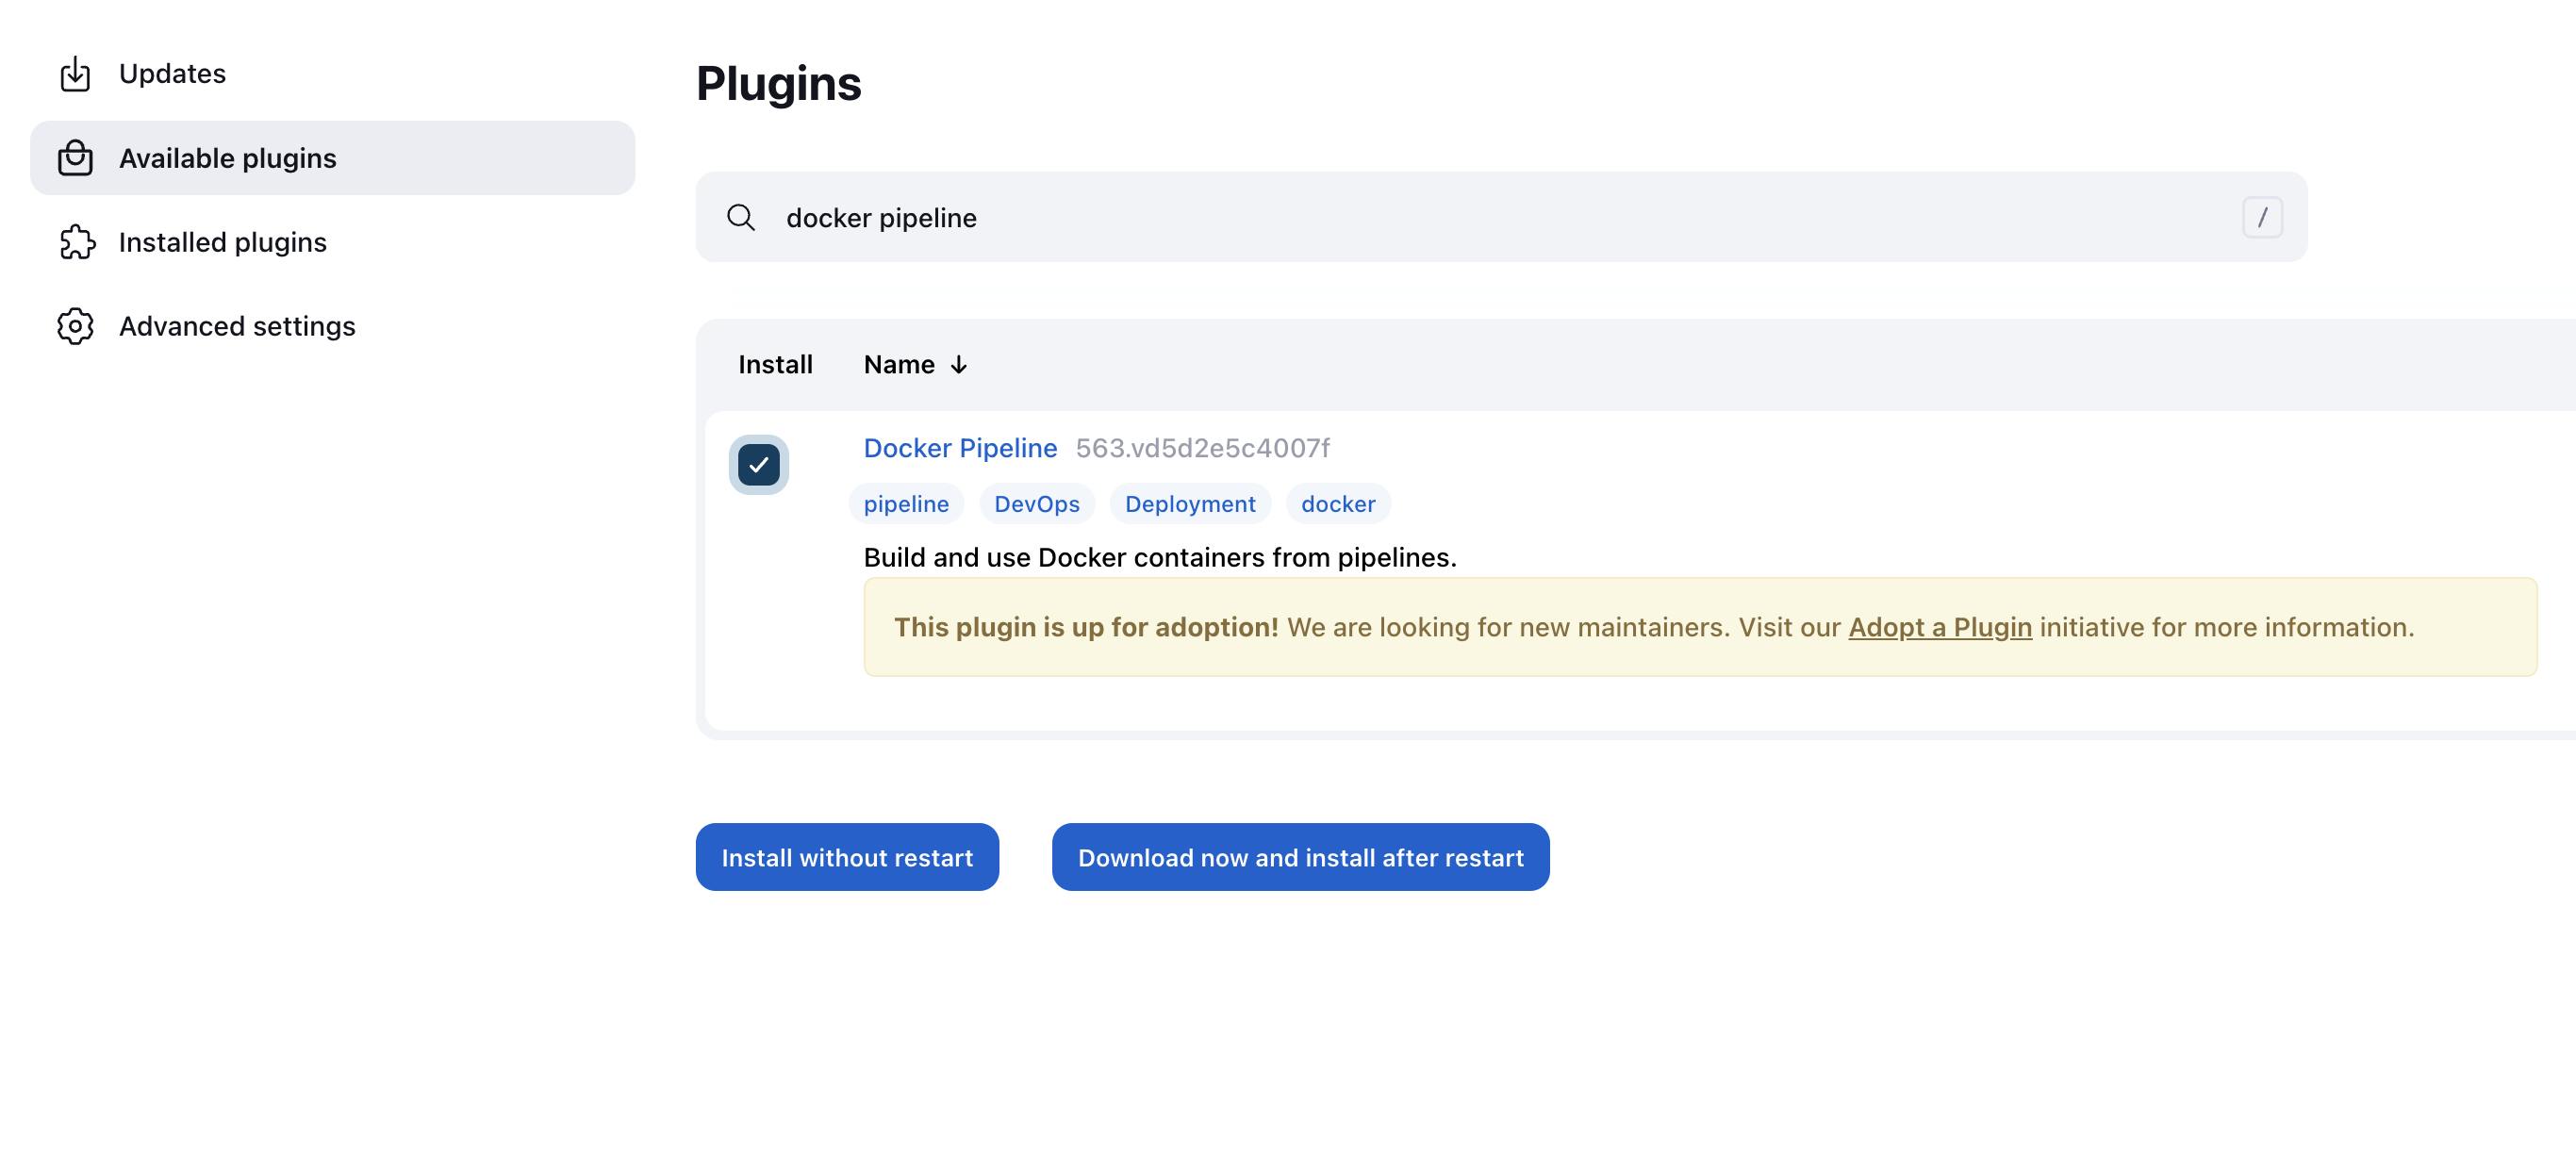
Now just restart your Jenkins and all done
Install and configure Sonarcube locally
Again Go to your Ubuntu terminal and run this command to download the unzip package
sudo apt install unzipNow go to the root user and add user Sonarcube
  sudo su -
  adduser sonarqube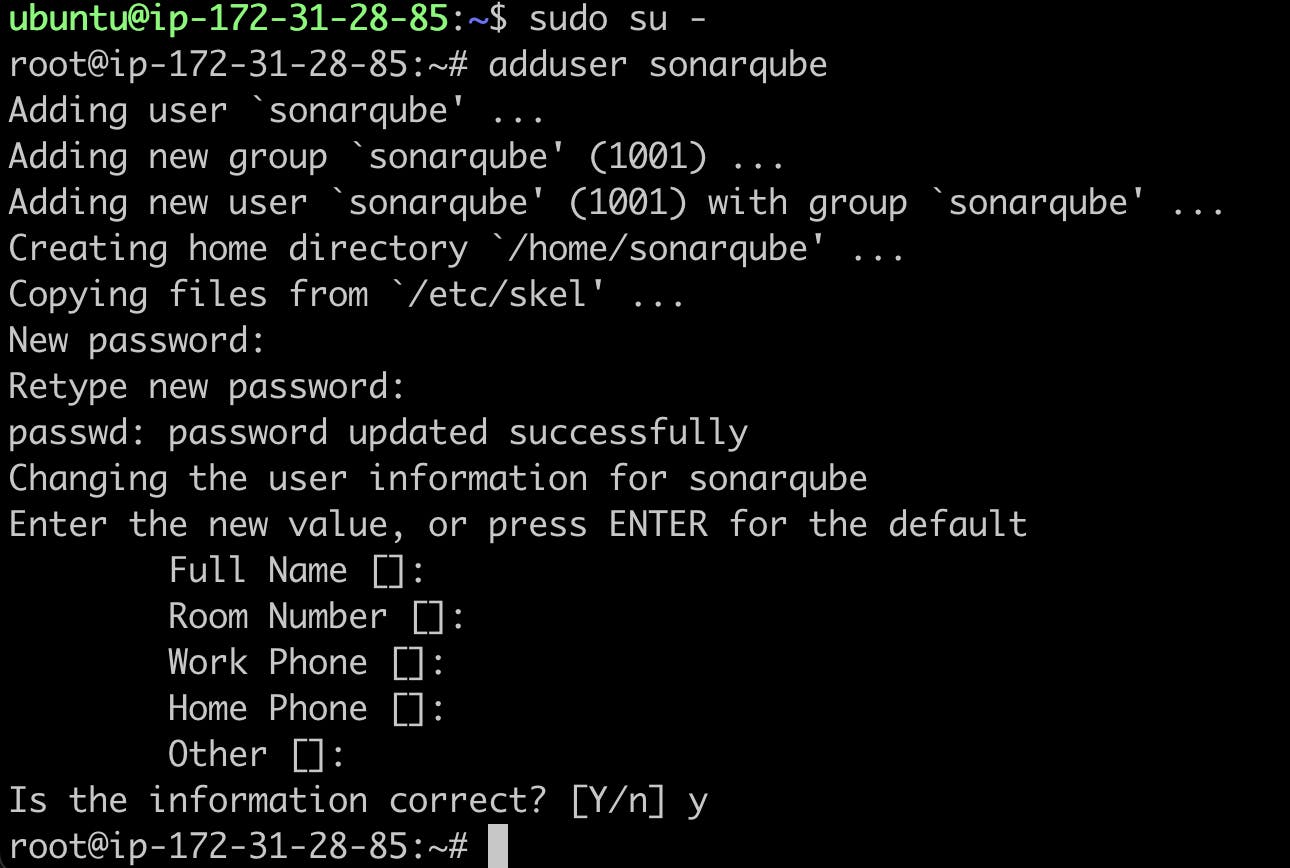
Now switch to the newly created user
sudo su - sonarqube
now you are into Sonarcube user
Now use wget to download the sonar binaries
wget https://binaries.sonarsource.com/Distribution/sonarqube/sonarqube-9.4.0.54424.zipand zip file is downloaded as you can see

Now to unzip use
unzip *the sonarqube folder is extracted

Now grant permission to this folder by using these commands
  chmod -R 755 /home/sonarqube/sonarqube-9.4.0.54424
  chown -R sonarqube:sonarqube /home/sonarqube/sonarqube-9.4.0.54424
Go to the sonar folder
cd sonarqube-9.4.0.54424/bin/linux-x86-64/
Now you have to start the sonar server by default sonar server starts on port 9000
./sonar.sh start
Now open port 9000 followed by your ec2 public IP address the sonar login page will be opened
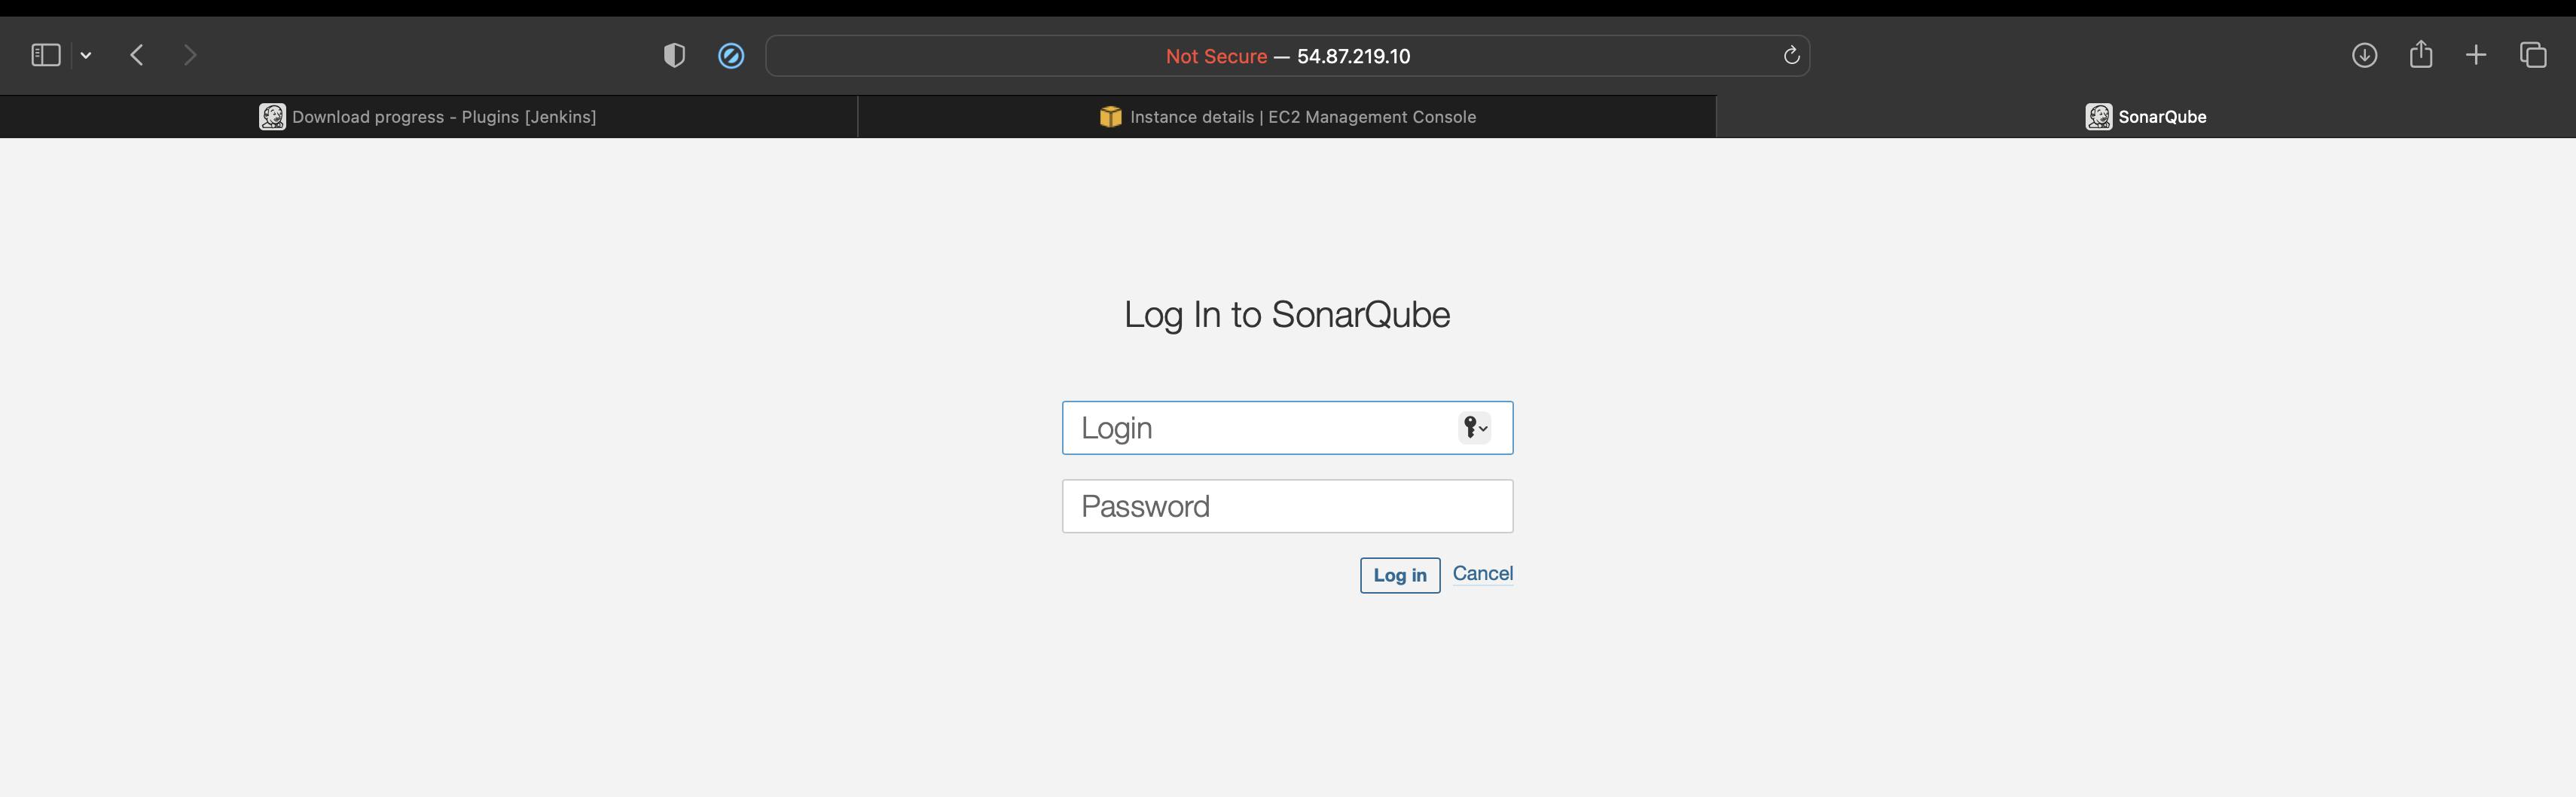
by default the username and password are admin
After that, it will ask you to update the password and you will be on the Sonarqube dashboard
now the question is how Sonarqube authenticates with Jenkins
How SonarQube authenticate with Jenkins
let's see how these two different applications communicate with each other for that
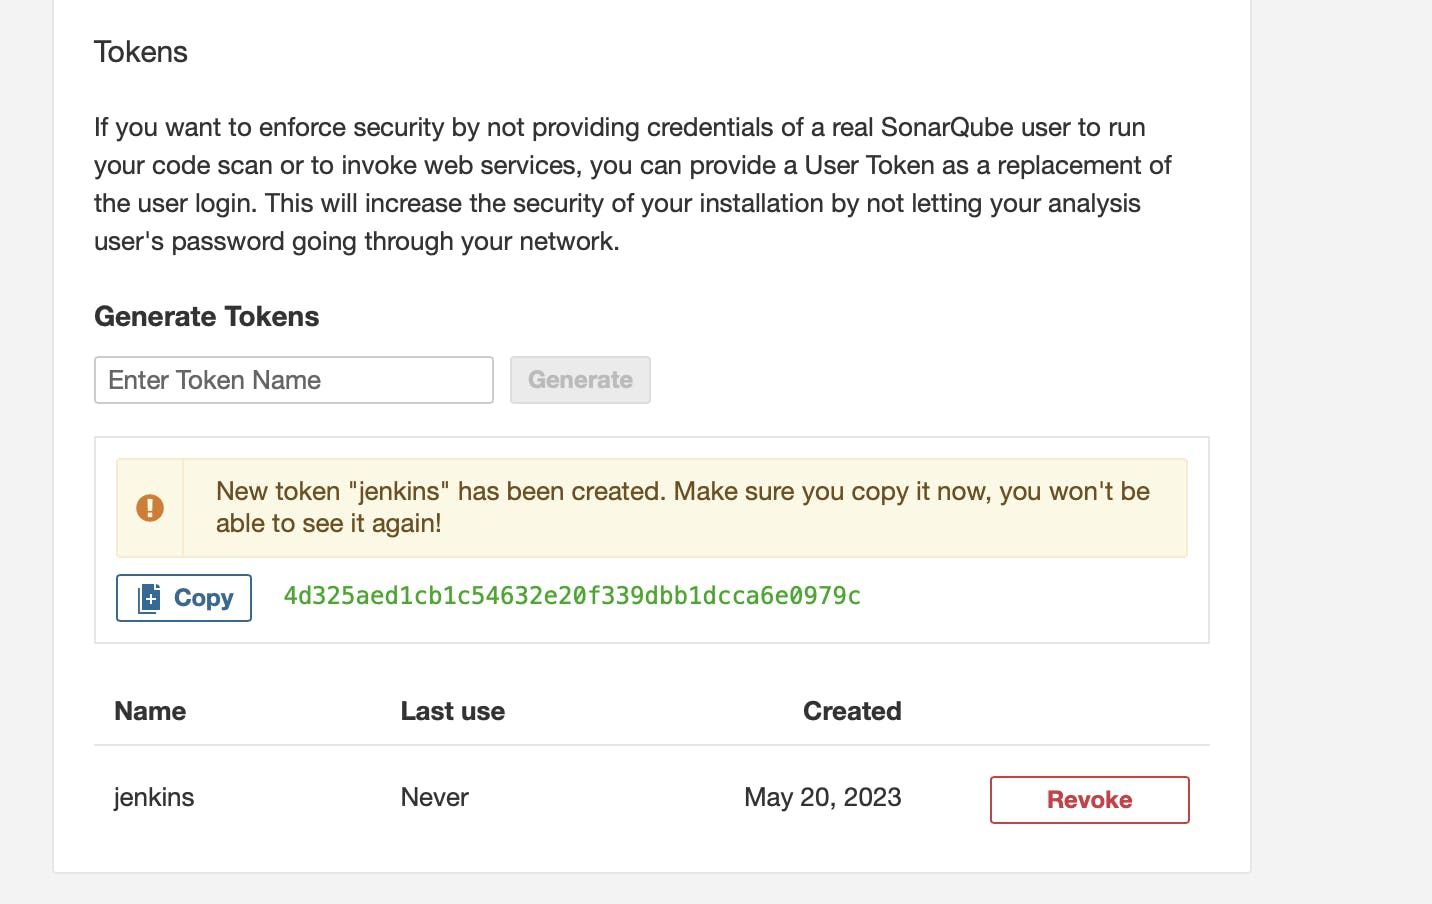
Go to Sonarqube and in your account section click on My account

click on security in the tokens tab give a name to your token and click on generate a token and copy the token
Now go to Jenkins click on manage Jenkins in the security tab click on Credentials

Now click on the system
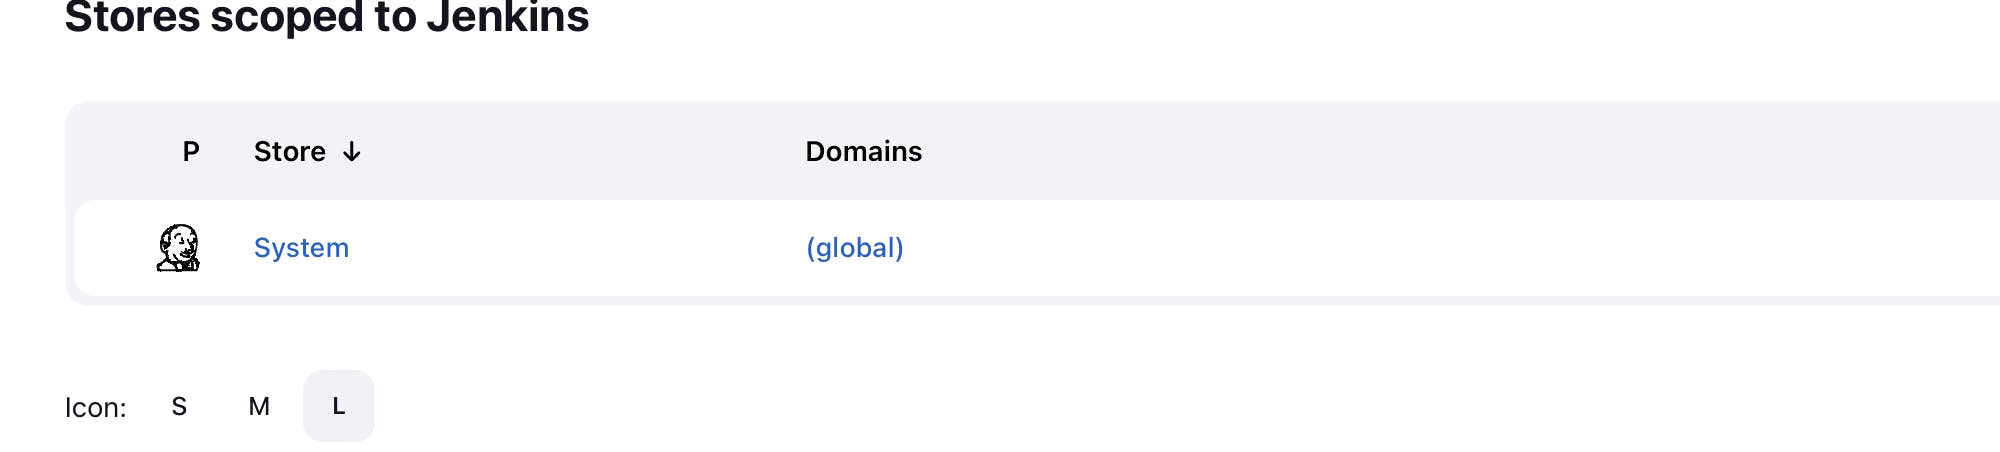
and then click on global credentials

above you see add credential click on it

Now select kind as secret text and paste the generated credentials in secret name id as sonarqube
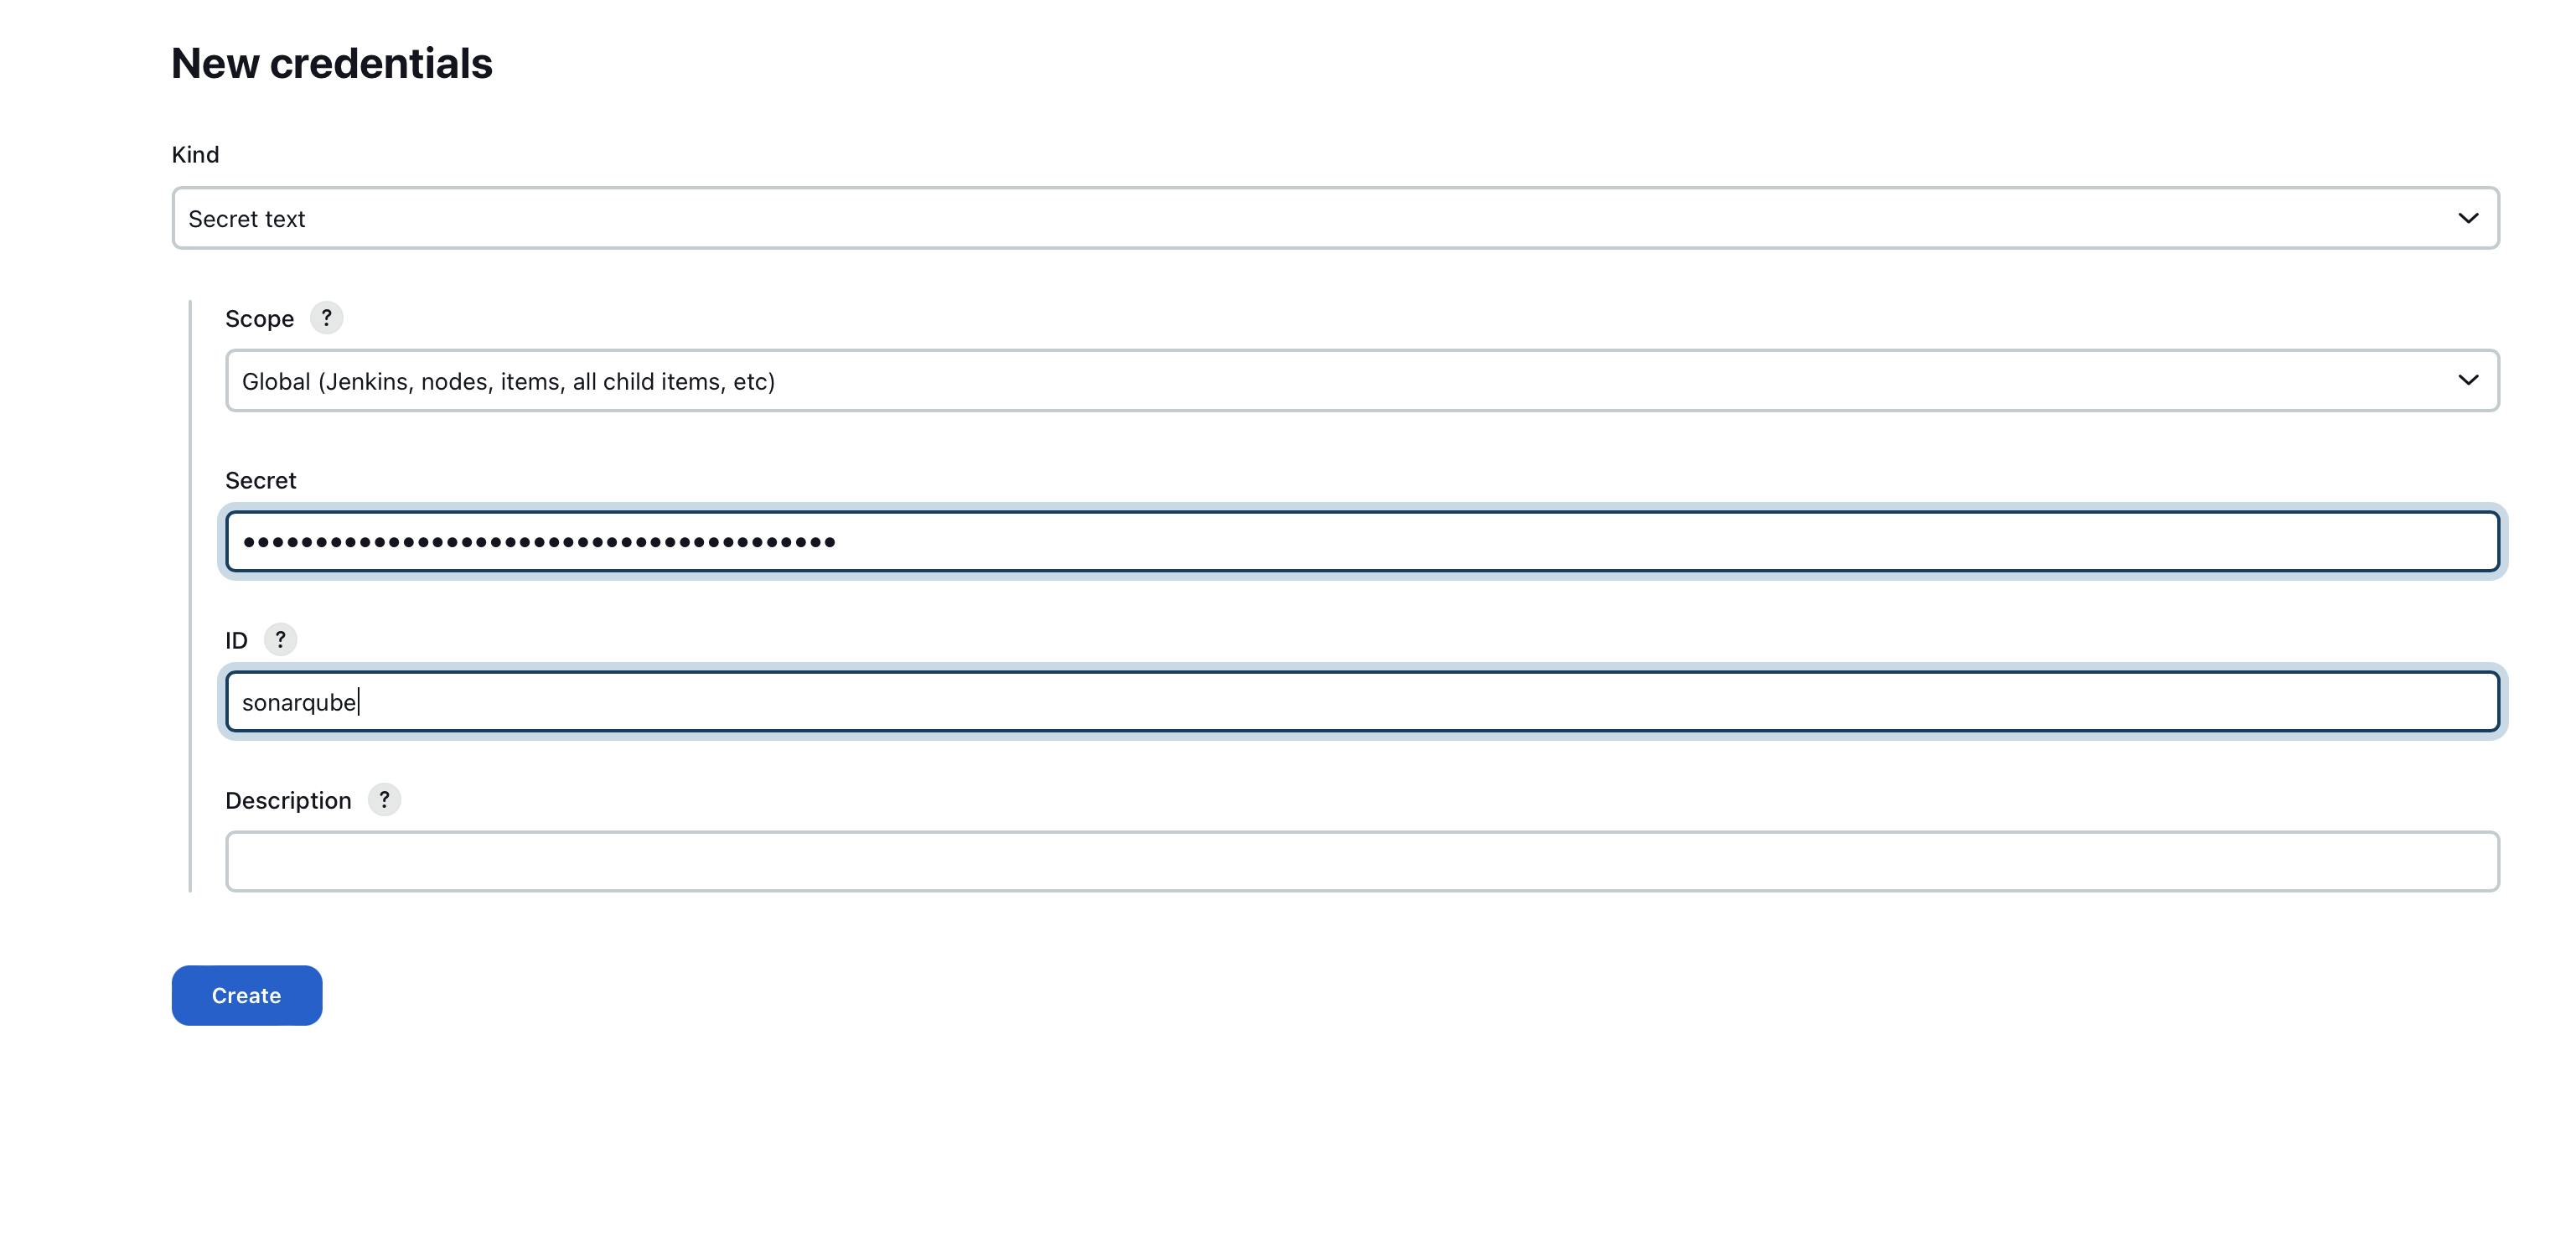
click on Create button
So, our sonarcube configuration is also done, our next step is to download the docker
Install docker and authenticate with Jenkins
go to your terminal if you logged in Sonarqube user just type exit and you will be at your root user

now run these commands to install the docker
sudo apt install docker.io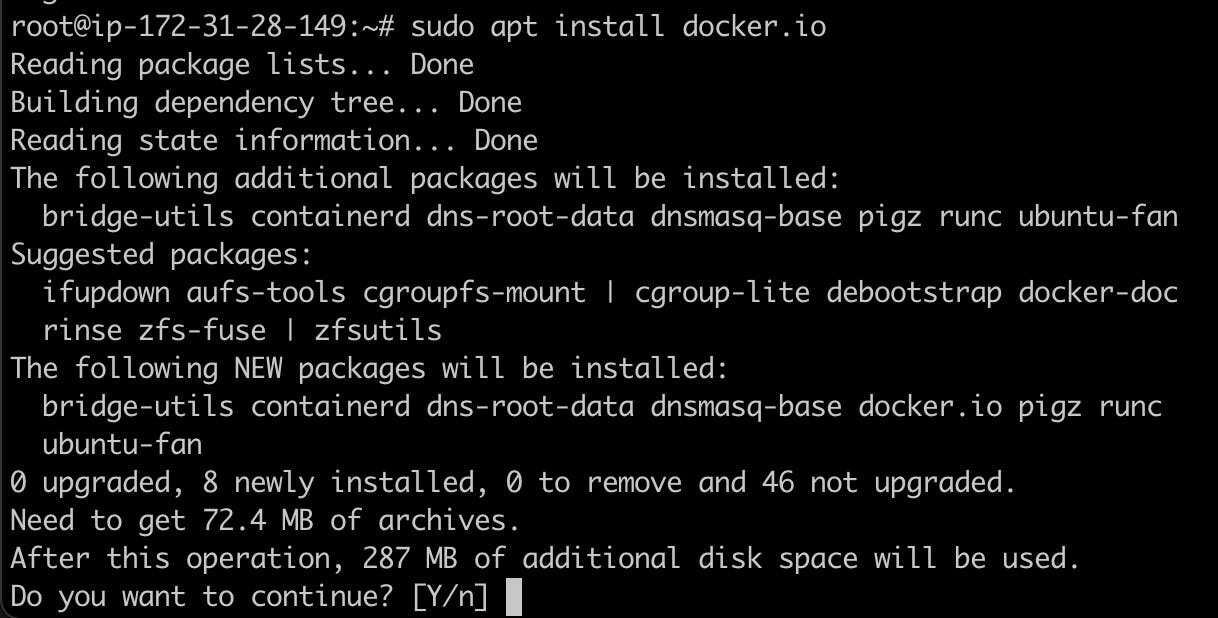
Grant Jenkins user and Ubuntu user permission to docker daemon.
  sudo su -
  usermod -aG docker jenkins
  usermod -aG docker ubuntu
  systemctl restart docker
now after restarting docker do the same with Jenkins to restart Jenkins
sudo systemctl restart jenkins
Now we have to put GitHub credentials in our Jenkins
So First we will configure docker hub credentials for that go to Jenkins click on manage Jenkins> credentials > click on system > Global credentials> click on add credentials
For the docker hub choose kind as username and password
In username add your docker hub username
a password will be your docker hub password
ID will docker-cred
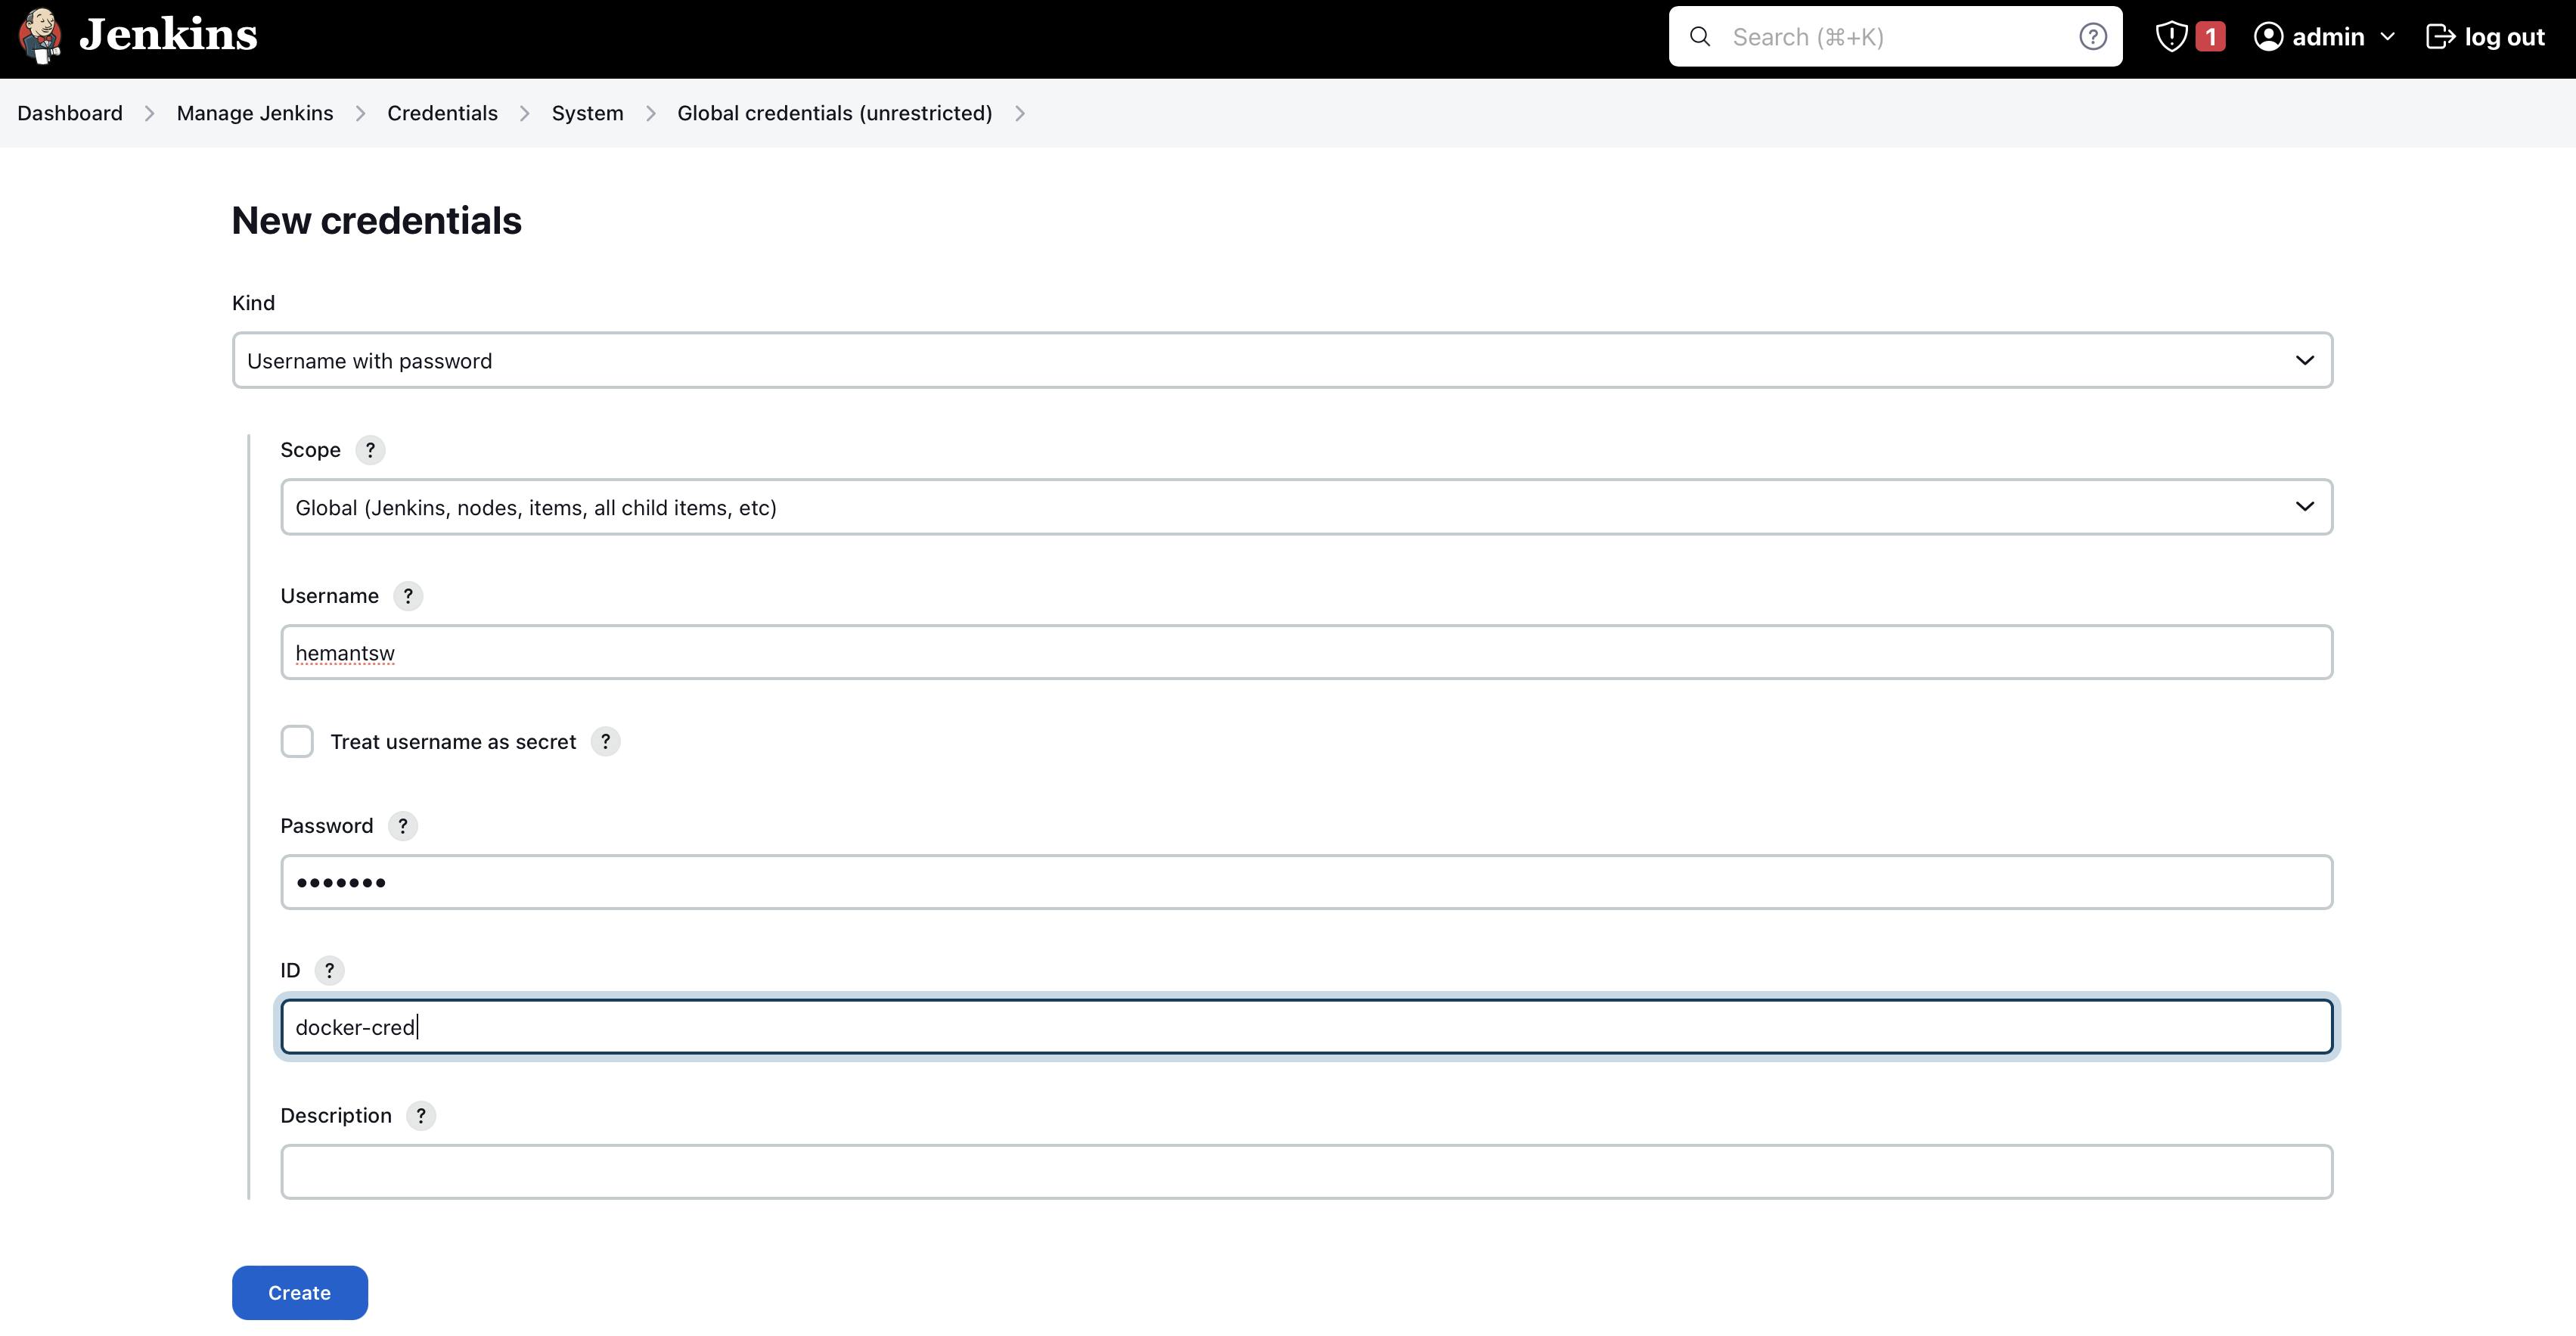
and click on Create
Setup GitHub credentials in Jenkins
Again go to global credentials > click on add credentials
For Github choose kind as secret text
The secret will be your GitHub access token key (google how to generate GitHub acces token )
ID will be GitHub
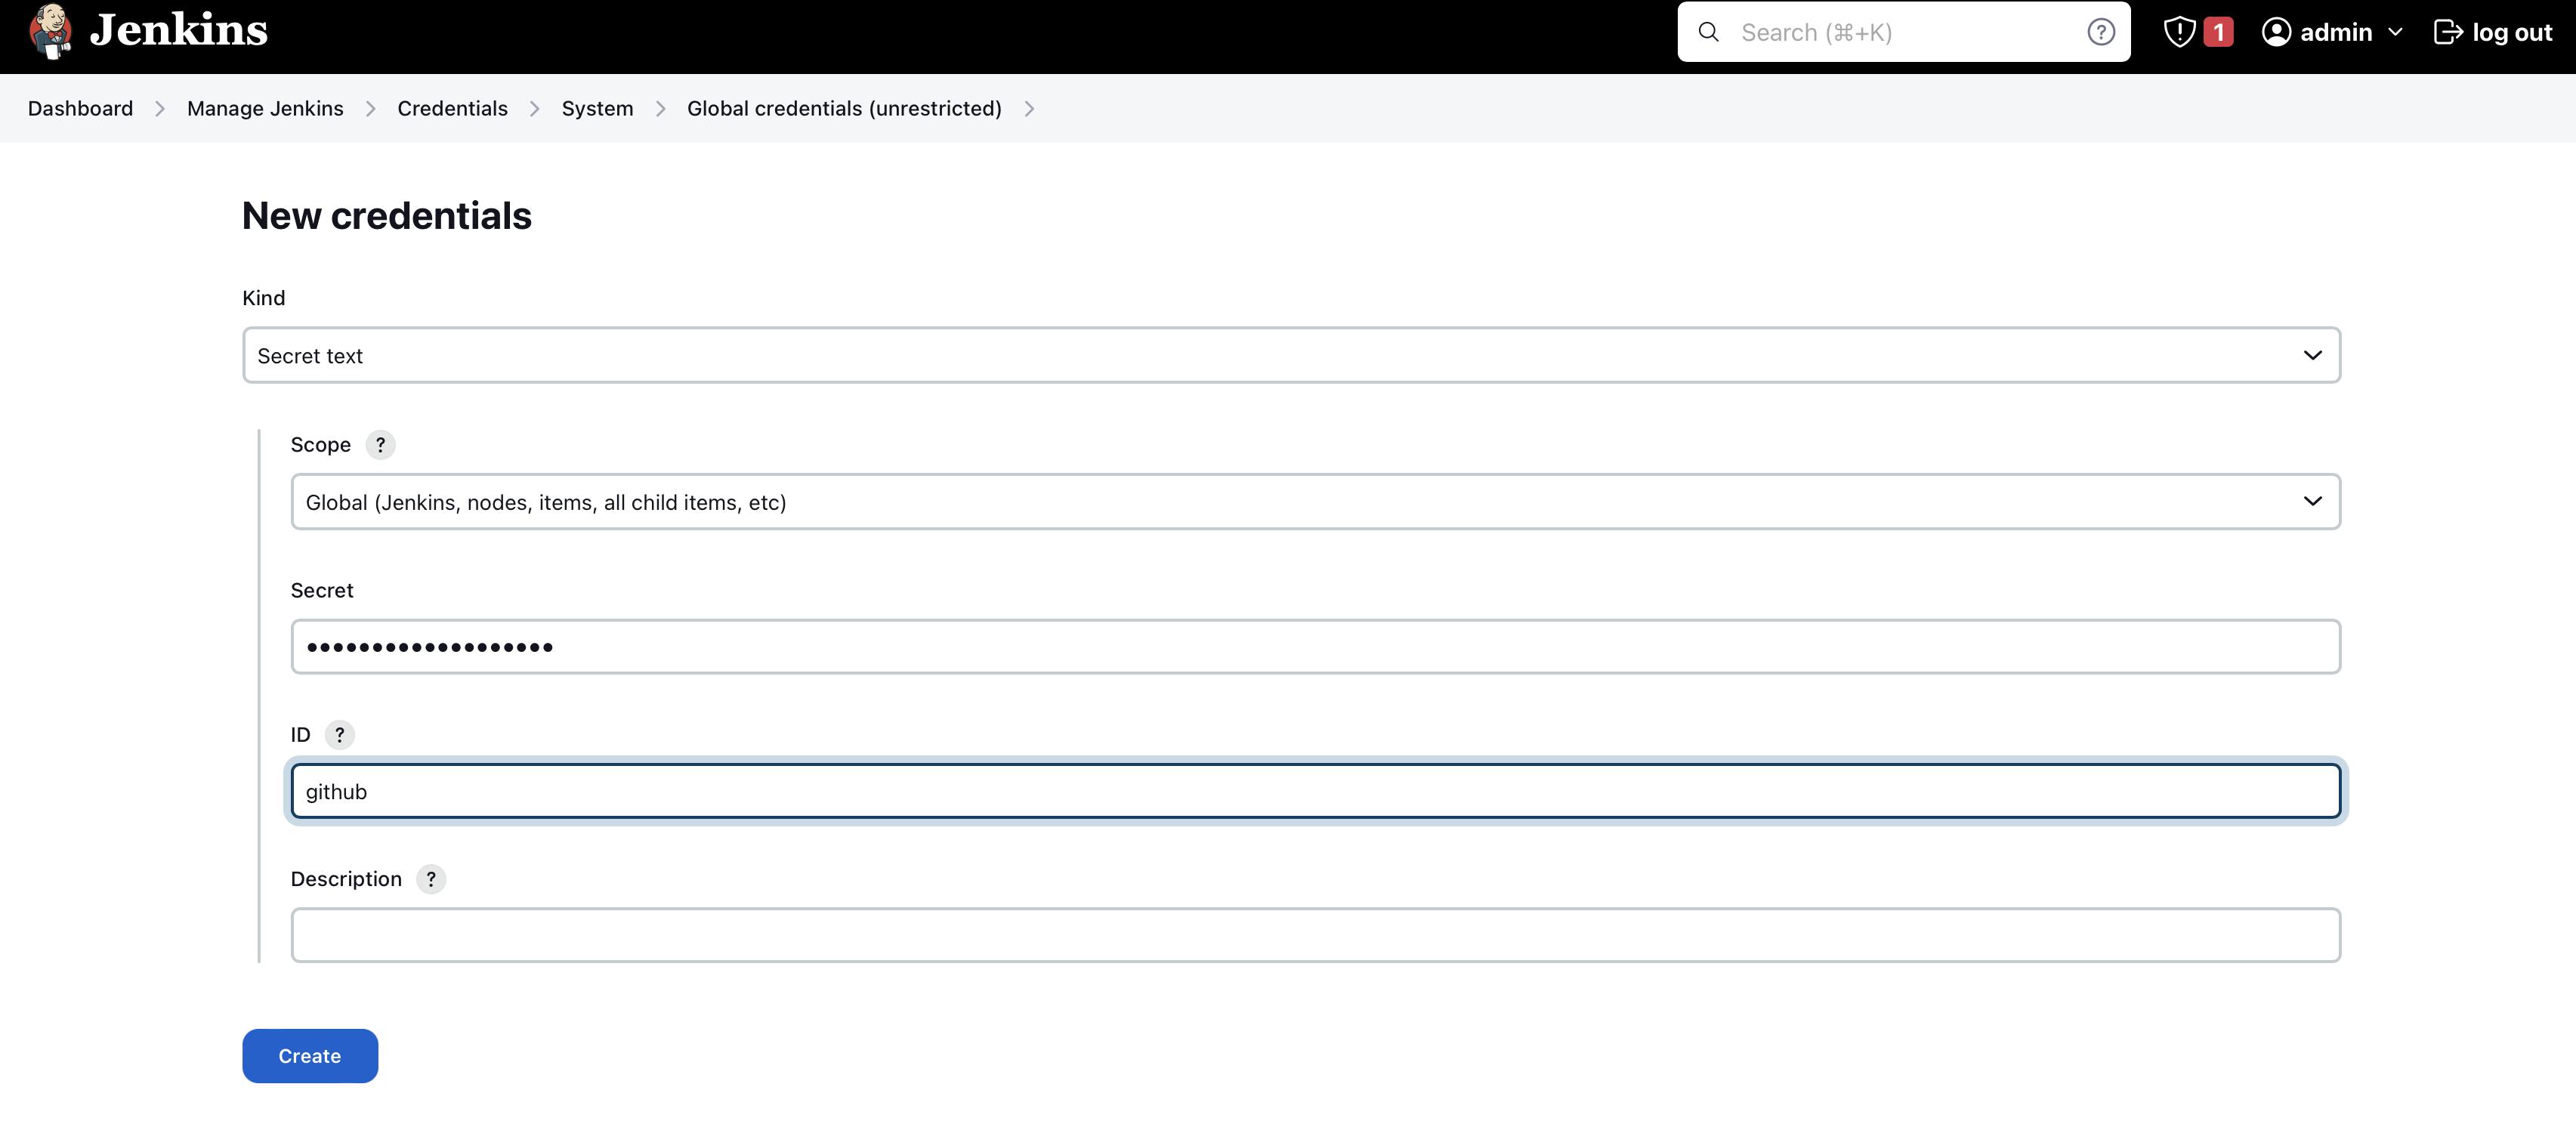
click on create
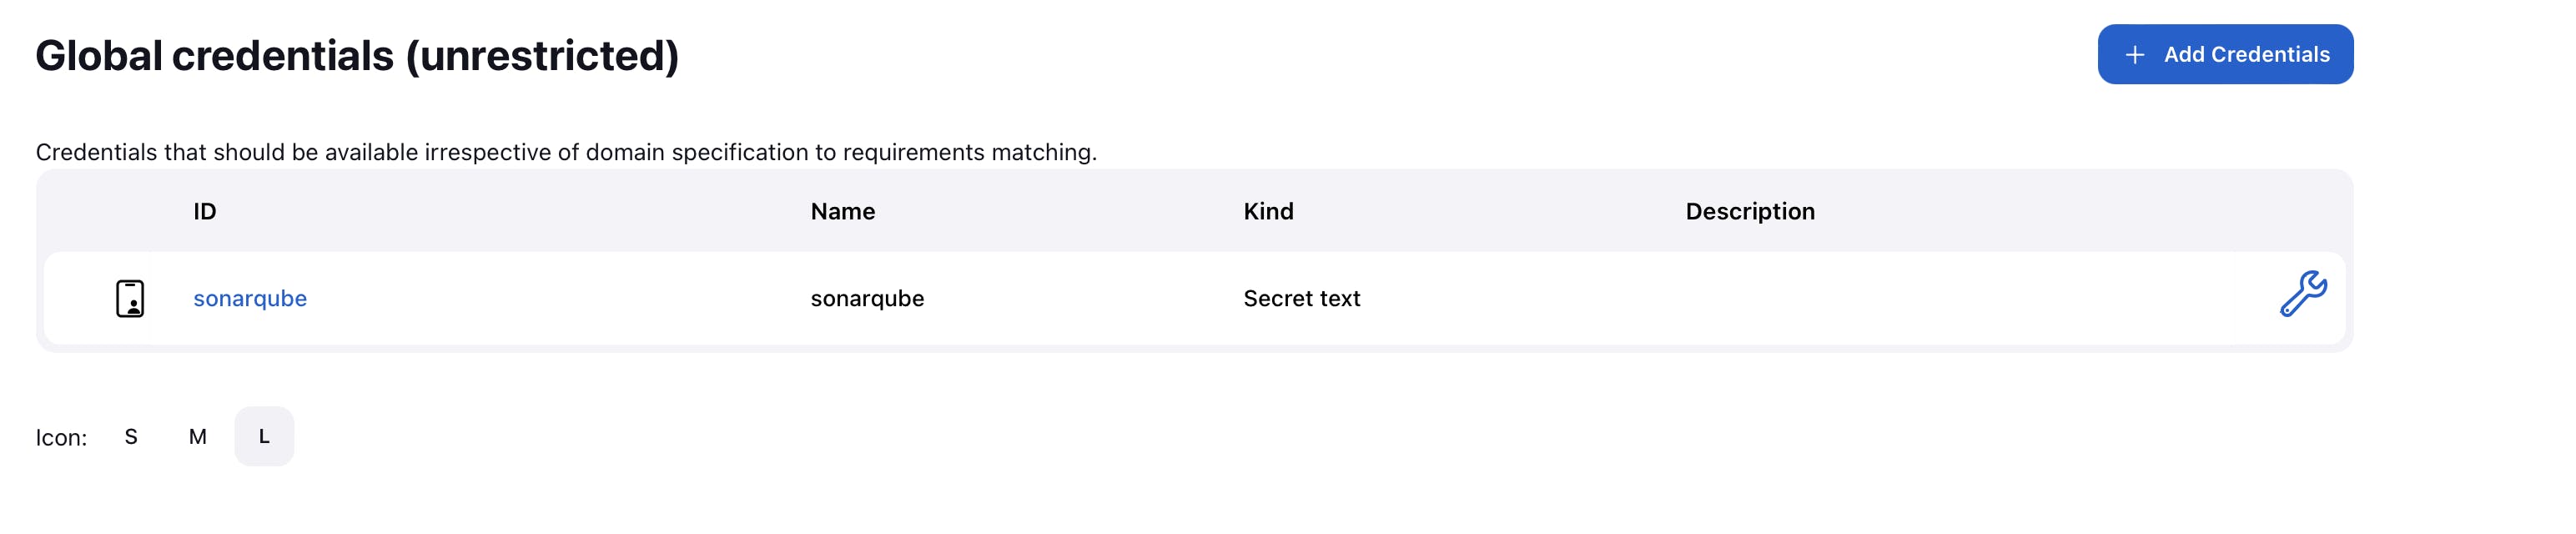
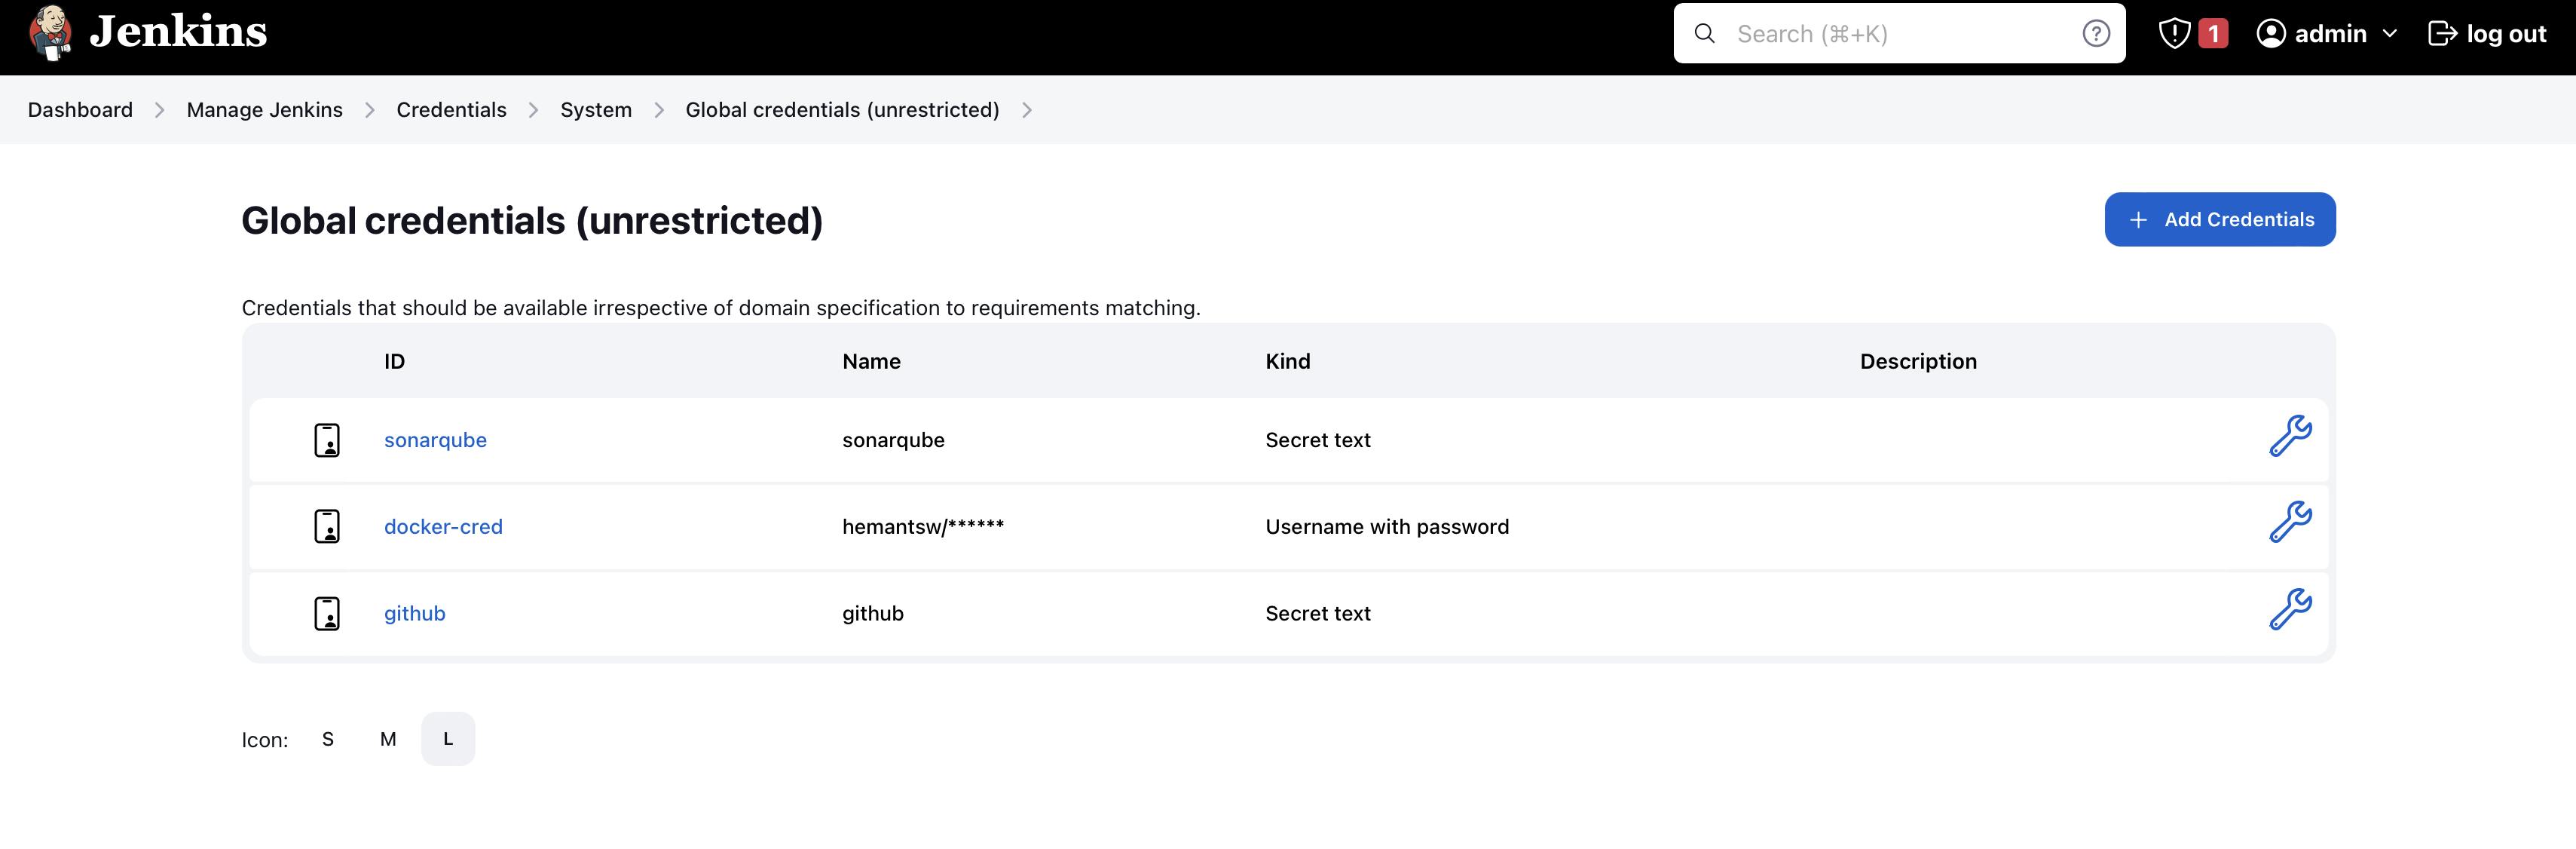
As you can see that you have configured your sonarqube, docker hub , and GitHub in jenkins credentials
Setup pipeline and build
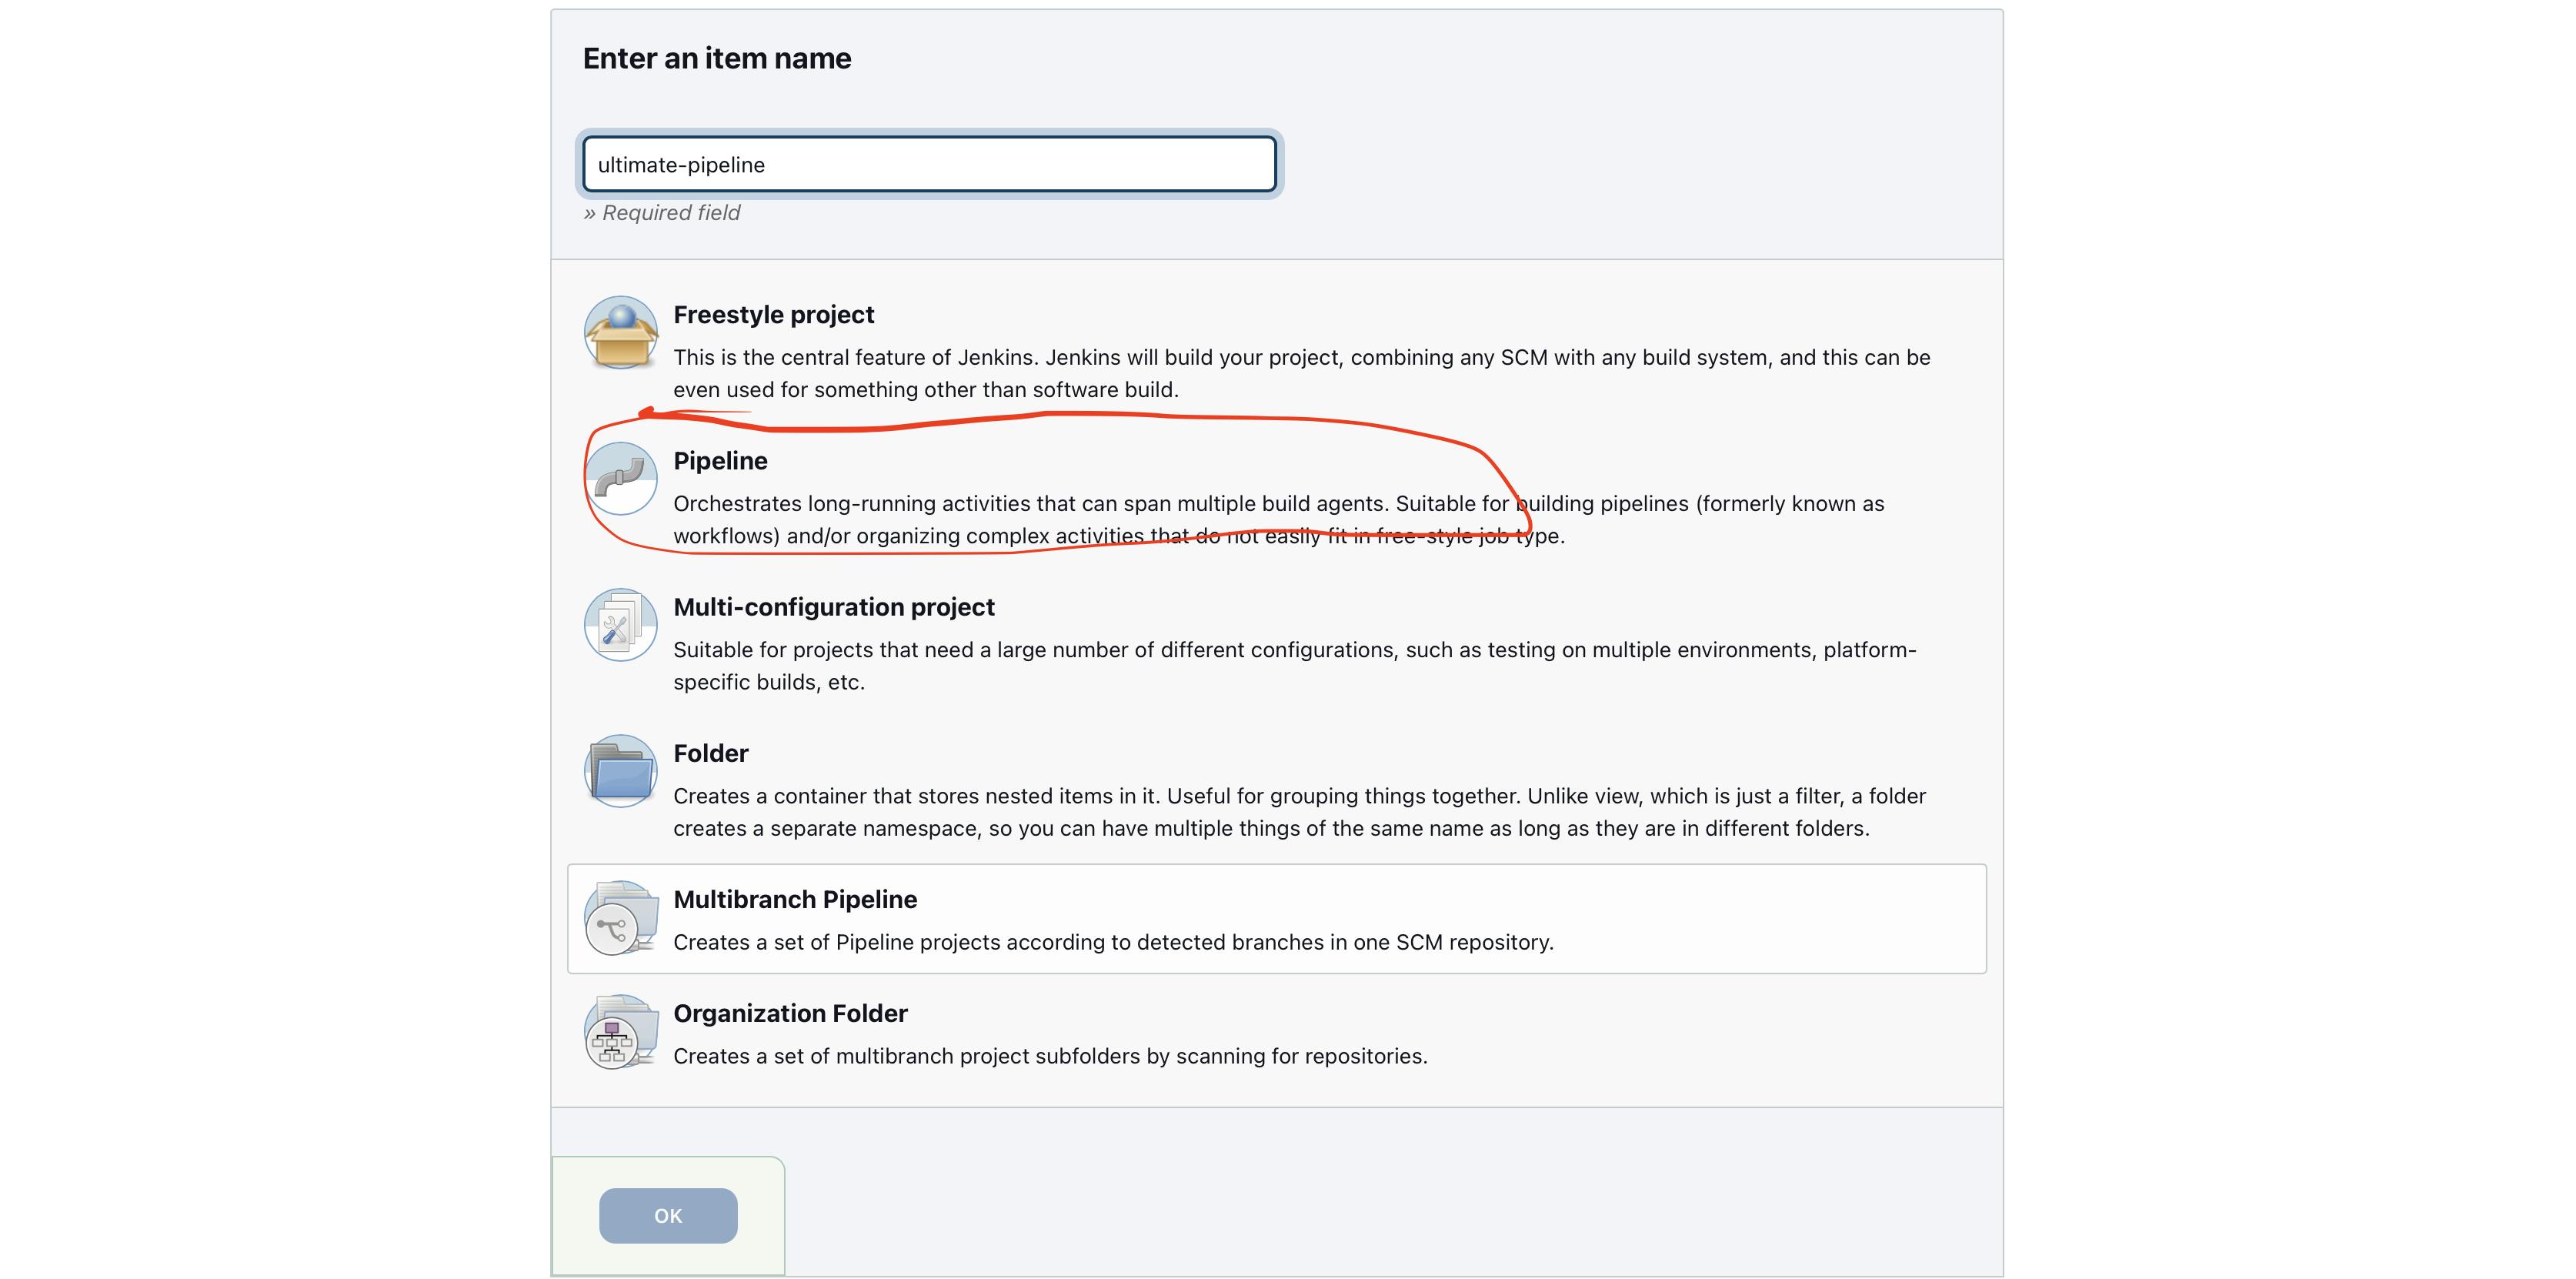
To write a pipeline go to your Jenkins dashboard and click on a new item
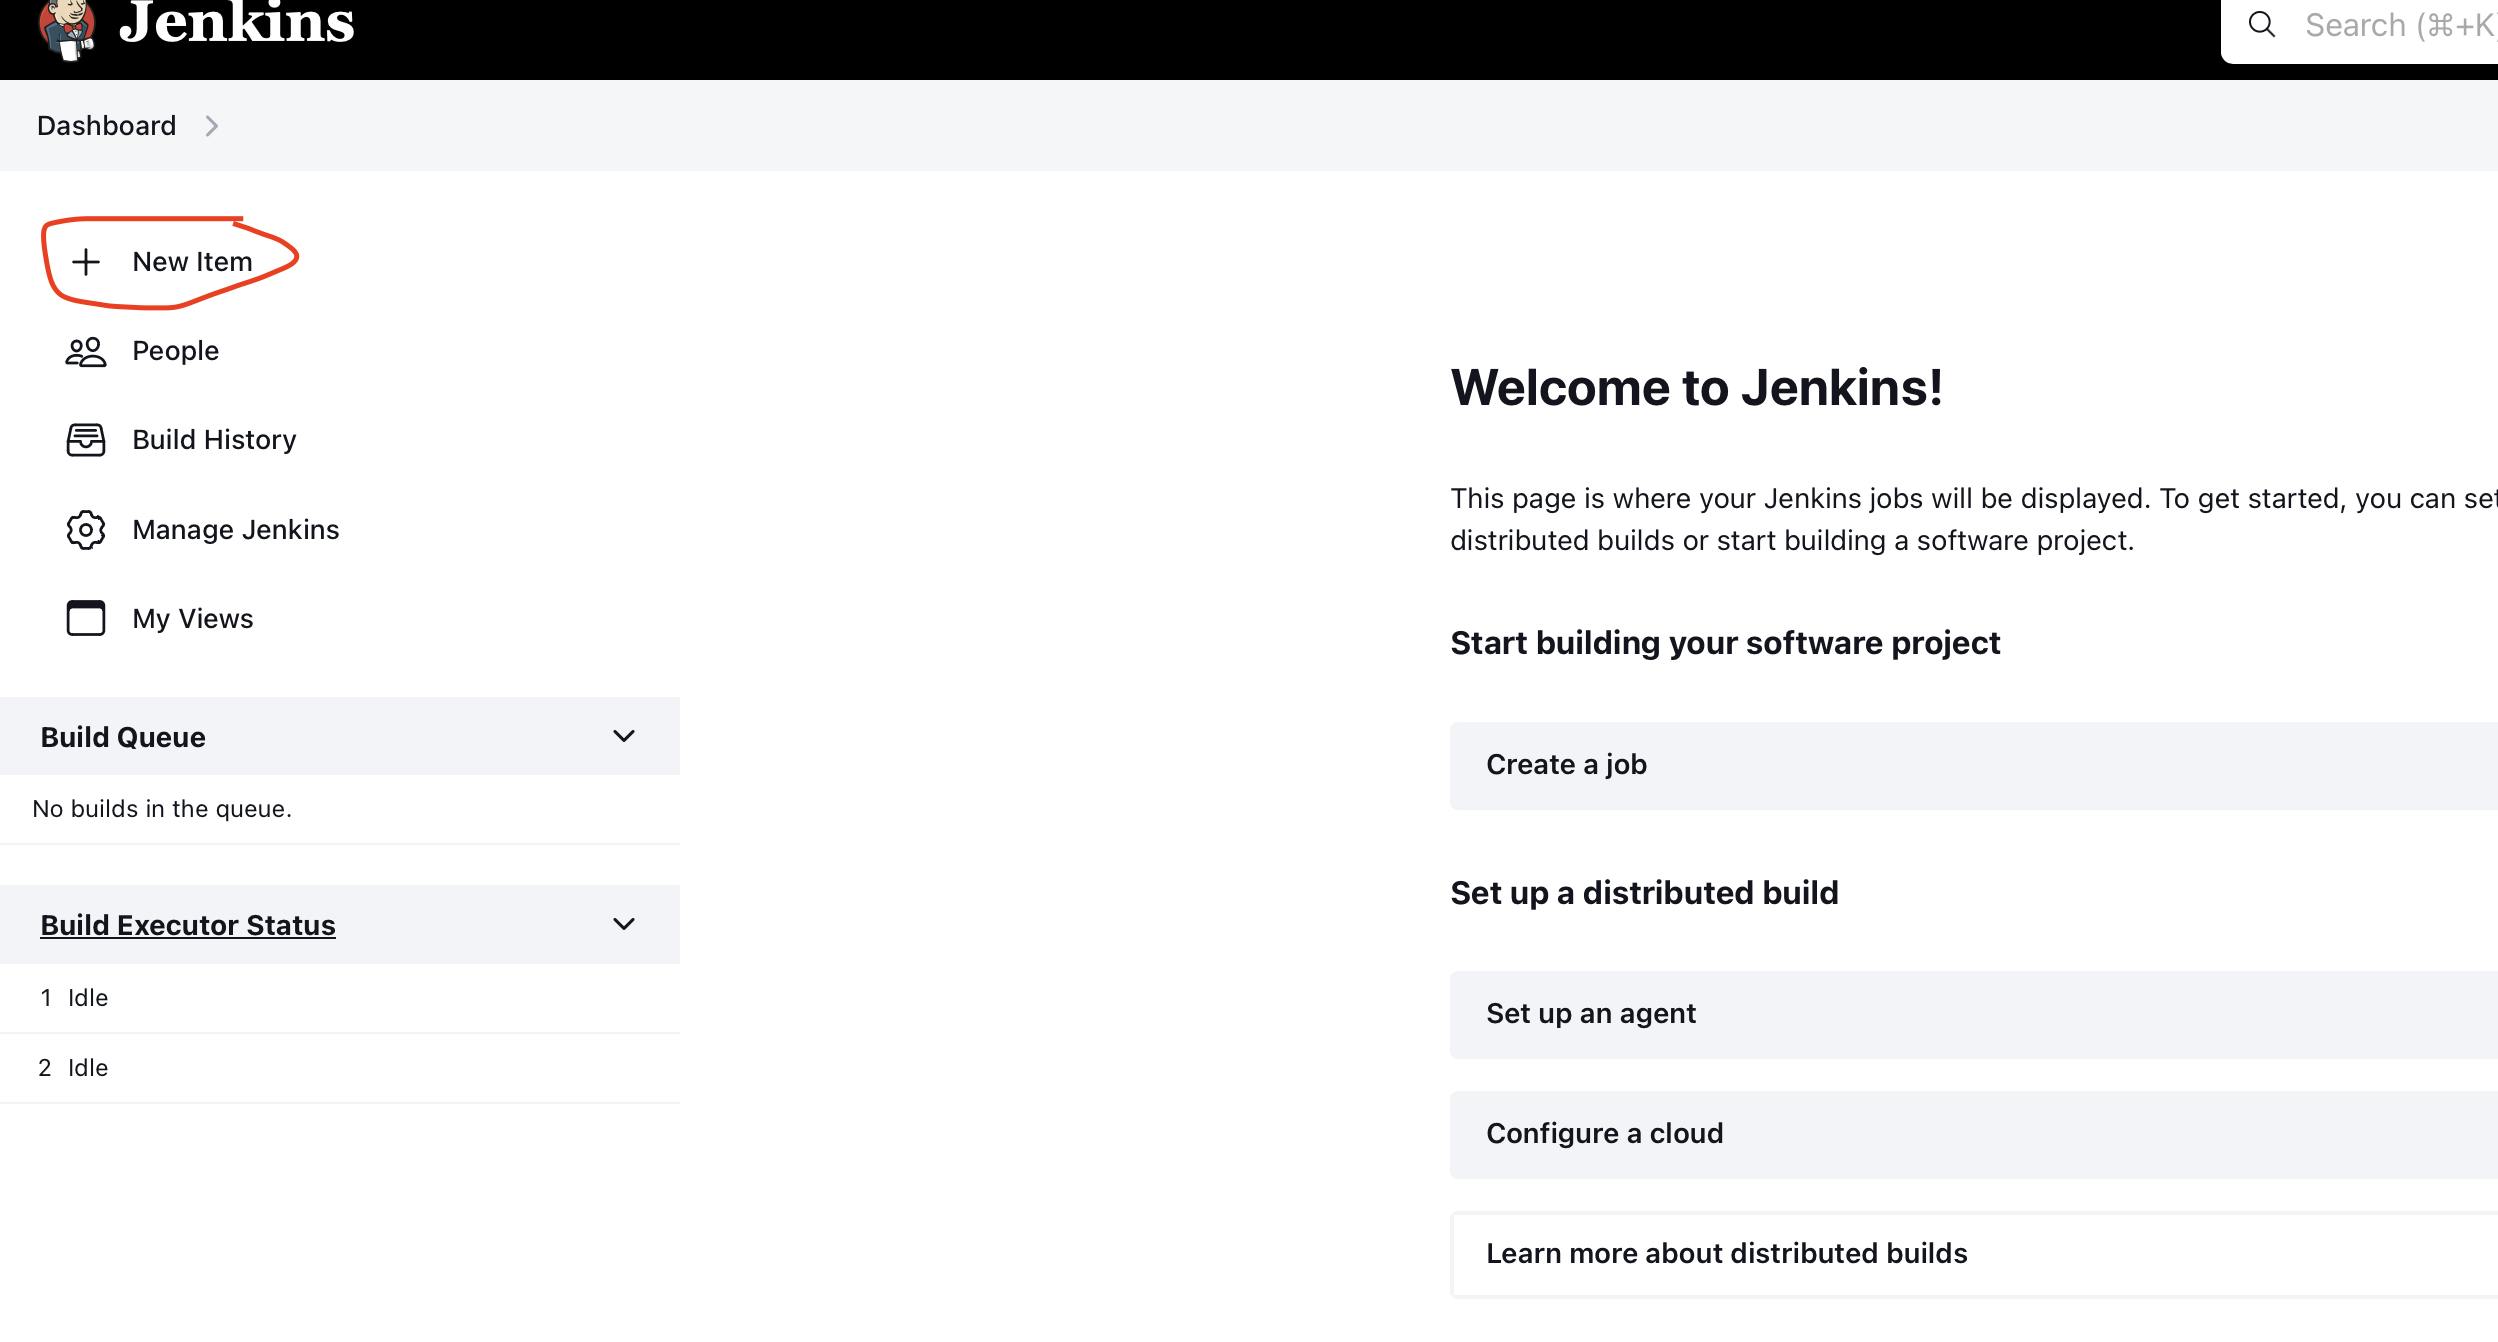
Now enter the item name and choose pipeline and click on Ok
You can write Jenkins pipeline in 2 different ways you can start writing groove script in Jenkins itself or Jenkins also allow you to put your Jenkins file in the repository where your source code is stored so, we are going to see with the second-way "pipeline script from SCM"
In the pipeline select pipeline script from SCM
SSM select as git
Put your repository URL (you can use my repo also
https://github.com/hemant-sw/pipelineBranch as main
Last, just add the path where your Jenkins file is located in the repository
java-maven-sonar-argocd-helm-k8s/spring-boot-app/JenkinsFile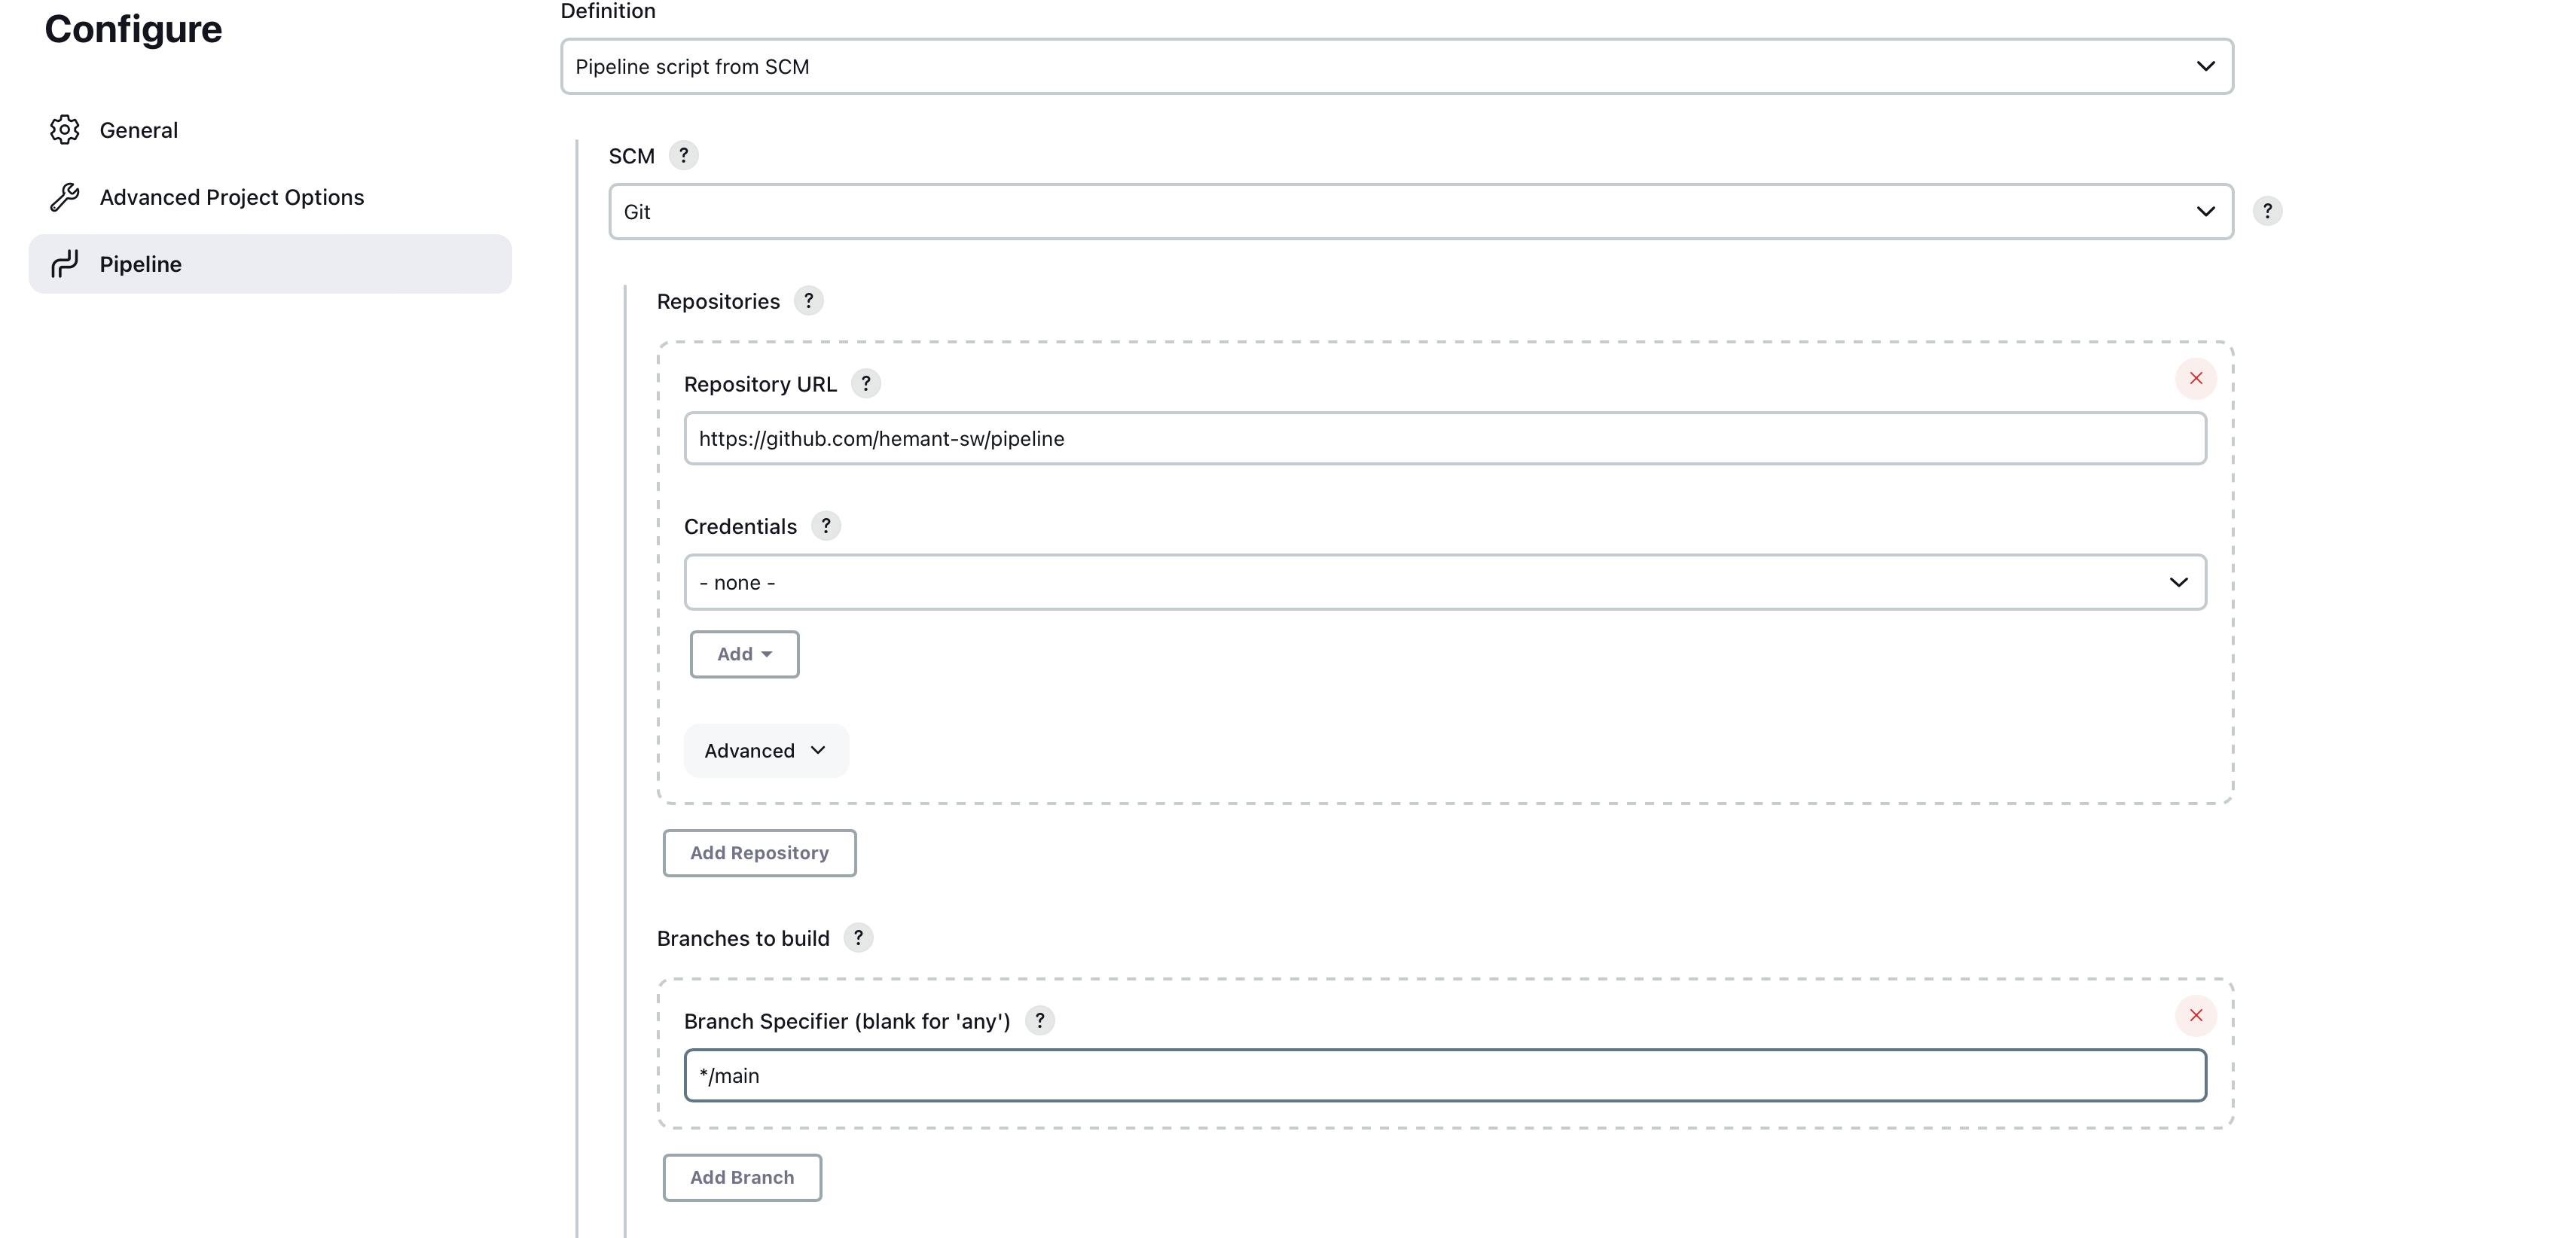

Click on save
Now to trigger a pipeline you have to click in build now it will start executing all the stages mentioned in the Jenkins file
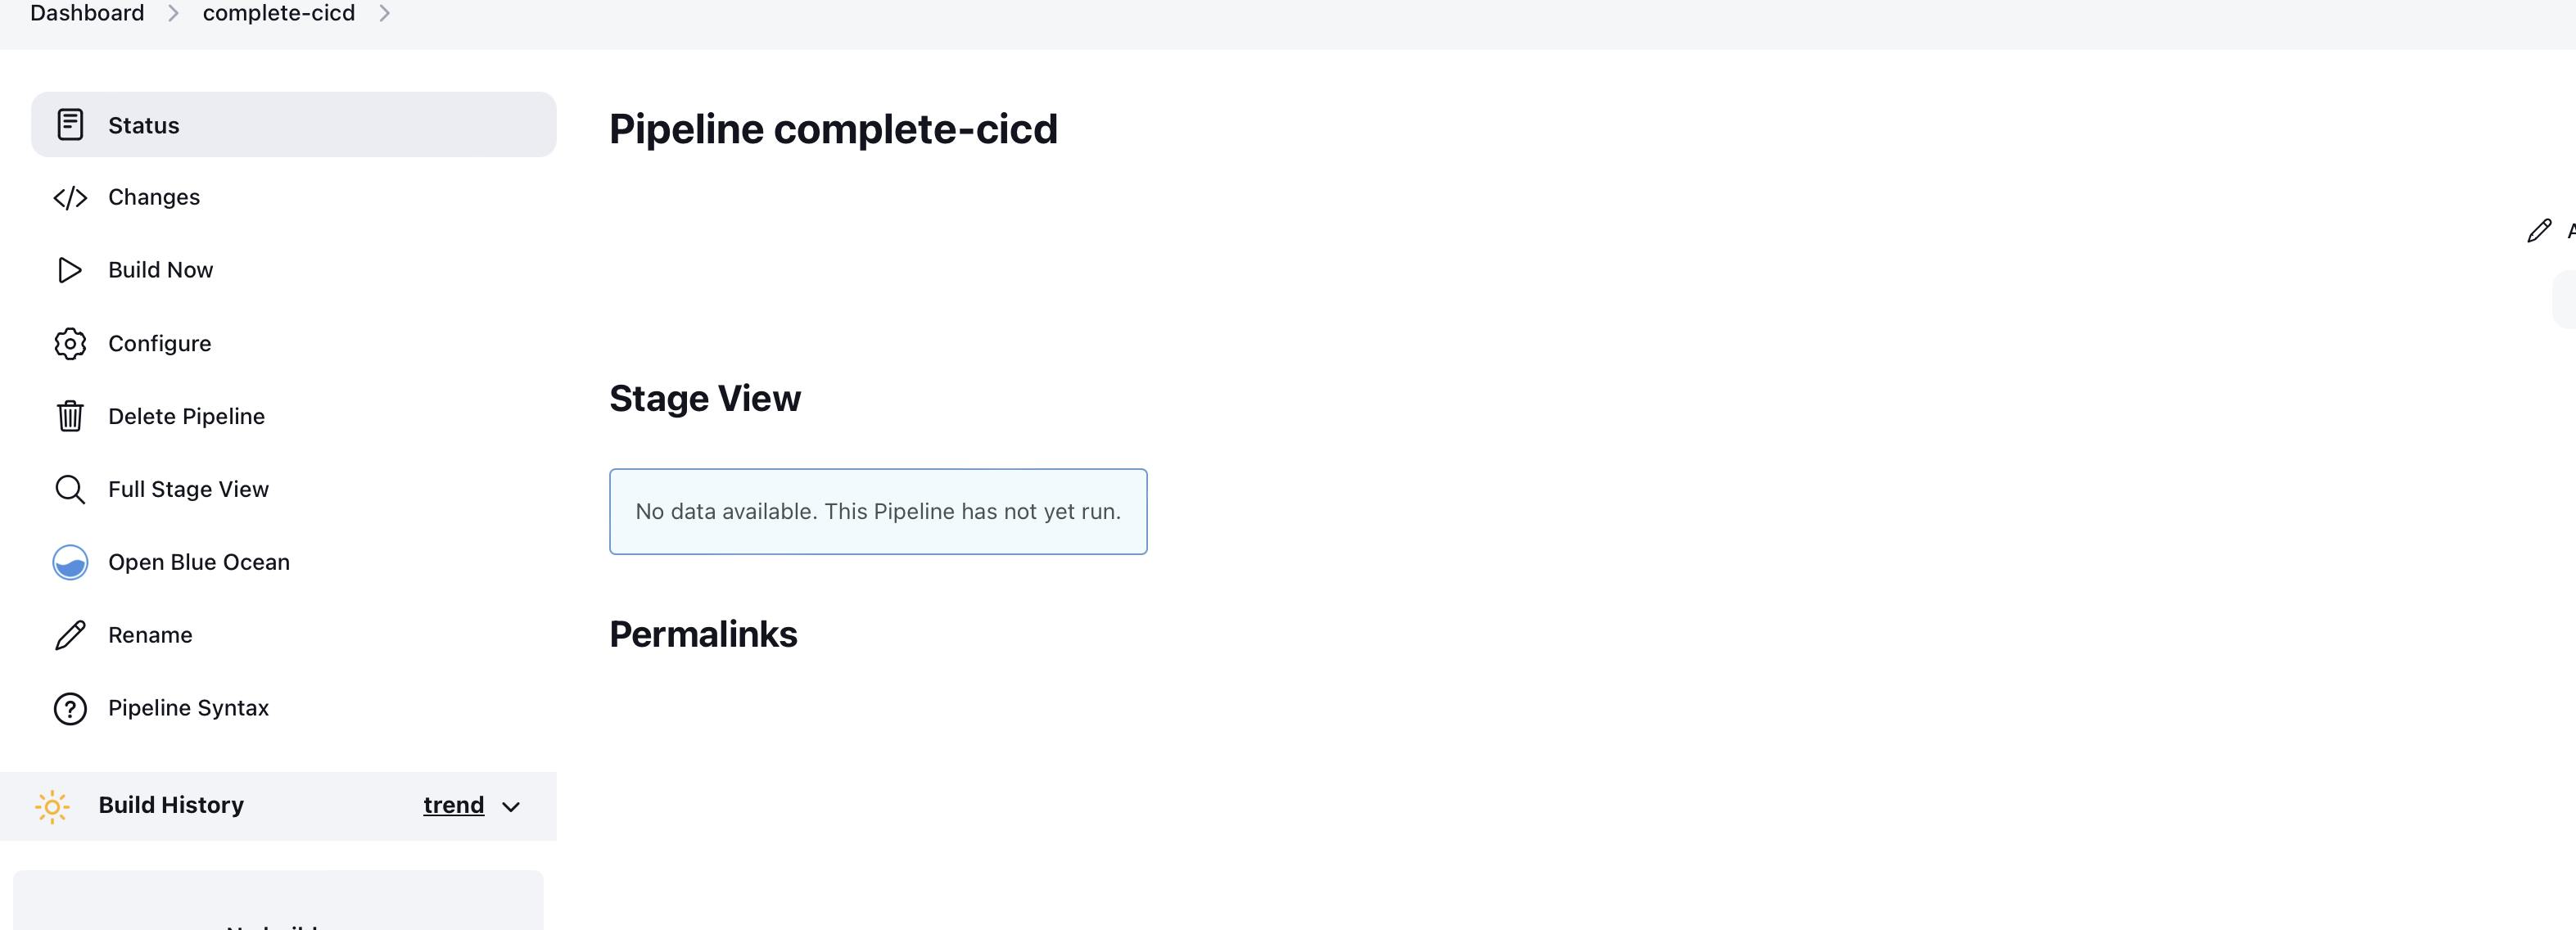
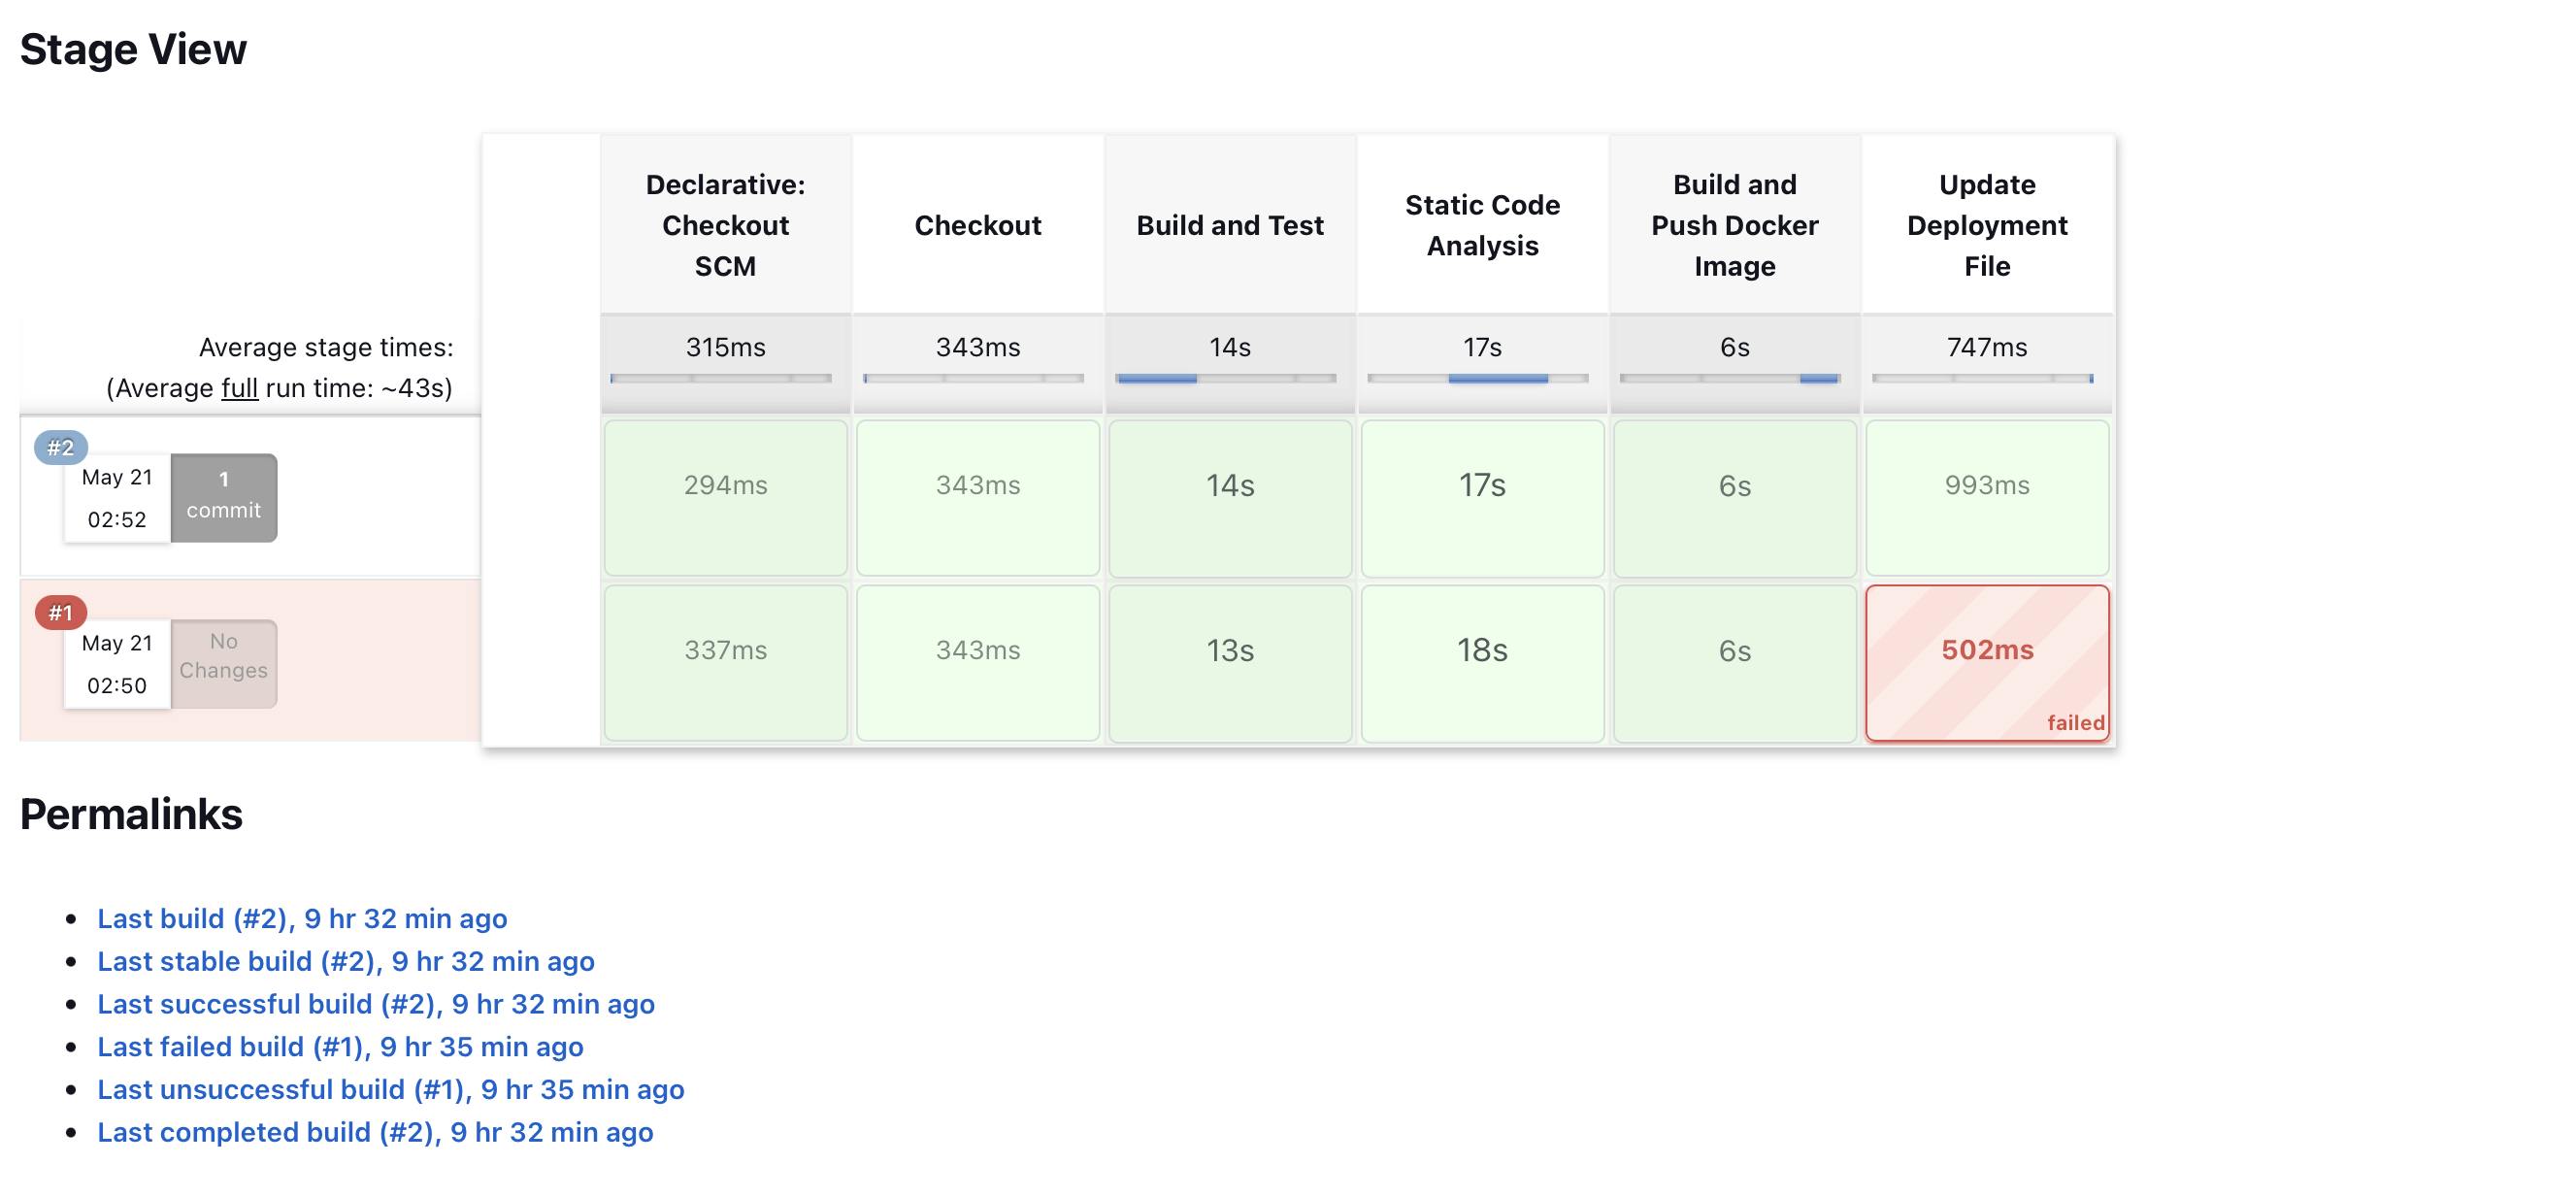
When you click on build now it will start executing your pipeline it might take 10 times to successfully build the pipeline if any error occurs you can console log which will show you what processes are running inside the build
When successfully building your pipeline the Continuous part is completes
Continuous delivery steps
How to Install Kubectl
First, you need to install Kubectl.
what is kubectl - The Kubernetes command-line tool, kubectl, allows you to run commands against Kubernetes clusters. You can use Kubectl to deploy applications, inspect and manage cluster resources, and view logs.
To install kubectl you can follow the official documentation of Kubernetes
For Mac you can install with the Homebrew package
Run this command
homebrew install kubectl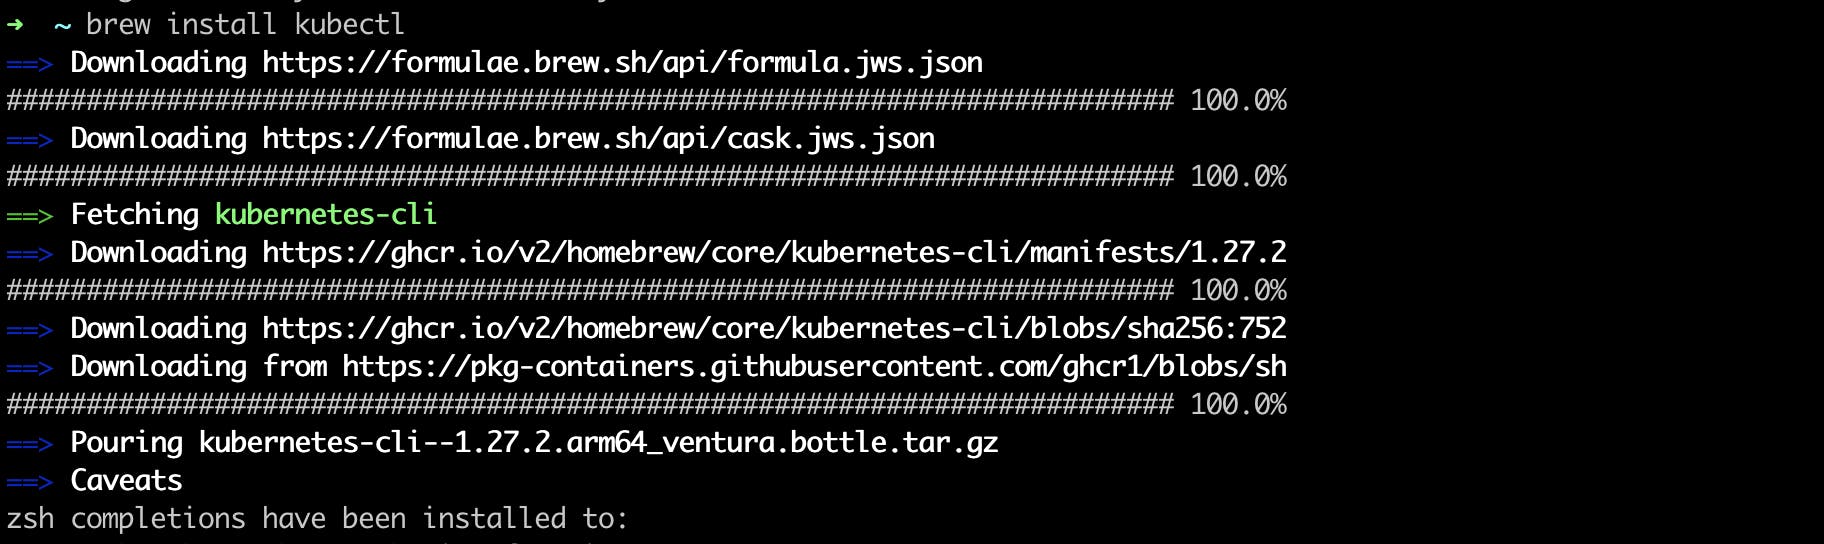
To check Kubectl is installed or not run this command
kubectl version --client
Create Minikube Cluster
To start the Minikube cluster first you should download Minikube in your local system
To install Minikube you just need a docker container to use minikube cluster so, make sure docker is installed in your local system
what is Minikube - Minikube is a lightweight Kubernetes implementation that creates a VM on your local machine and deploys a simple cluster containing only one node.
For Mac use this command
brew install minikube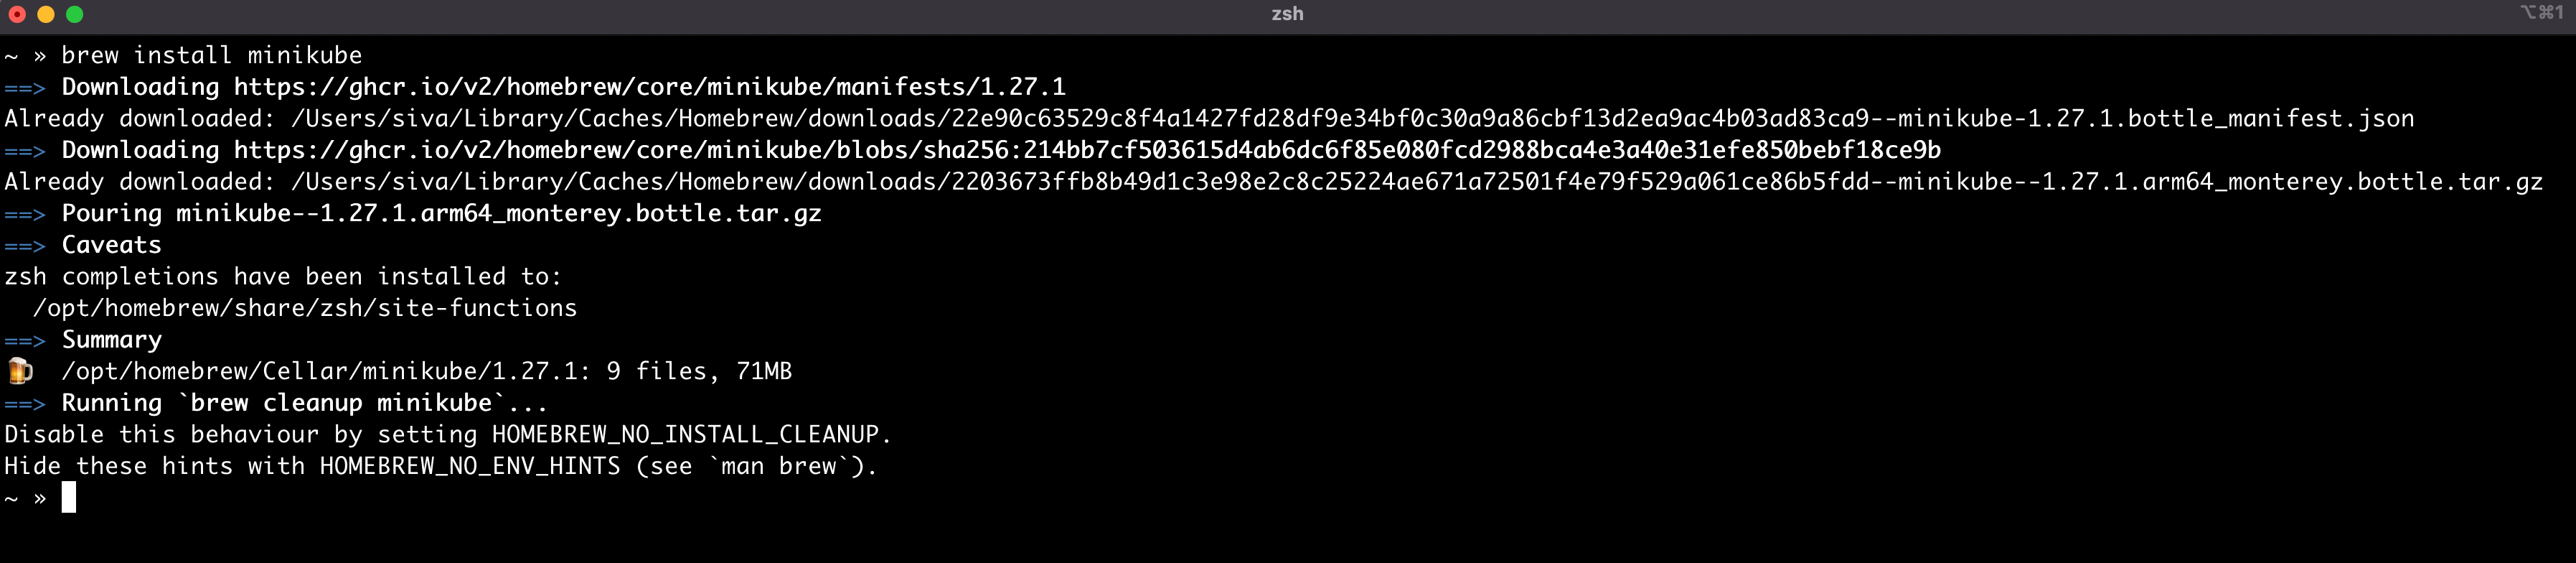
Now you need to start the minikube, run this command
  minikube start --memory=4098 --driver=docker
  minikube version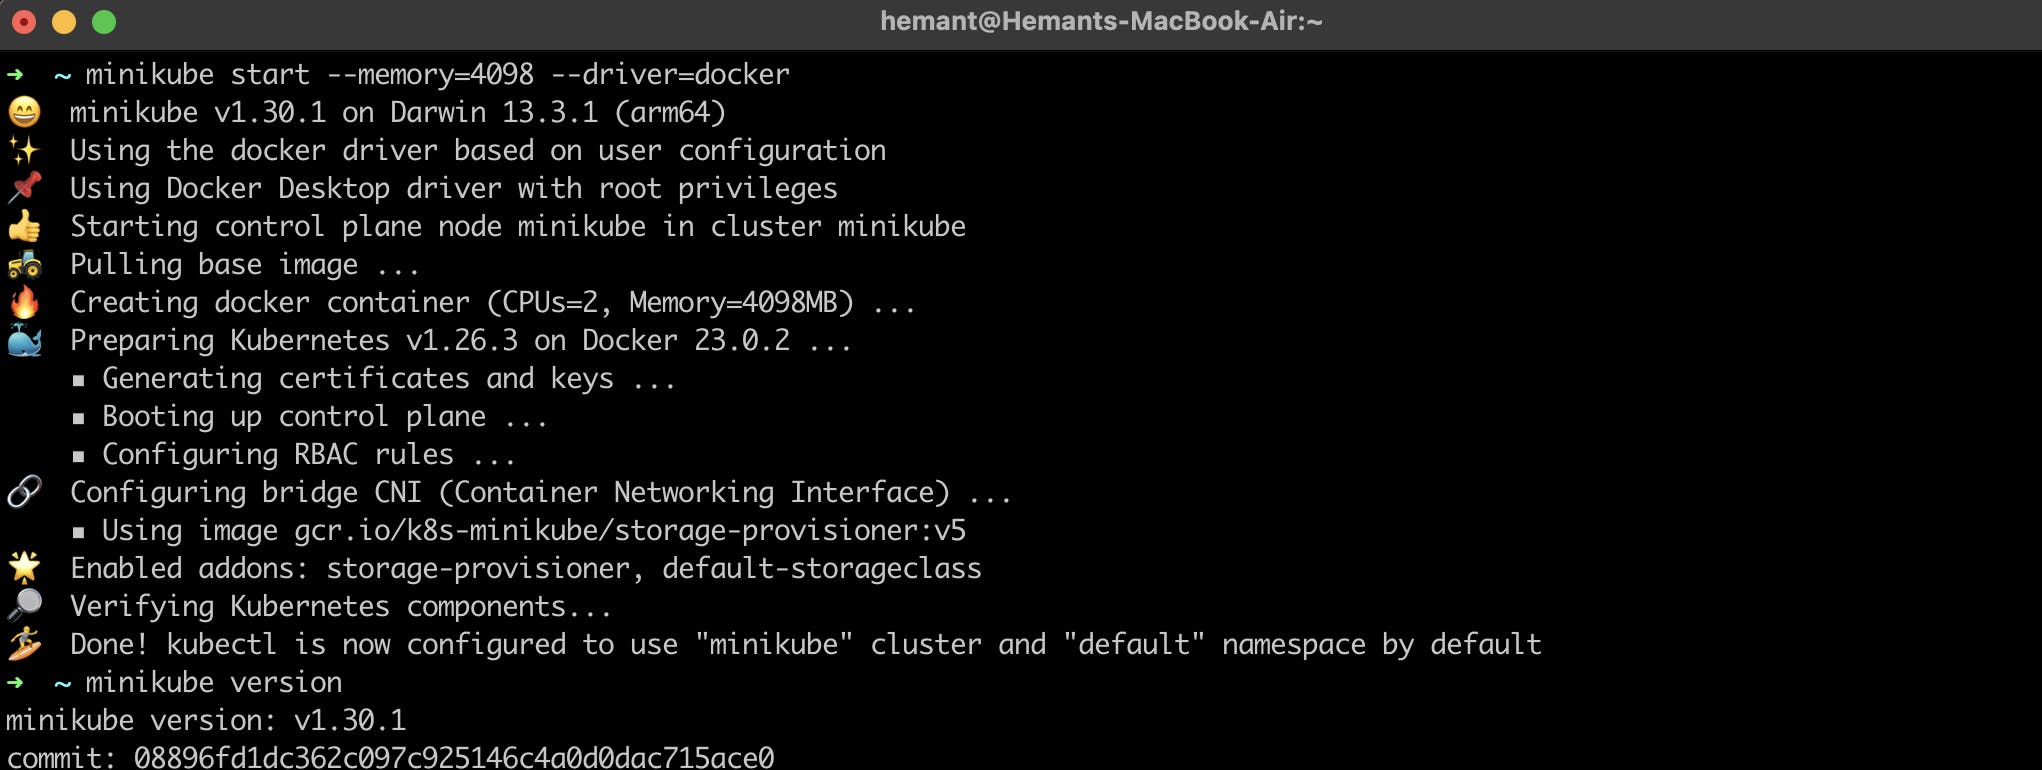
By default, minikube creates the Docker container with 2 CPUs and 2 GB memory.
We can also customize the number of CPUs, memory, and disk size.
to increase CPU and disk size you can use this command
--cpus 4 --disk 10gBut for now, we only customize our memory
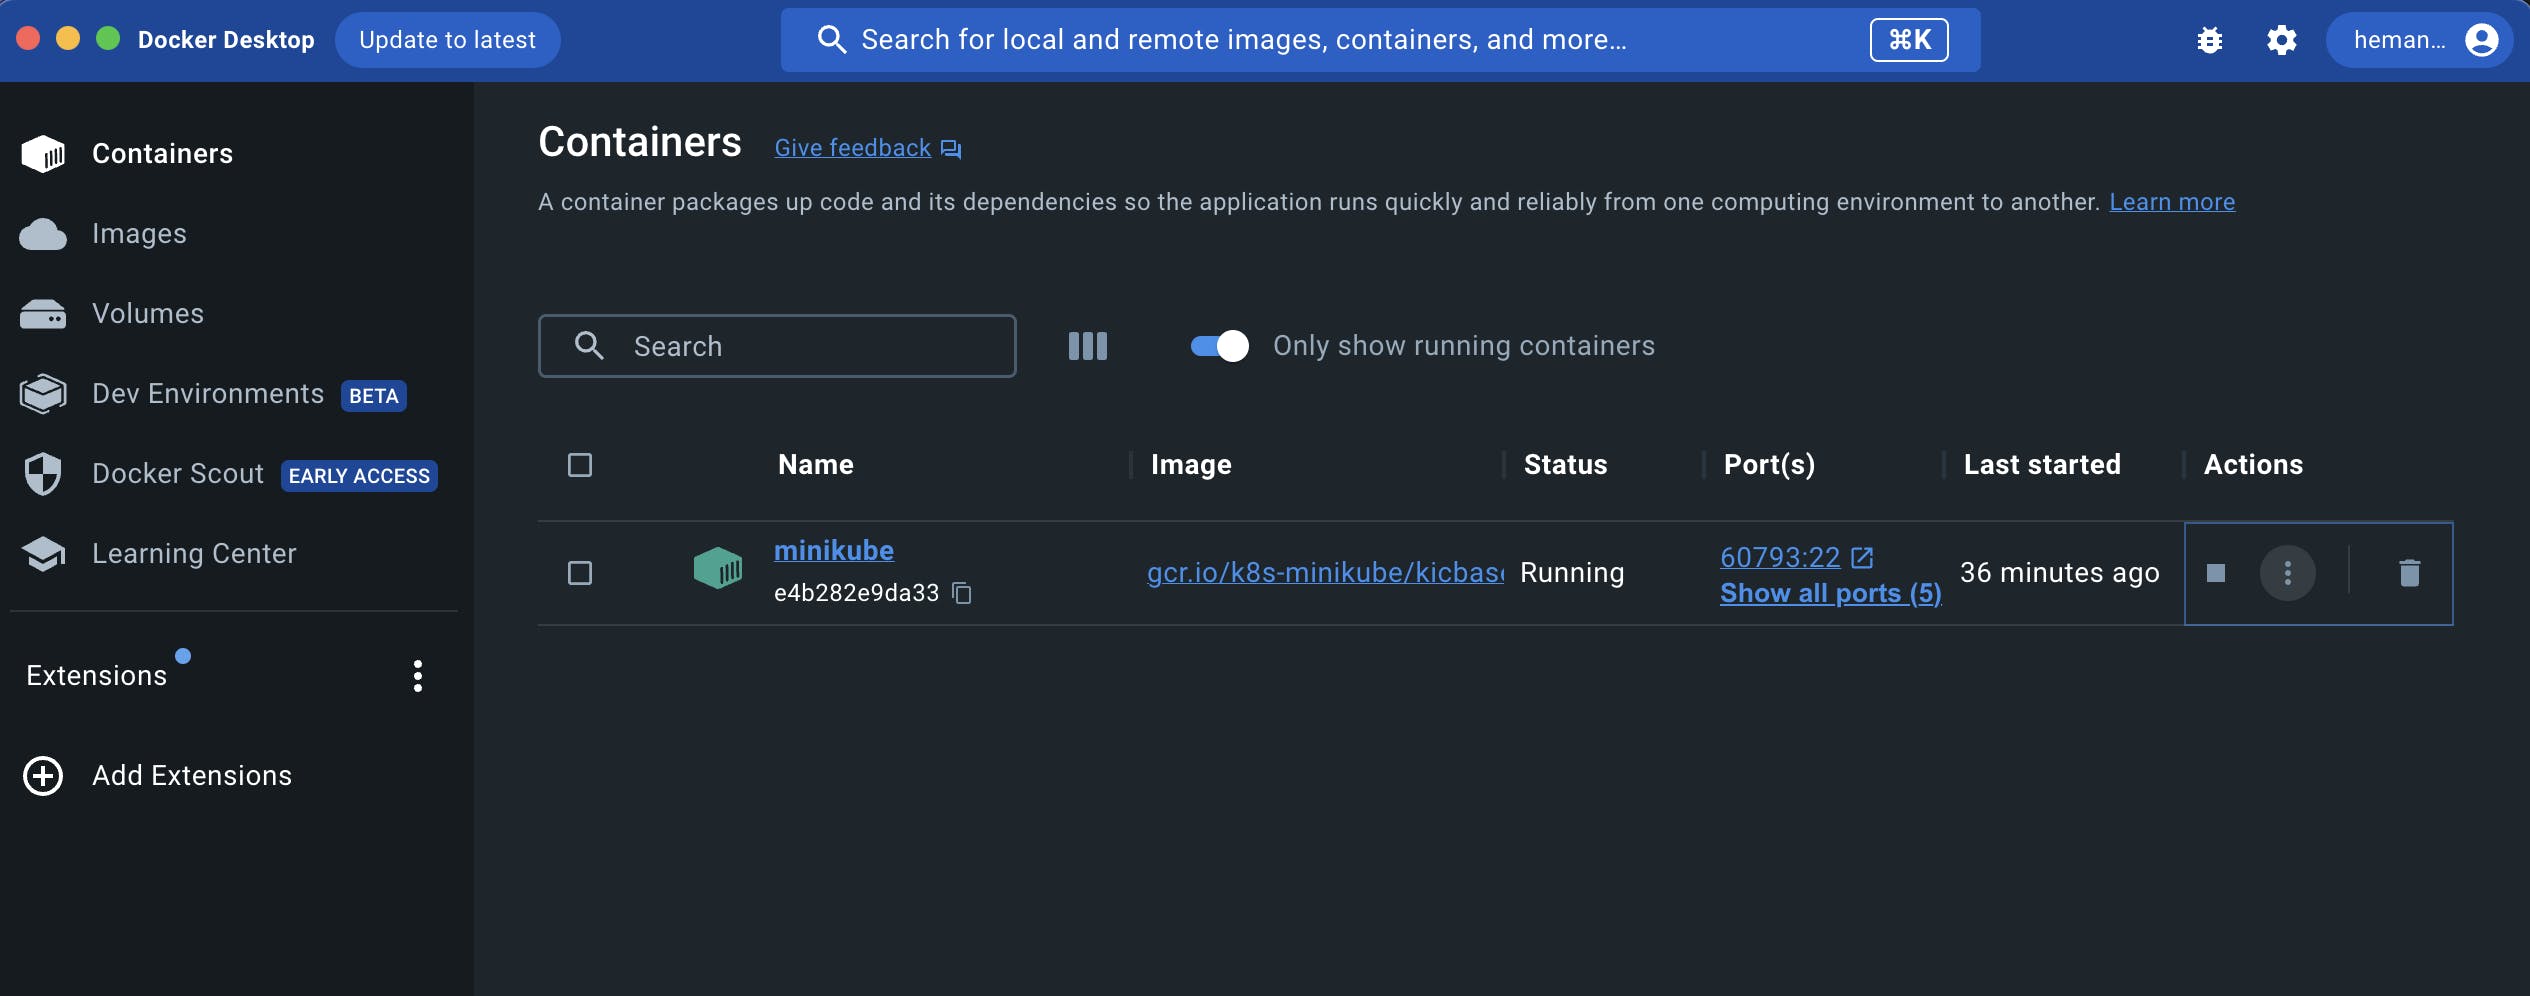
As you can see the minikube cluster is running on my docker desktop
all Done
How to install Kubernetes controllers
The installation of these Kubernetes controllers should take place in Kubernetes operators
What is Kubernetes operators - It is used to manage the life cycle of Kubernetes controllers it is a method of packaging, deploying, and managing a Kubernetes application. it makes the installation process very easy and they also come up with a default configuration
We are going to install ArgoCD with the help of an Kubernetes operator
for that go to https://operatorhub.io/ and search for the ArgoCD and click on it

Now click on the install button and paste each command one by one into your terminal
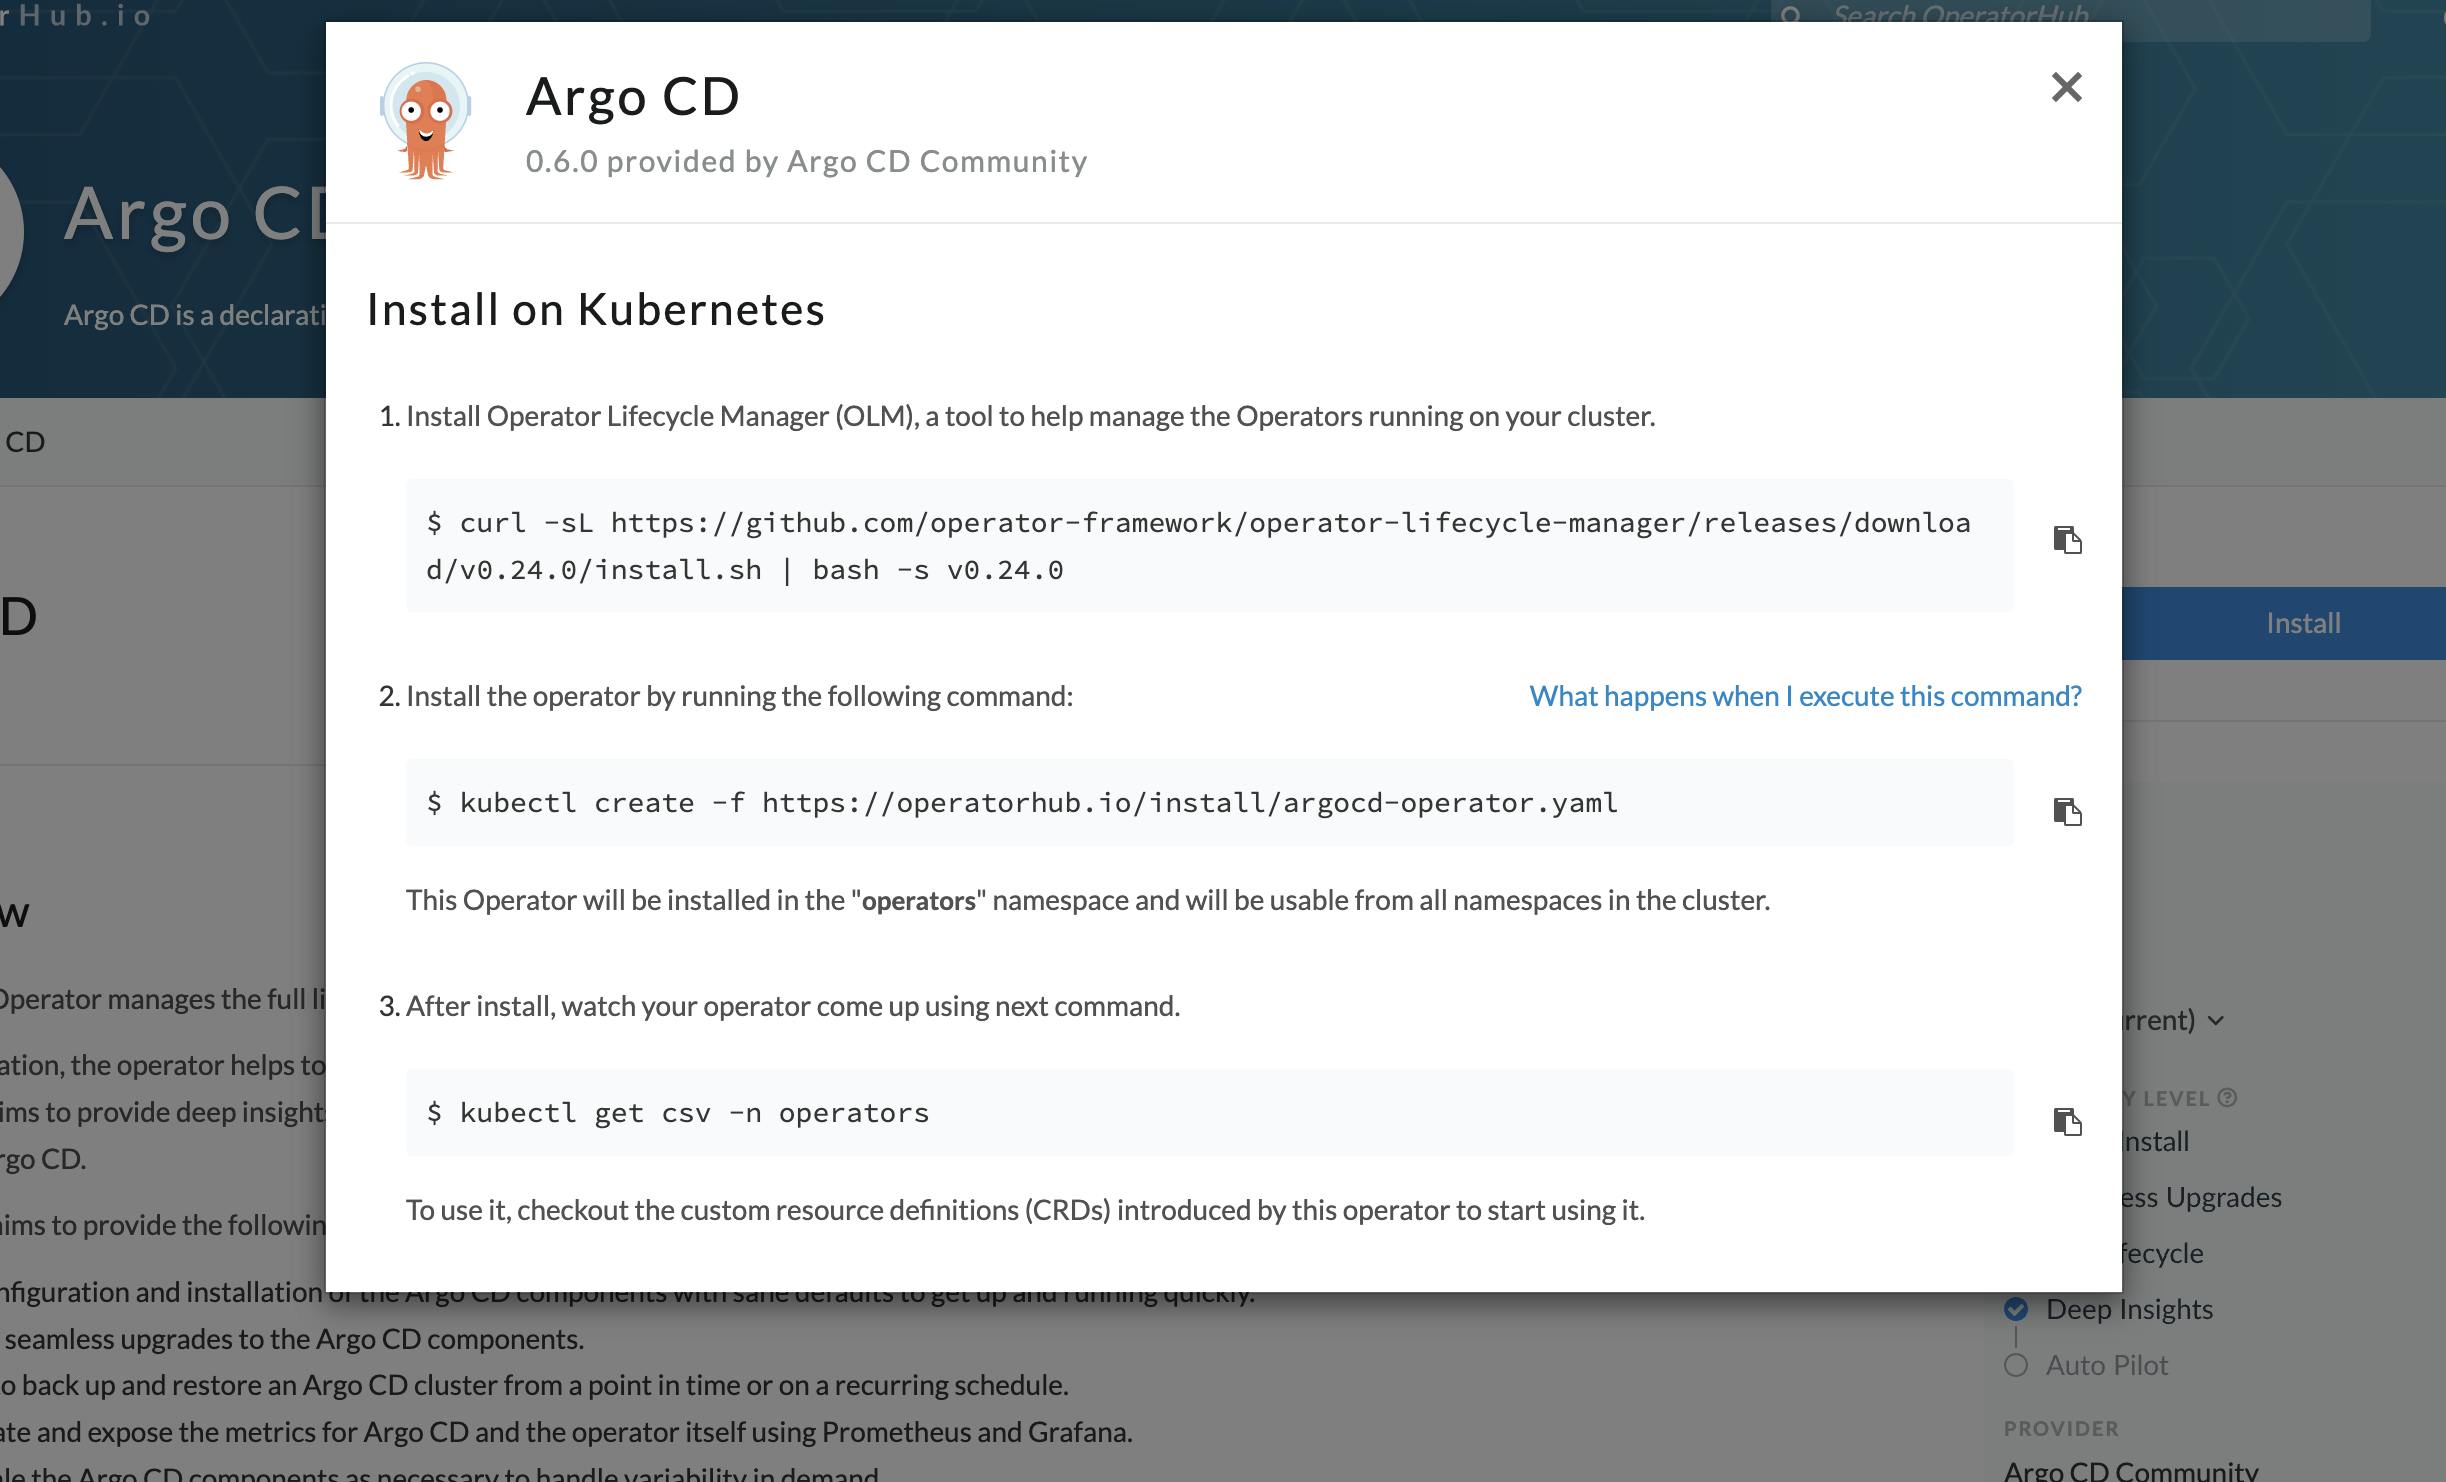
When you run all the above commands it will create an agro-operator-controller-manage container

Till now we have created a Kubernetes controller now we will see how to create argocd controller
How to create an ArgoCD controller-
first, go to your terminal and make sure that Minikube is up and running
minikube status
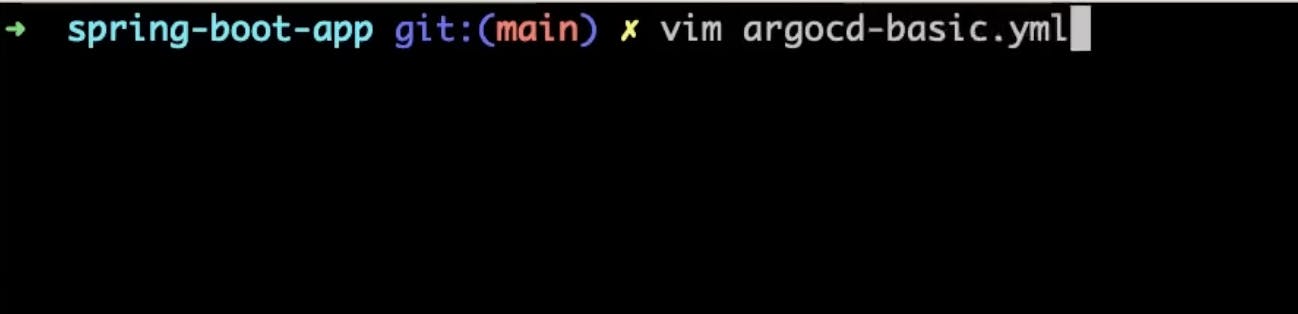
Now we will create a Vim file example that shows the most minimal valid manifest to create a new Argo CD cluster with the default configuration.
  apiVersion: argoproj.io/v1alpha1
  kind: ArgoCD
  metadata:
    name: example-argocd
    labels:
      example: basic
  spec: {}
copy these steps in your Vim file and save it
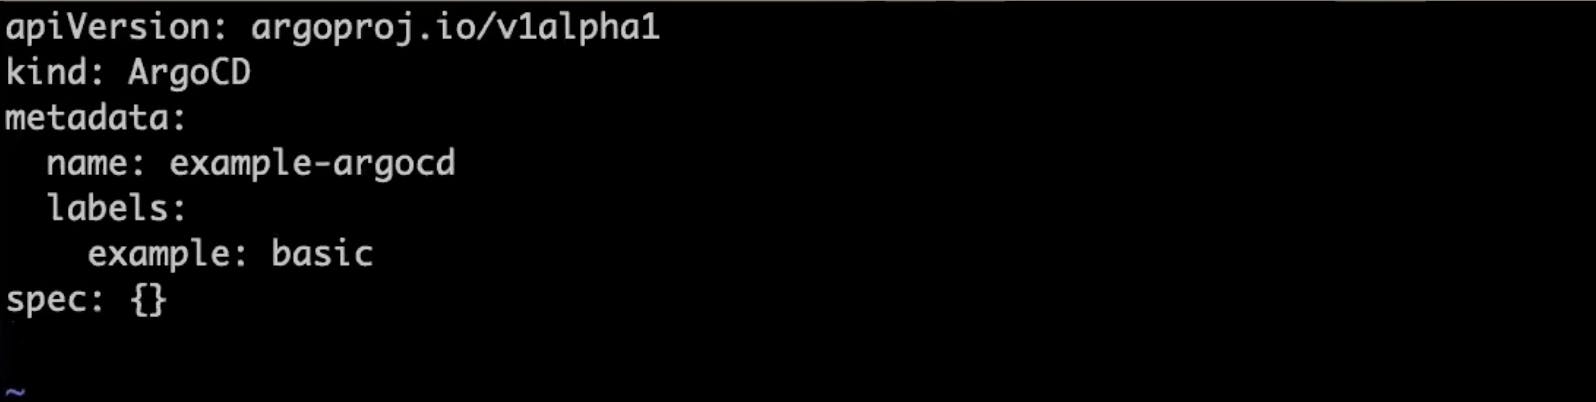
save this and apply by running this command
kubectl apply -f argocd-basic.yml
when you run kubectl get pods then you can see that the Argo-cd workloads are getting created
kubectl get pods
How to run Argocd in your browser
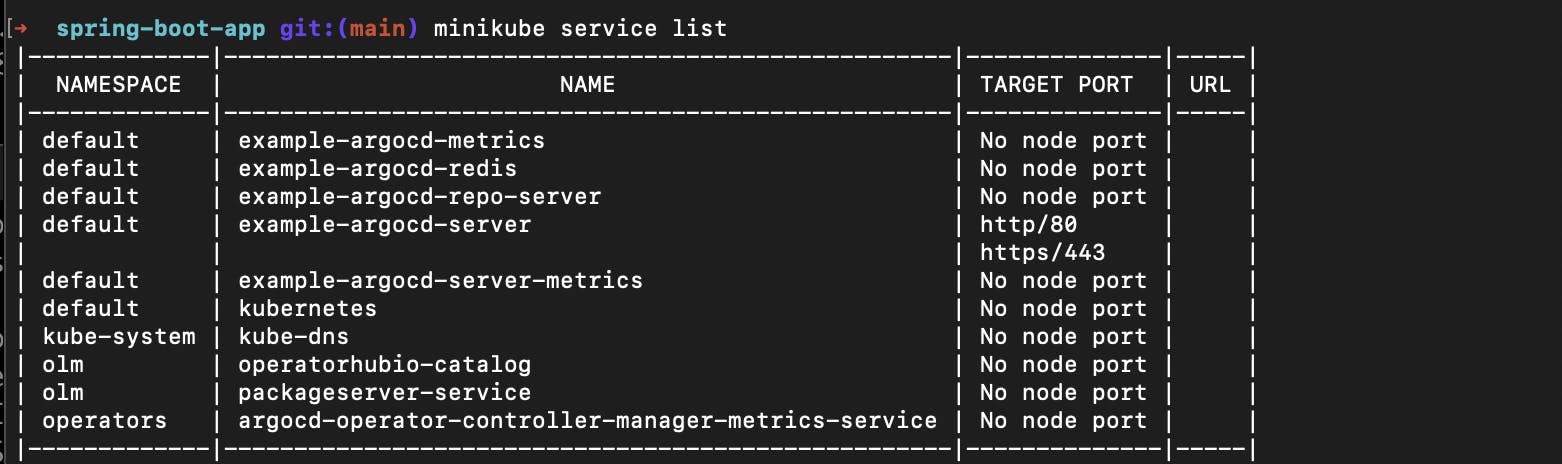
To get the list of all running services use this command
kubectl get svc
The example-argocd-server is responsible for the Argo-cd UI. so,
To run in the browser you have to edit the type ClusterIP to node port to that run this command
kubectl edit svc example-argocd-serverand edit the type


and save it

When you again run
kubectl get svcyou can see the type is updated
Now to run this into the browser you have to generate a URL as you can see that right now no URL allocated to the the example-argocd-server
To allocate URL to the namespace you can run this command
minikube service example-argocd-server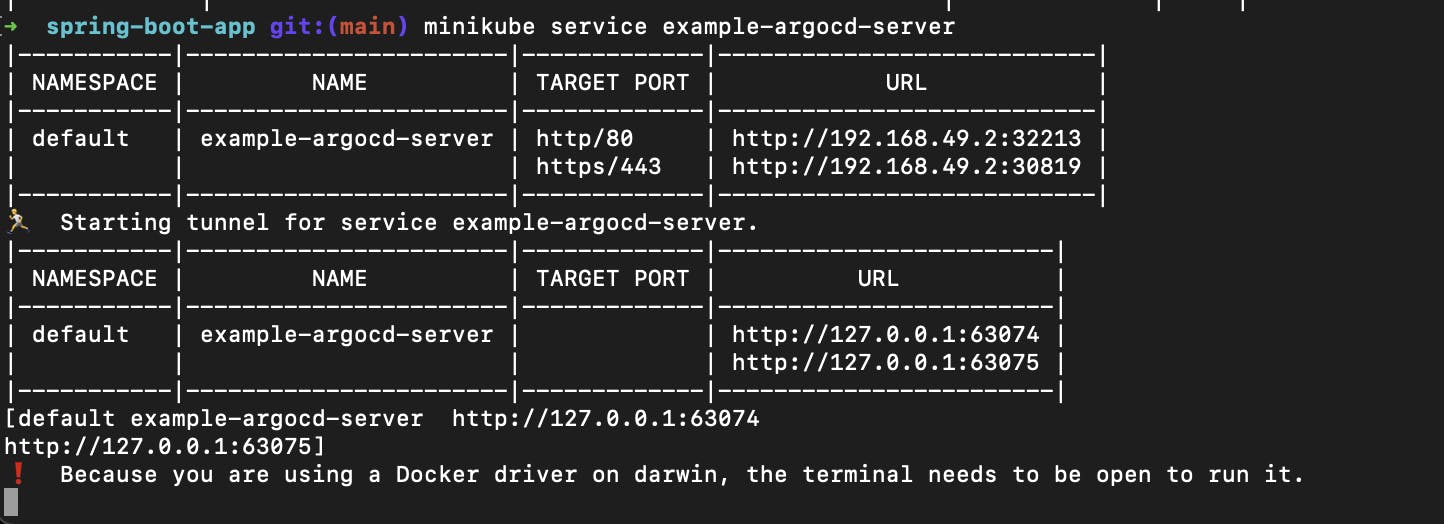
The above command will allocate url to your argo-cd you can copy this URL and run it into your browser
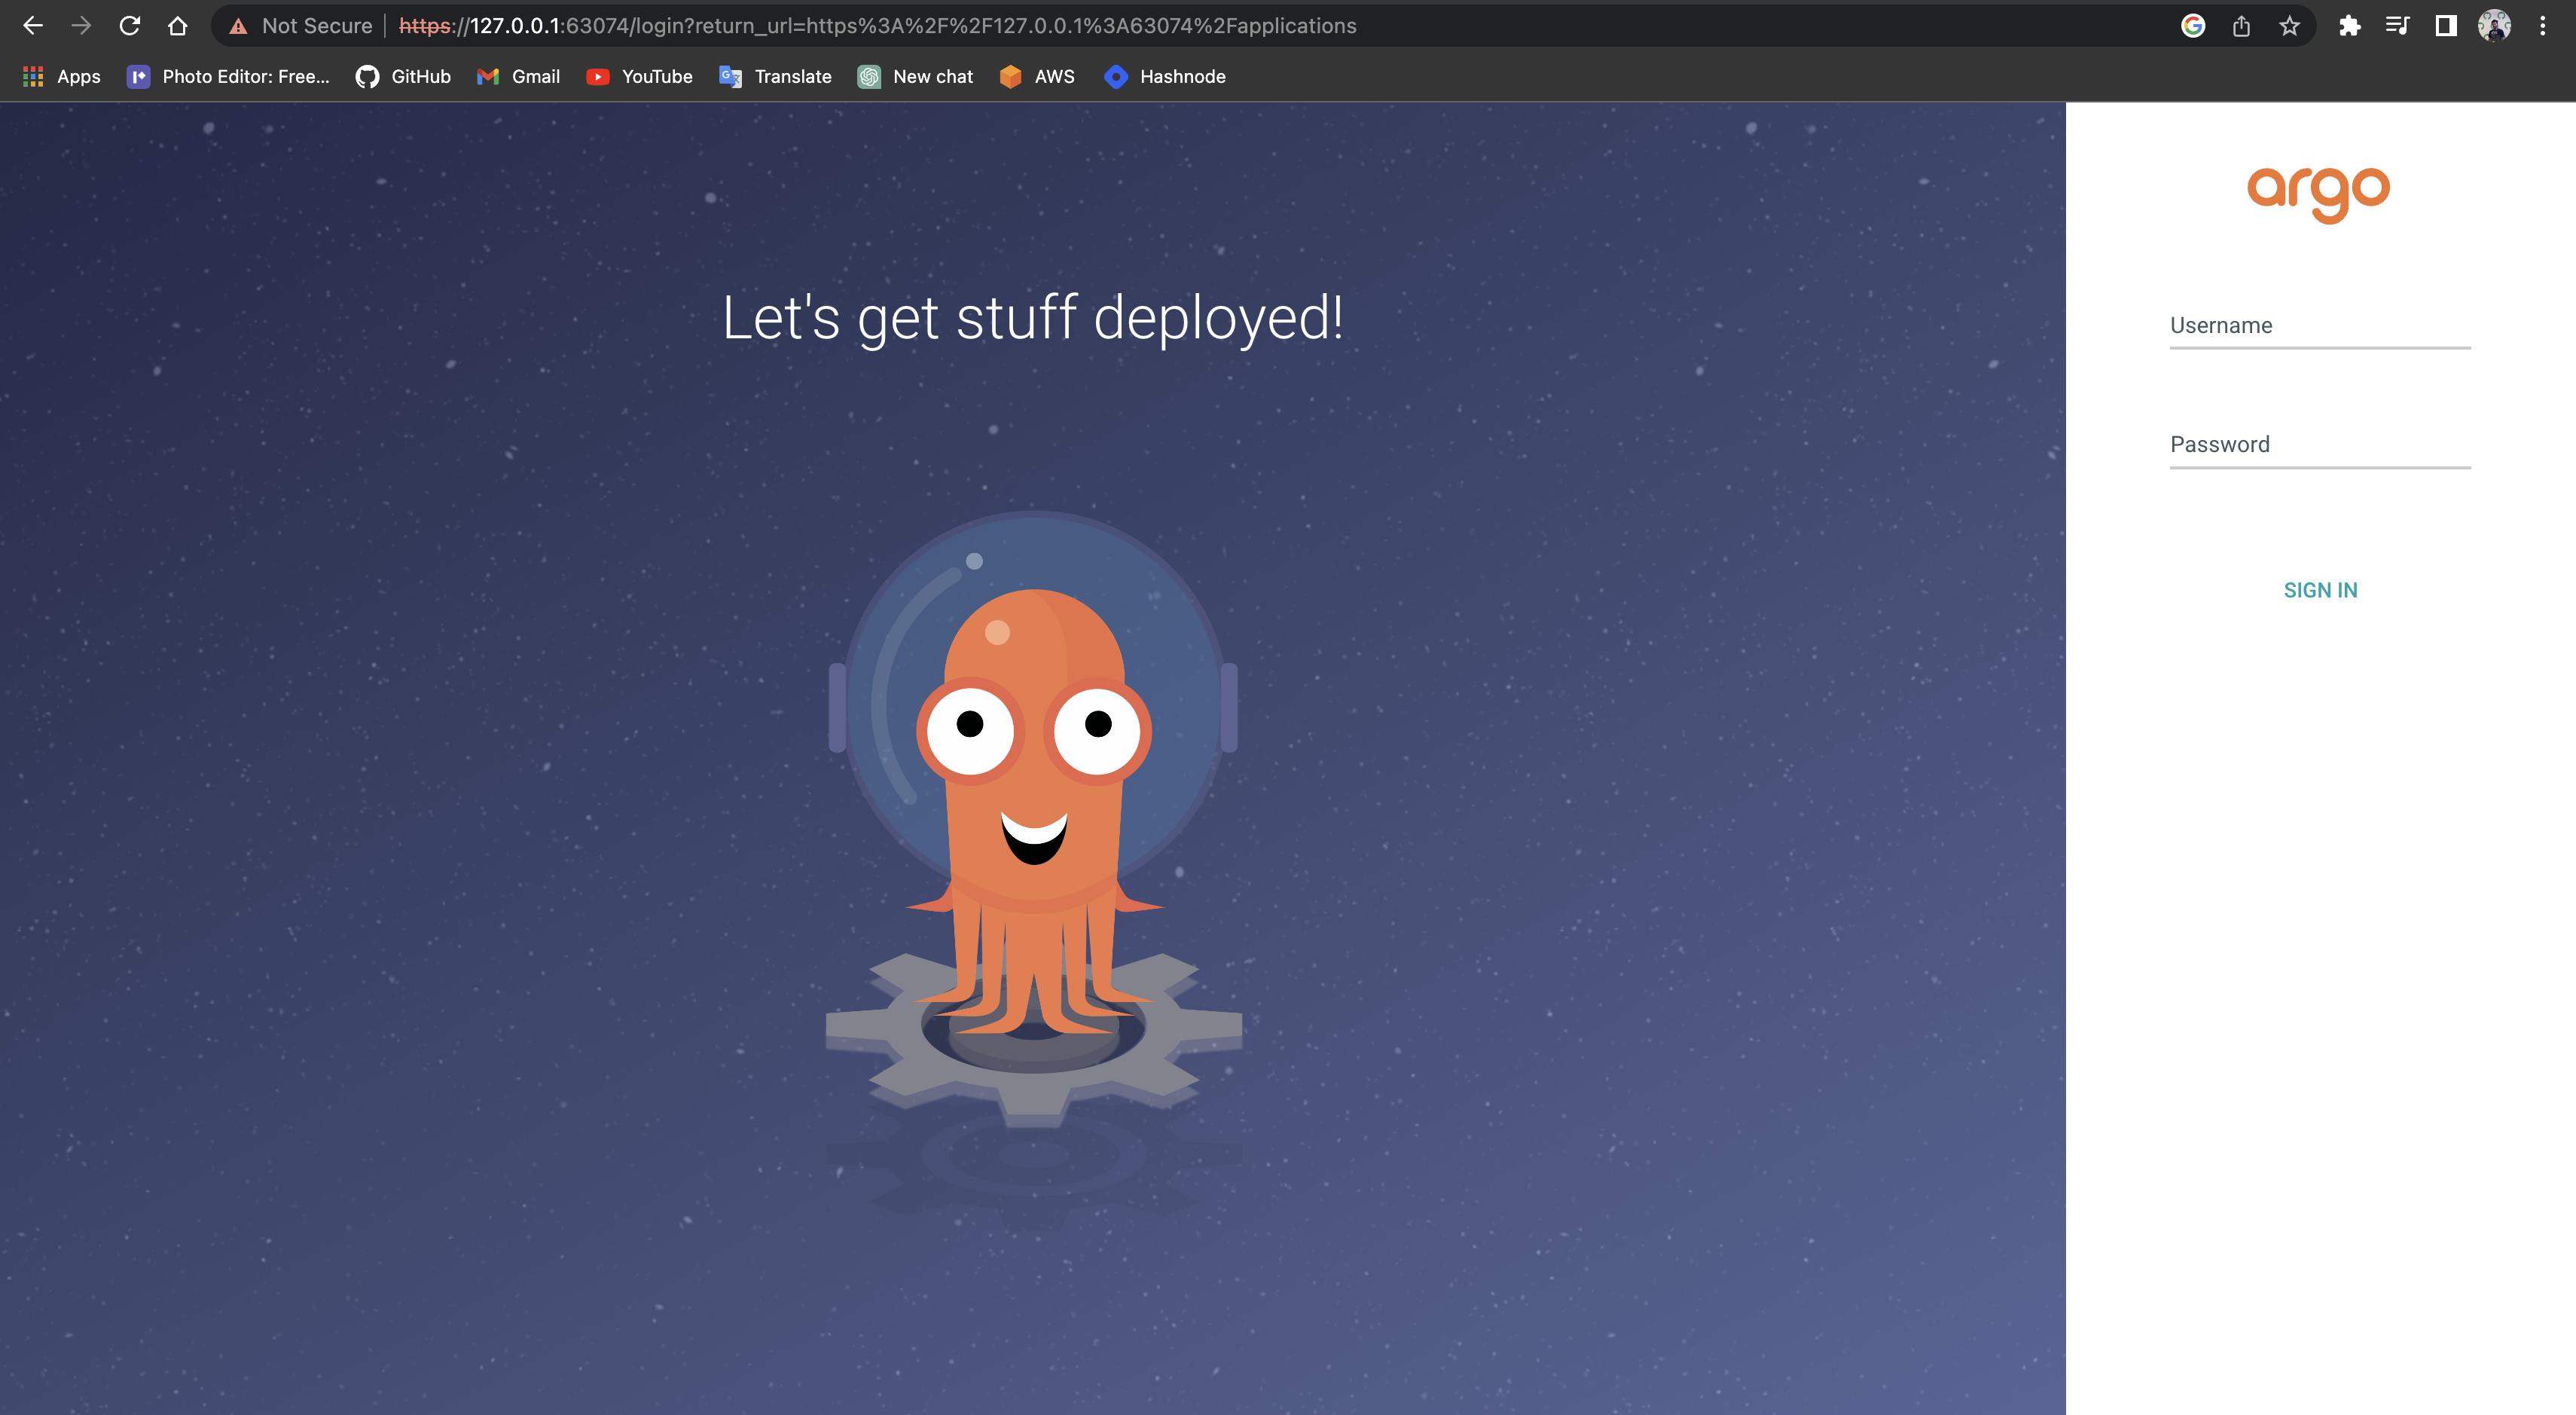
now you will just need to log in to your Argo-cd the username is admin
Argo-cd stores the password in secret to get the password follow the below steps
First, run this command
kubectl get secret
The Argo-cd stores the password in example-argocd-cluster
run this command to get the password

kubectl edit secret example-argocd-cluster
copy the admin password and exit
The Kubernetes secret is base64 encrypted they are not plain text
so for that run this command
echo your_admin.password | base64 -d
Copy the output the output is your password ignore % sign don't copy the % sign
You will be successfully logged in to Argo-cd
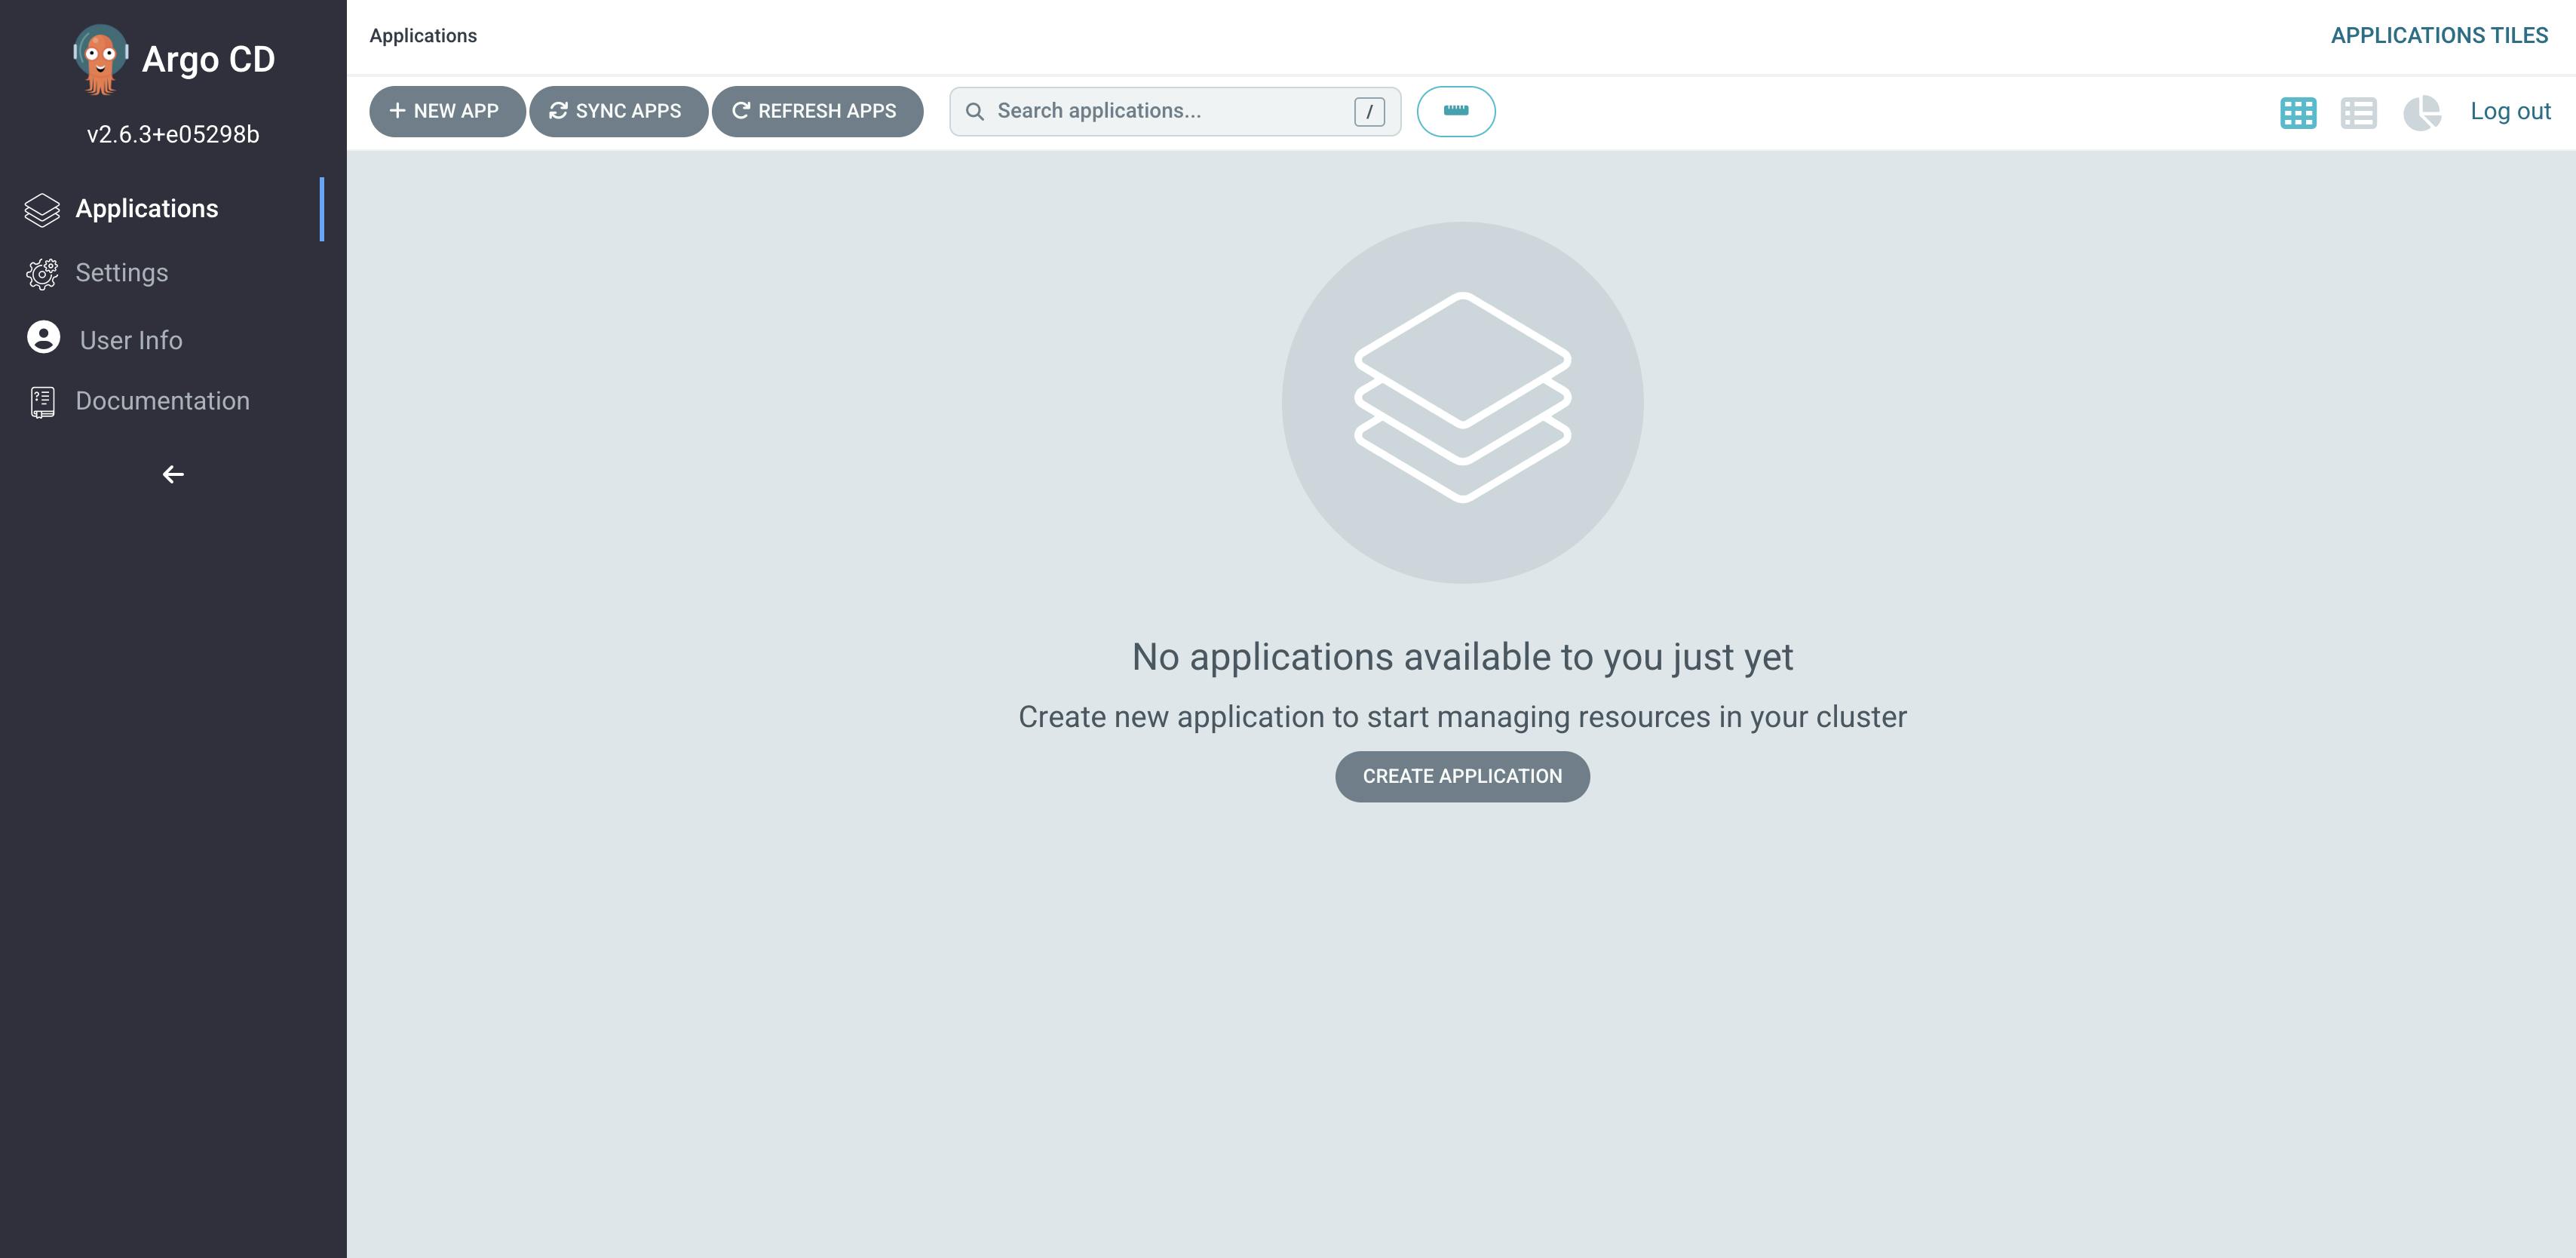
To deploy the application click on Create application button in the middle.
The application name will be
testProject name is
defaultSync as
automaticNamespace will
defaultIn the source URL of the GitHub repository -
https://github.com/hemant-sw/pipelineThe path will be where your deployment.yml file is located -
java-maven-sonar-argocd-helm-k8s/spring-boot-app-manifestsIn Destination
The cluster URL will be
https://kubernetes.default.svc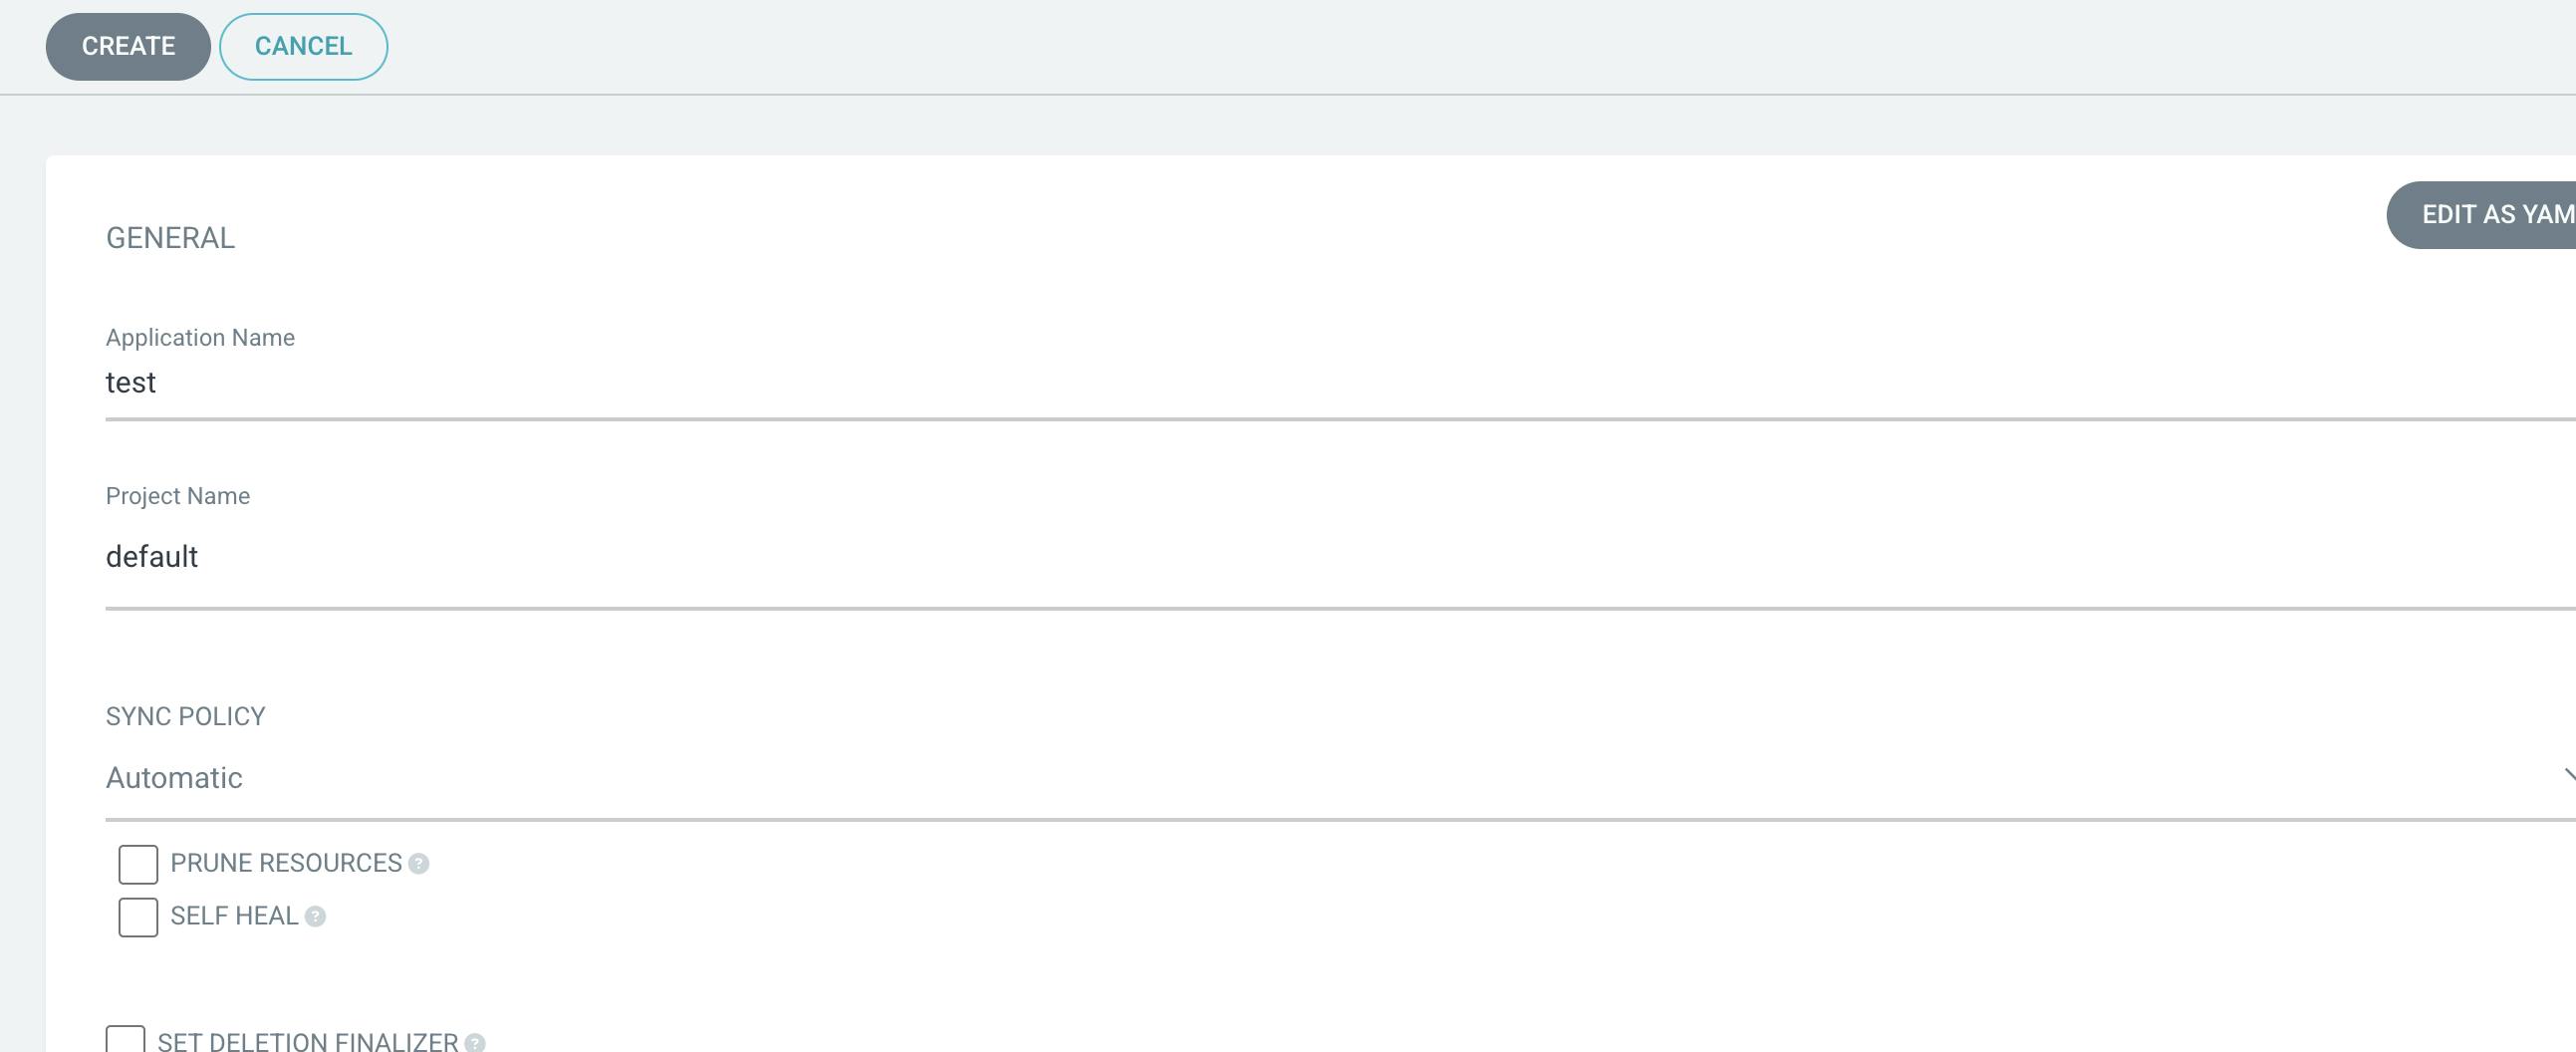
Now click on Create your deployment will be created
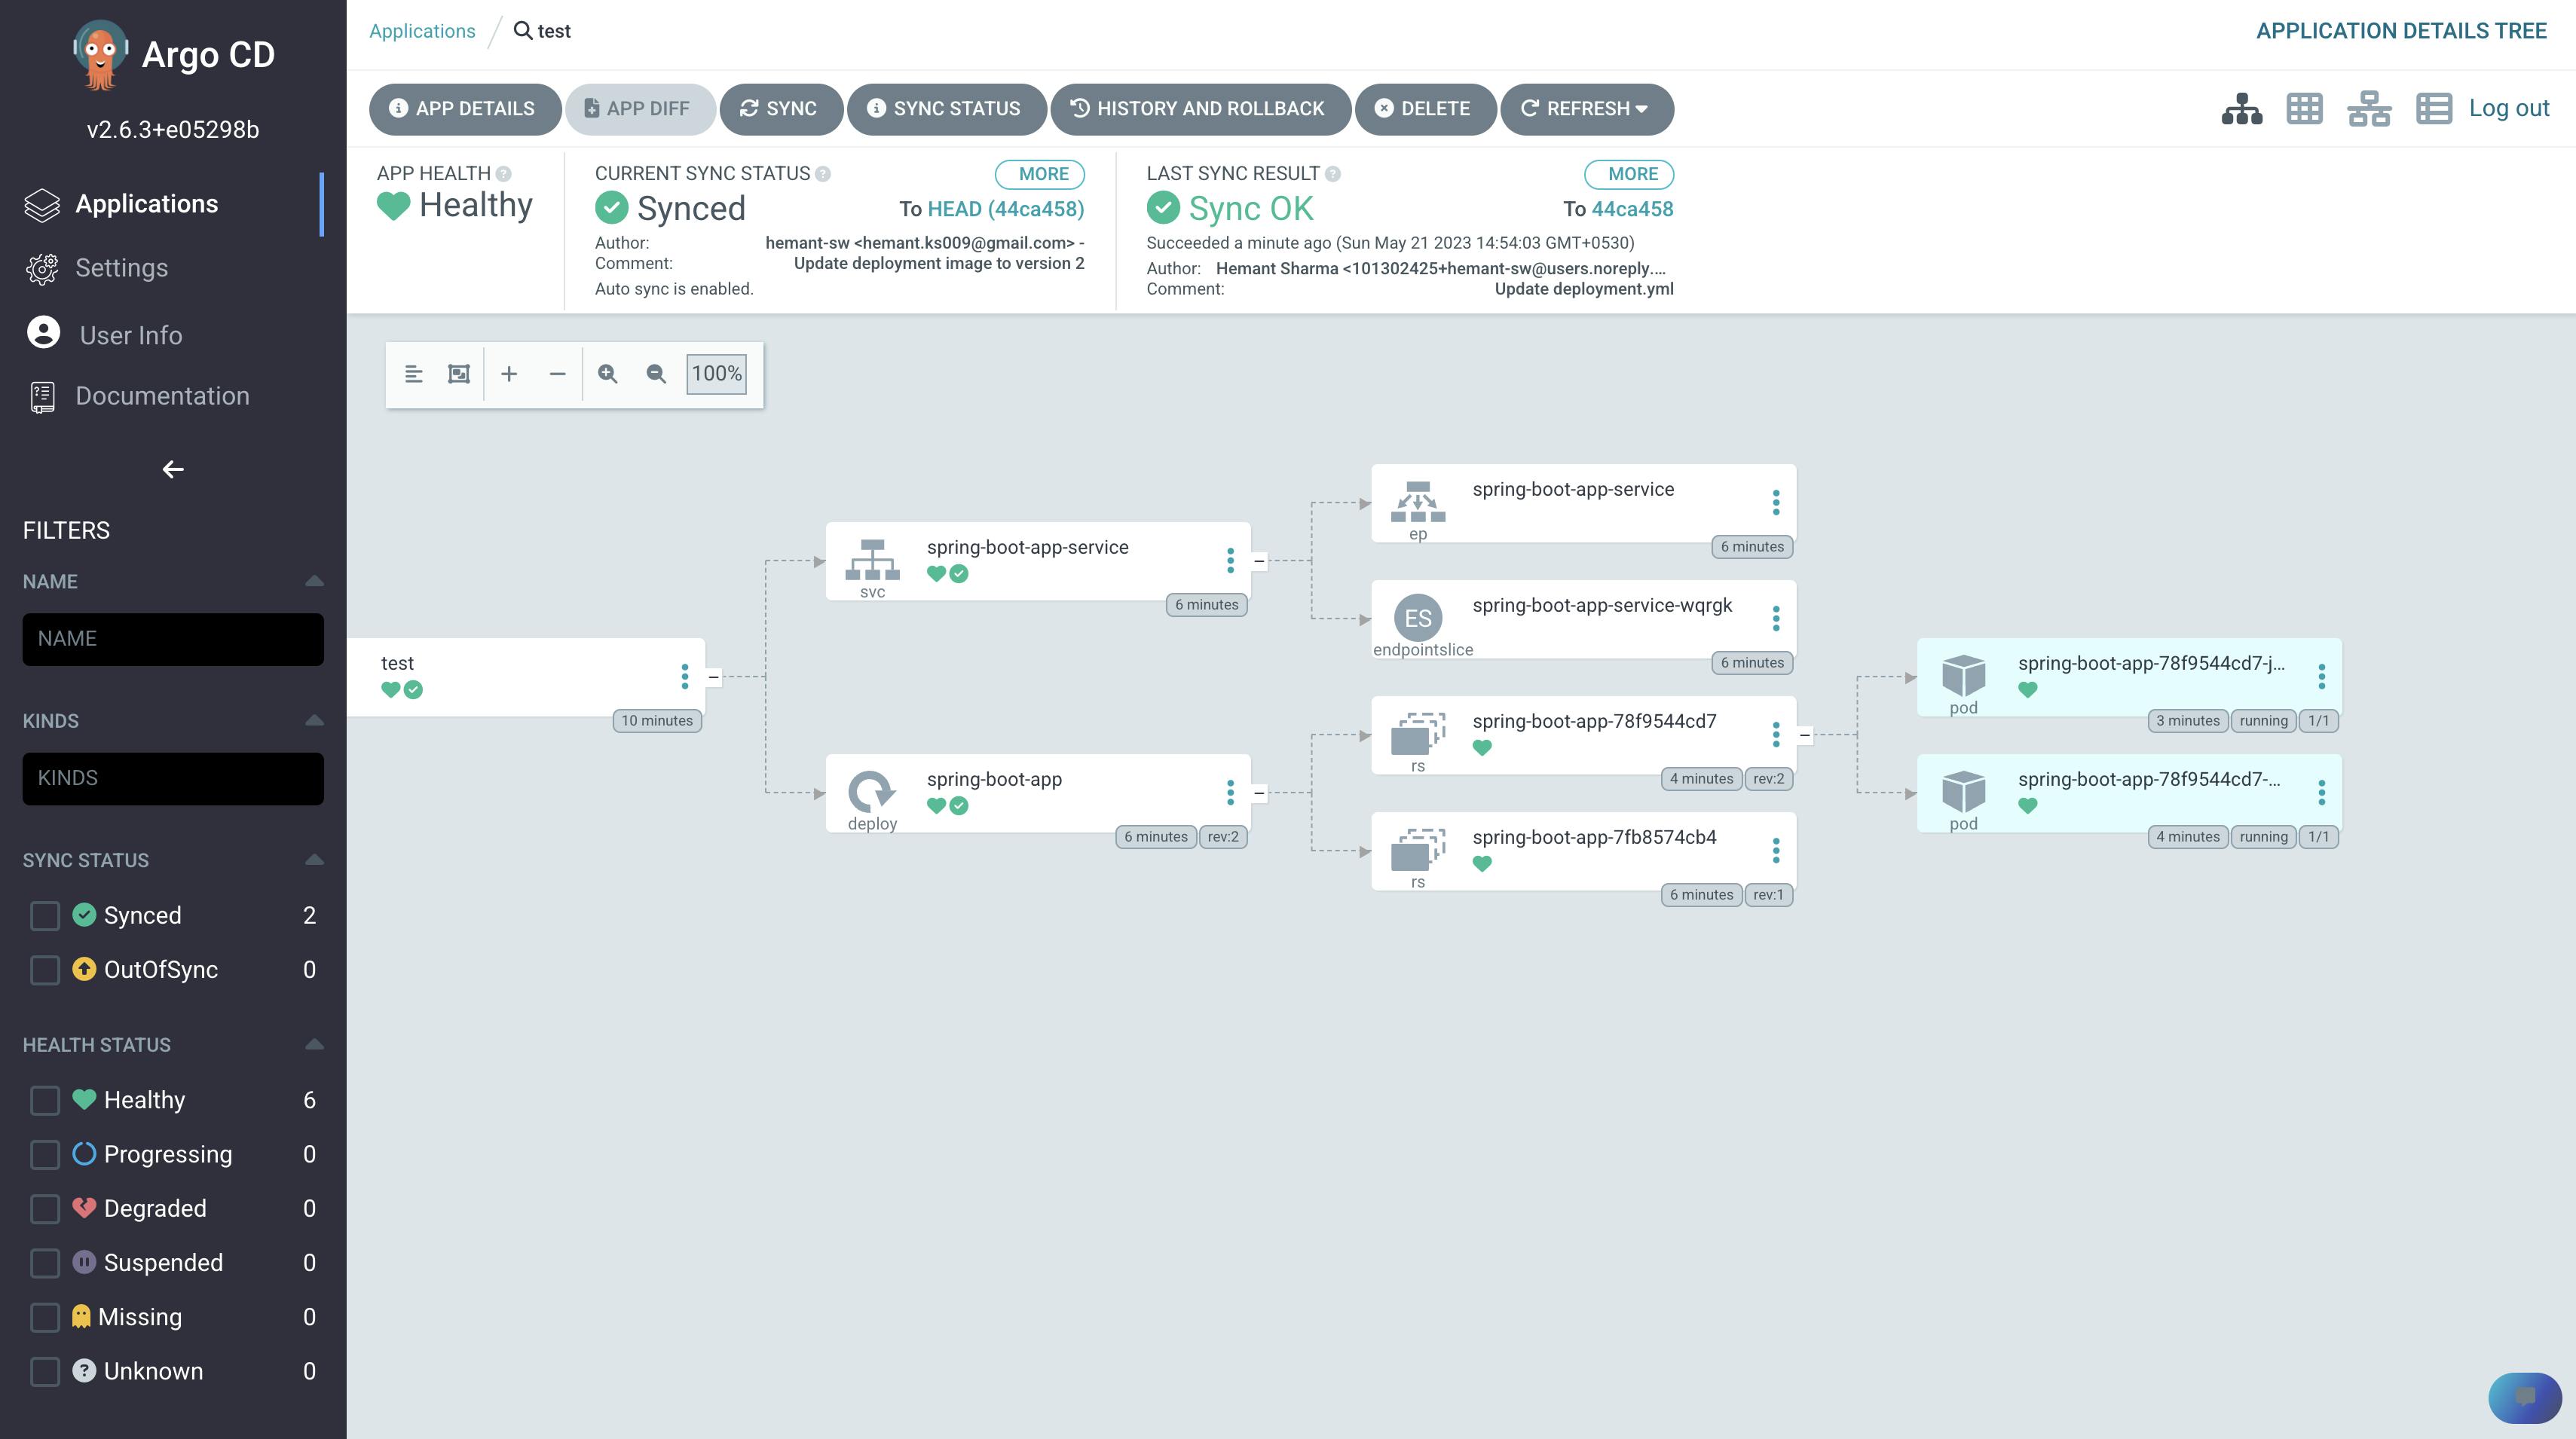
The argo cd just deployed your deploymennt.yml file
When you run
kubectl get deploy
you can see that the spring boot app is deployed
When you check the pods
kubectl get pods
you can see that pods are created and running these all things are done by Argo-cd itself
How to deploy the application on the browser
First, you have to run
minikube service listcommnad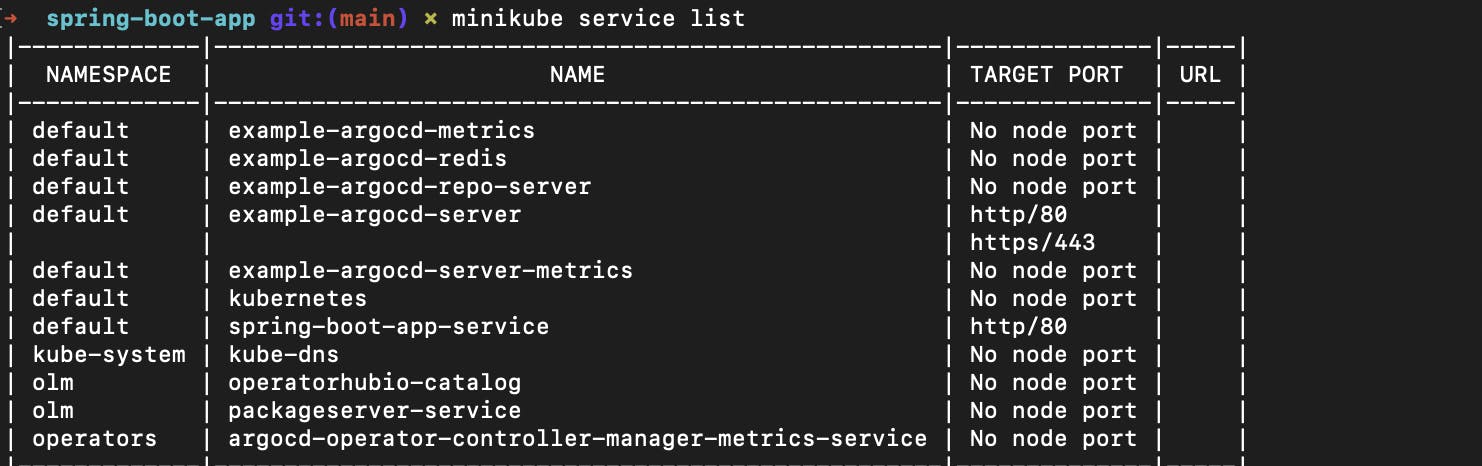
Here you can see that spring-boot-app-service
Now to run spring-boot-app-service use this command
minikube service spring-boot-app-service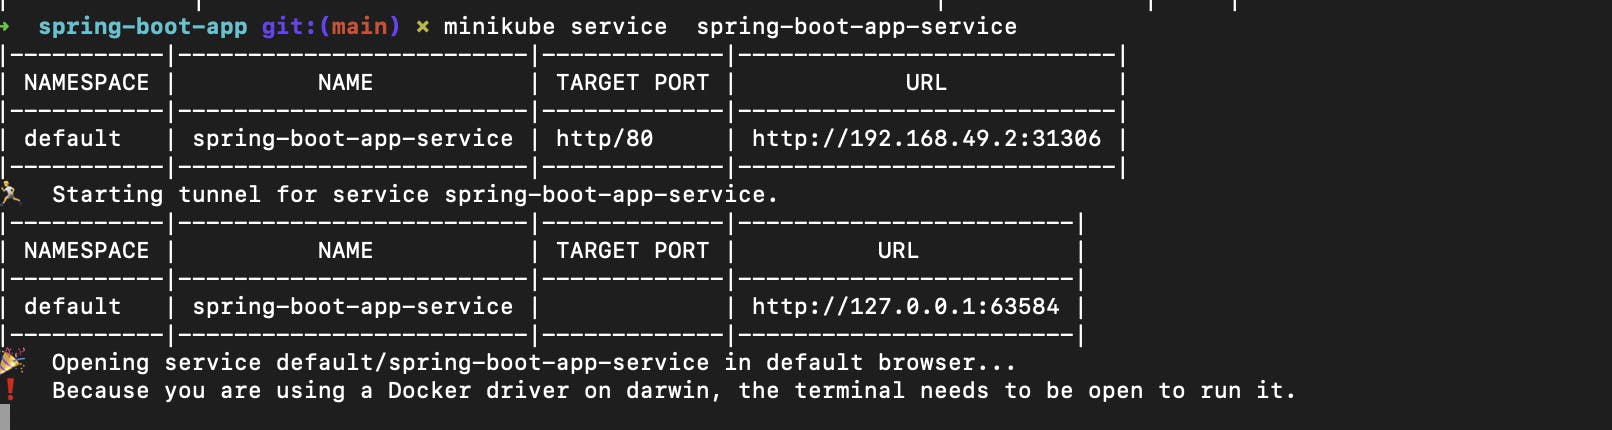
Now just copy the URL and paste it into your browser

Congrats you have successfully deployed Java application using complete CI/CD 🎉