

Table of contents
- What is Github Action?
- Difference between Github Action and Jenkins
- Which one you should choose?
- How to write a github action file
- What are Github-hosted runners?
- What are self-hosted runners?
- When you should use self-hosted runners and not Github-hosted runners
- How to attach self-hosted runners to GitHub
- All Done 🎉
What is Github Action?
GitHub Actions is a powerful workflow automation tool provided by GitHub. It automates tasks in software development. It helps you automate actions like testing, building, and deploying your code. With GitHub Actions, you can set up continuous integration (CI) and continuous deployment (CD) pipelines, run tests, build and deploy applications, and perform other actions triggered by events, such as code changes, pull requests, or scheduled intervals. Workflows are defined using YAML syntax and can be easily integrated with your GitHub repositories.
Difference between Github Action and Jenkins
Github action is similar to Jenkins it can do all the tasks of continuous Integration and and continuous delivery. The main difference is Github action is primarily focused on Github. It is a platform-oriented Solution so it provides a more stable and integrated automation experience specifically designed for GitHub repositories. while Jenkins offers more flexibility and scalability but requires more setup and maintenance effort.
Which one you should choose?
So, Whenever you want to consider a GIthub action or Jenkins the primary thing you have to understand is the goal of your organization, if the organization wants to continue with GitHub action in the future then you should definitely choose Github action if they want to migrate to a different platform in the future then in such cases Github action is not the right solution for you. they should use Jenkins because it is more flexible
How to write a github action file
If you want to write a GitHub action file you just need to go to the parent directory of your repository and create
.github/workflowdirectory.In that folder name the file with a
.ymlextension, for example,action.yml. This is where you'll define your workflow.Define the name of your workflow using the
namekey. For example:name: My First GitHub Actions on: [push] jobs: build: runs-on: ubuntu-latest strategy: matrix: python-version: [3.8, 3.9] steps: - uses: actions/checkout@v3 - name: Set up Python uses: actions/setup-python@v2 with: python-version: ${{ matrix.python-version }} - name: Install dependencies run: | python -m pip install --upgrade pip pip install pytest - name: Run tests run: | cd src python -m pytest addition.pyon:Specify the event that should trigger like pull, push , issue etc .For example, to trigger the workflow on every push to themainbranch:
Jobs are the same as the pipeline in Jenkins add steps to the workflow using the
jobskey. Each job contains a sequence of steps. if you create 3 jobs mean you are running 3 Jenkins pipeline. you can write multiple jobs in one Jenkins fileIn the above example job is created, in this job, it is written that use the latest Ubuntu image which is hosted in GitHub hosted runner you can also use self-hosted runners by changing the
runs-in: self-hostedin the next section we will see what is self hosted runnersWith
strategyyou can easily parallelize your job across different environments, test configurations, or other parameters, enabling faster execution and improved resource utilizationIn the above example, It creates a matrix of different Python versions, including
3.8and3.9. This configuration allows the job to be executed with both Python versions specified in the matrixstepsare the same as stages in Jenkins thestepsblock is used to define a sequence of actions or commands to be executed within a job. There are different steps same as jenkins where you have test stage, build stage etc.Save the workflow file.
Once saved, GitHub will automatically detect the workflow file and trigger it according to the specified events. You can view the status and details of your workflows in the "Actions" tab of your GitHub repository.
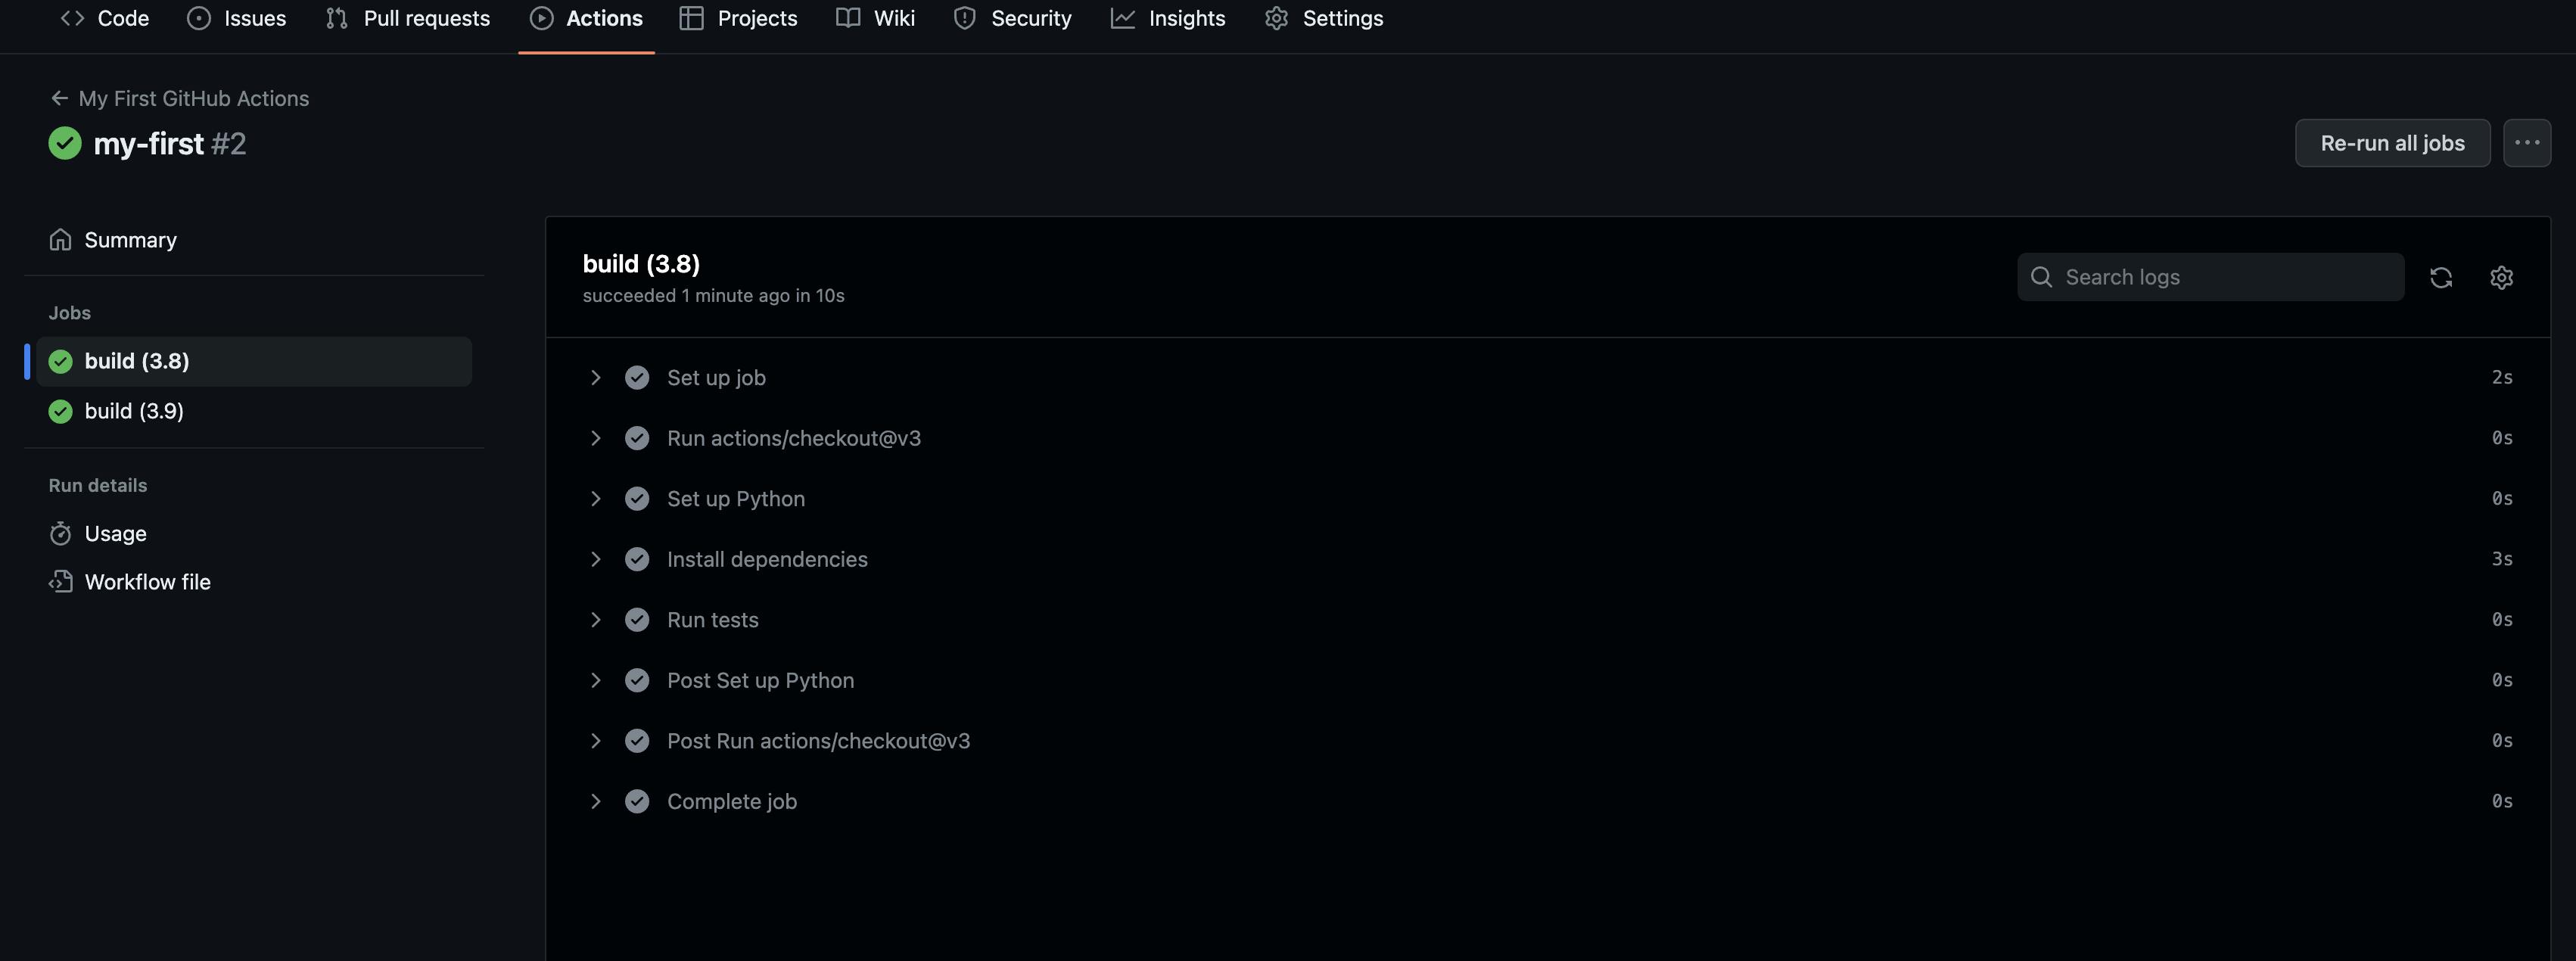
This complete action is done using GitHub-hosted-runners
In Github action you can use GitHub-hosted runners or self-hosted runners
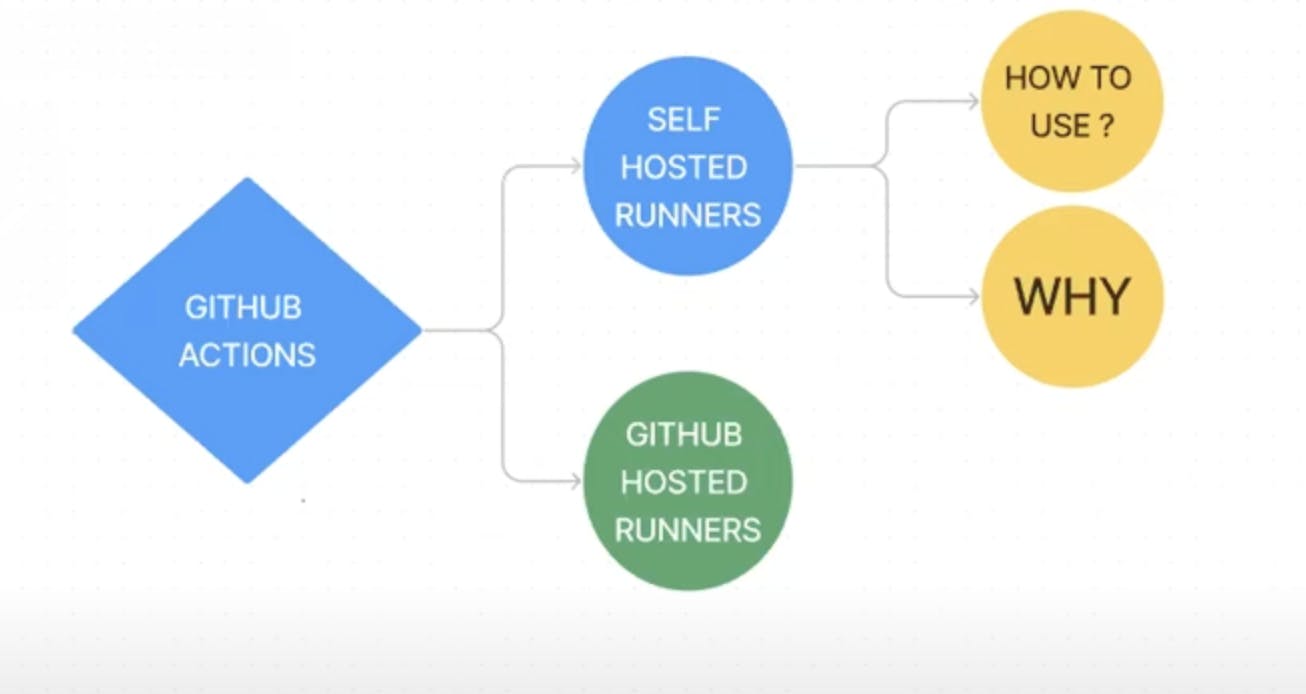
What are Github-hosted runners?
When you use a GitHub-hosted runner, machine maintenance and upgrades are taken care by github. Each GitHub-hosted runner is a new virtual machine (VM) hosted by GitHub with the runner application and other tools preinstalled and is available with Ubuntu Linux, Windows, or macOS operating systems.
All steps in the job execute on the VM, allowing the steps in that job to share information using the runner’s filesystem. You can run workflows directly on the VM or in a Docker container
What are self-hosted runners?
Self-hosted runners are the same as Jenkins like we create a docker agent. self-hosted runners are machines or virtual environments that you can set up and manage yourself to execute workflows and jobs. you have more control and flexibility over the execution environment compared to GitHub-hosted runners. You can customize the runner's hardware specifications, software configurations, and networking capabilities to meet the specific requirements of your software development process.
When you should use self-hosted runners and not Github-hosted runners
When you are a private project that means there will be no access to your GitHub repository because it is a private repository
When the runners provided by GitHub hosted runners are not enough to run your complete end-to-end project means that the resource provided by GitHub are not enough
Security approach, suppose you are a banking application then you definitely not put your code in a GitHub-hosted runner where you don't have any information about it it may be hosted in Australia or Europe you don't know.
How to attach self-hosted runners to GitHub
First, we will go to AWS console and create an ec2 instance and will try to attach this ec2 instance with GitHub and see how GitHub communicates with this instance
First, create an EC2 instance
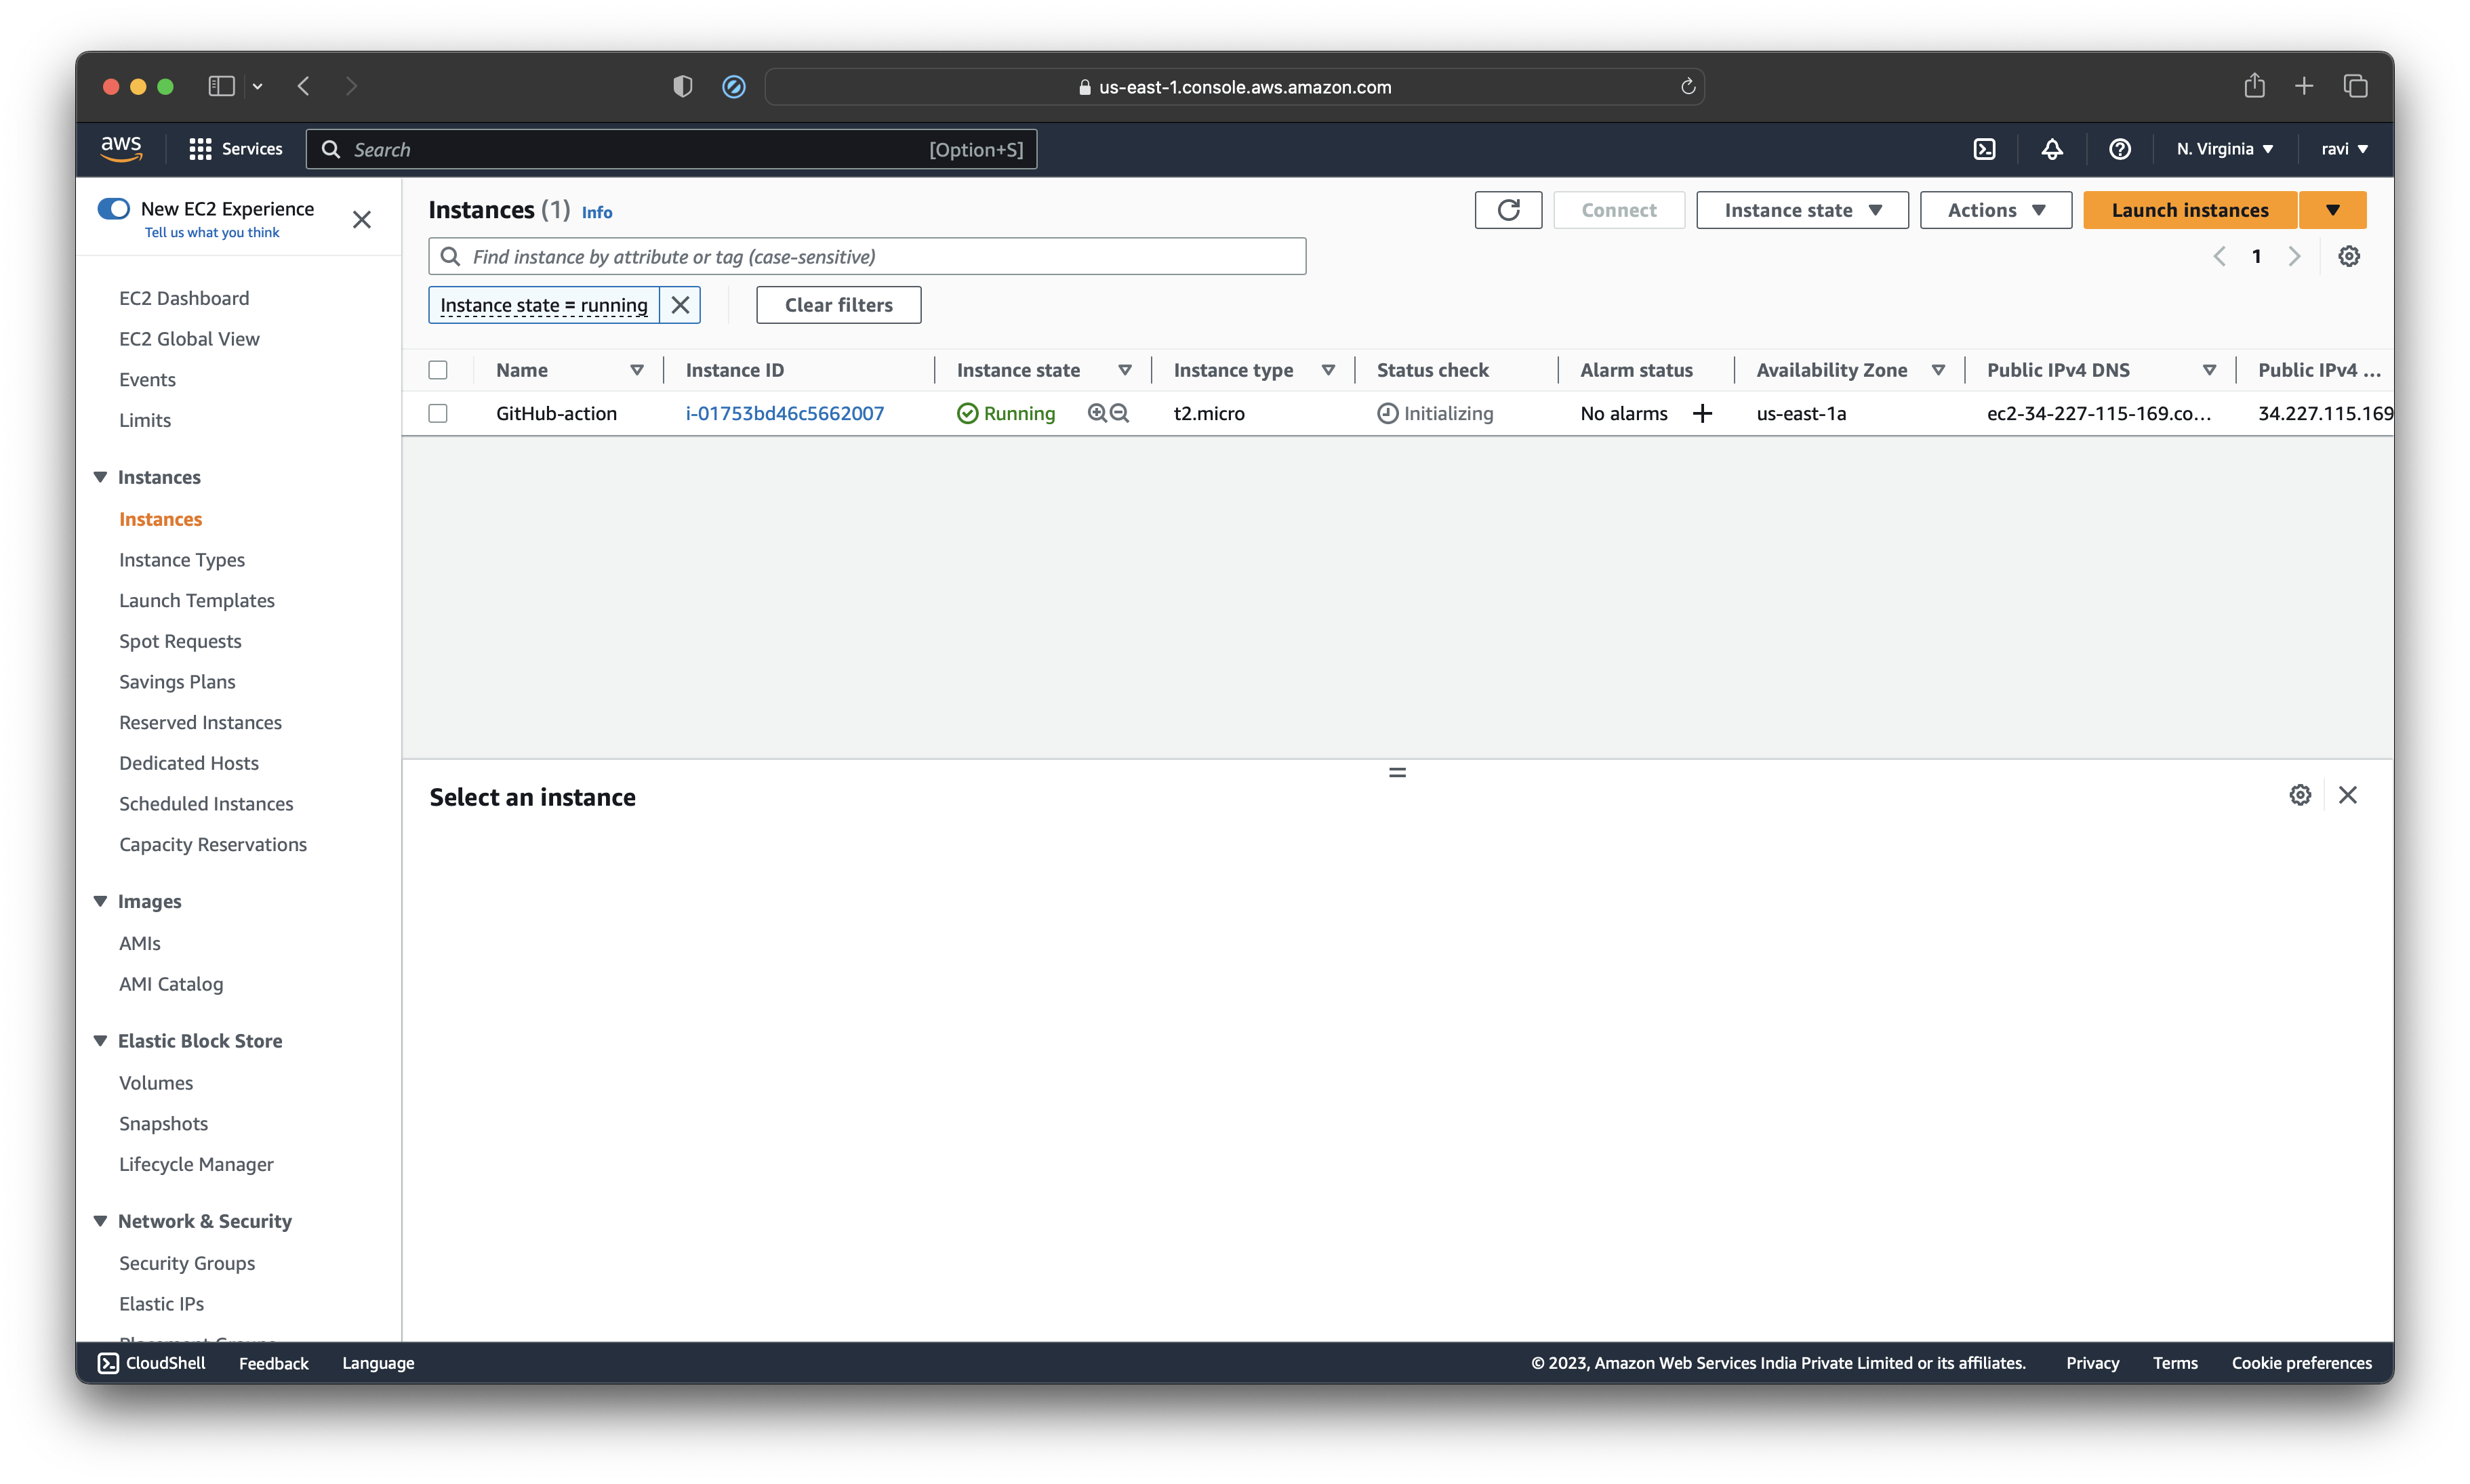
Once the instance is started you have to modify the inbound and outbound traffic rules and open the HTTP and https ports.
Go to security tabs and click on security groups
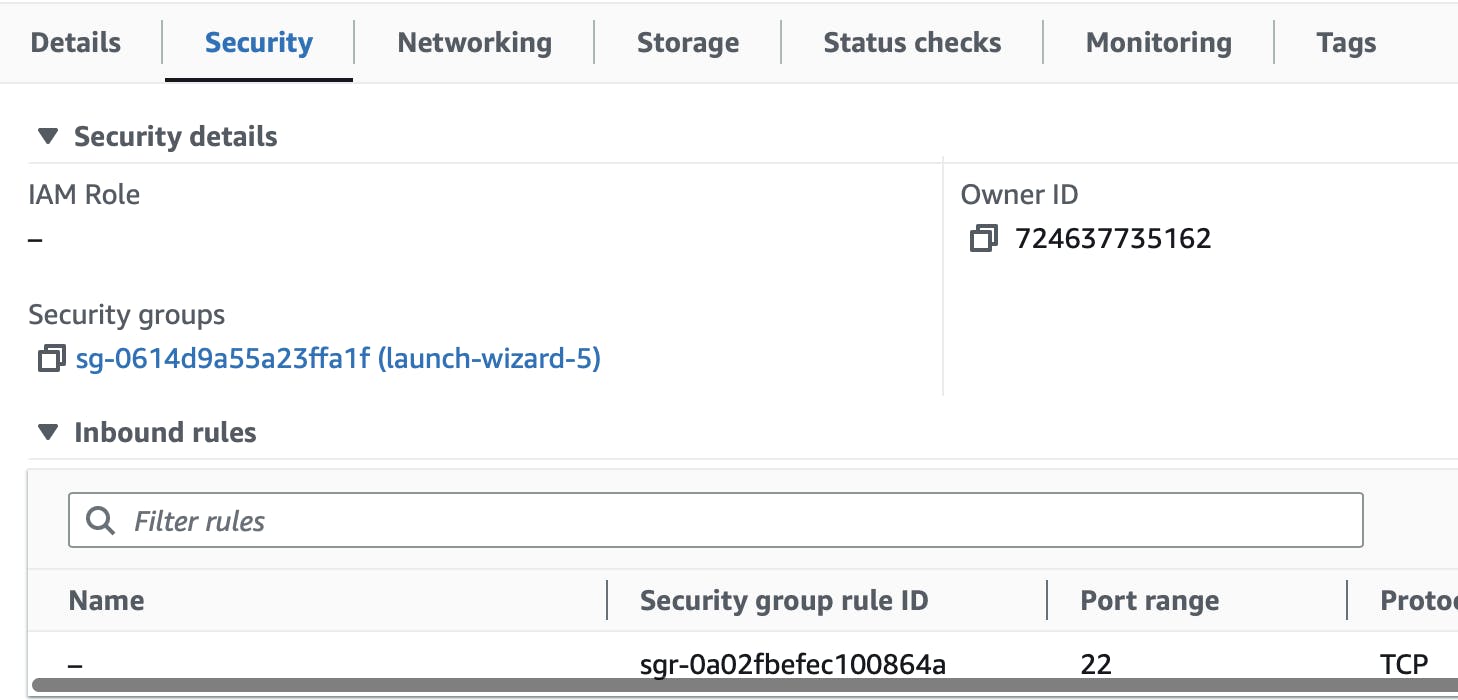
Go to edit inbound rules

Now click on add rules and select type as HTTP and source type as Anywhere-IPv4
Again click on add rules and select type as HTTPS and source type as Anywhere-IPv4
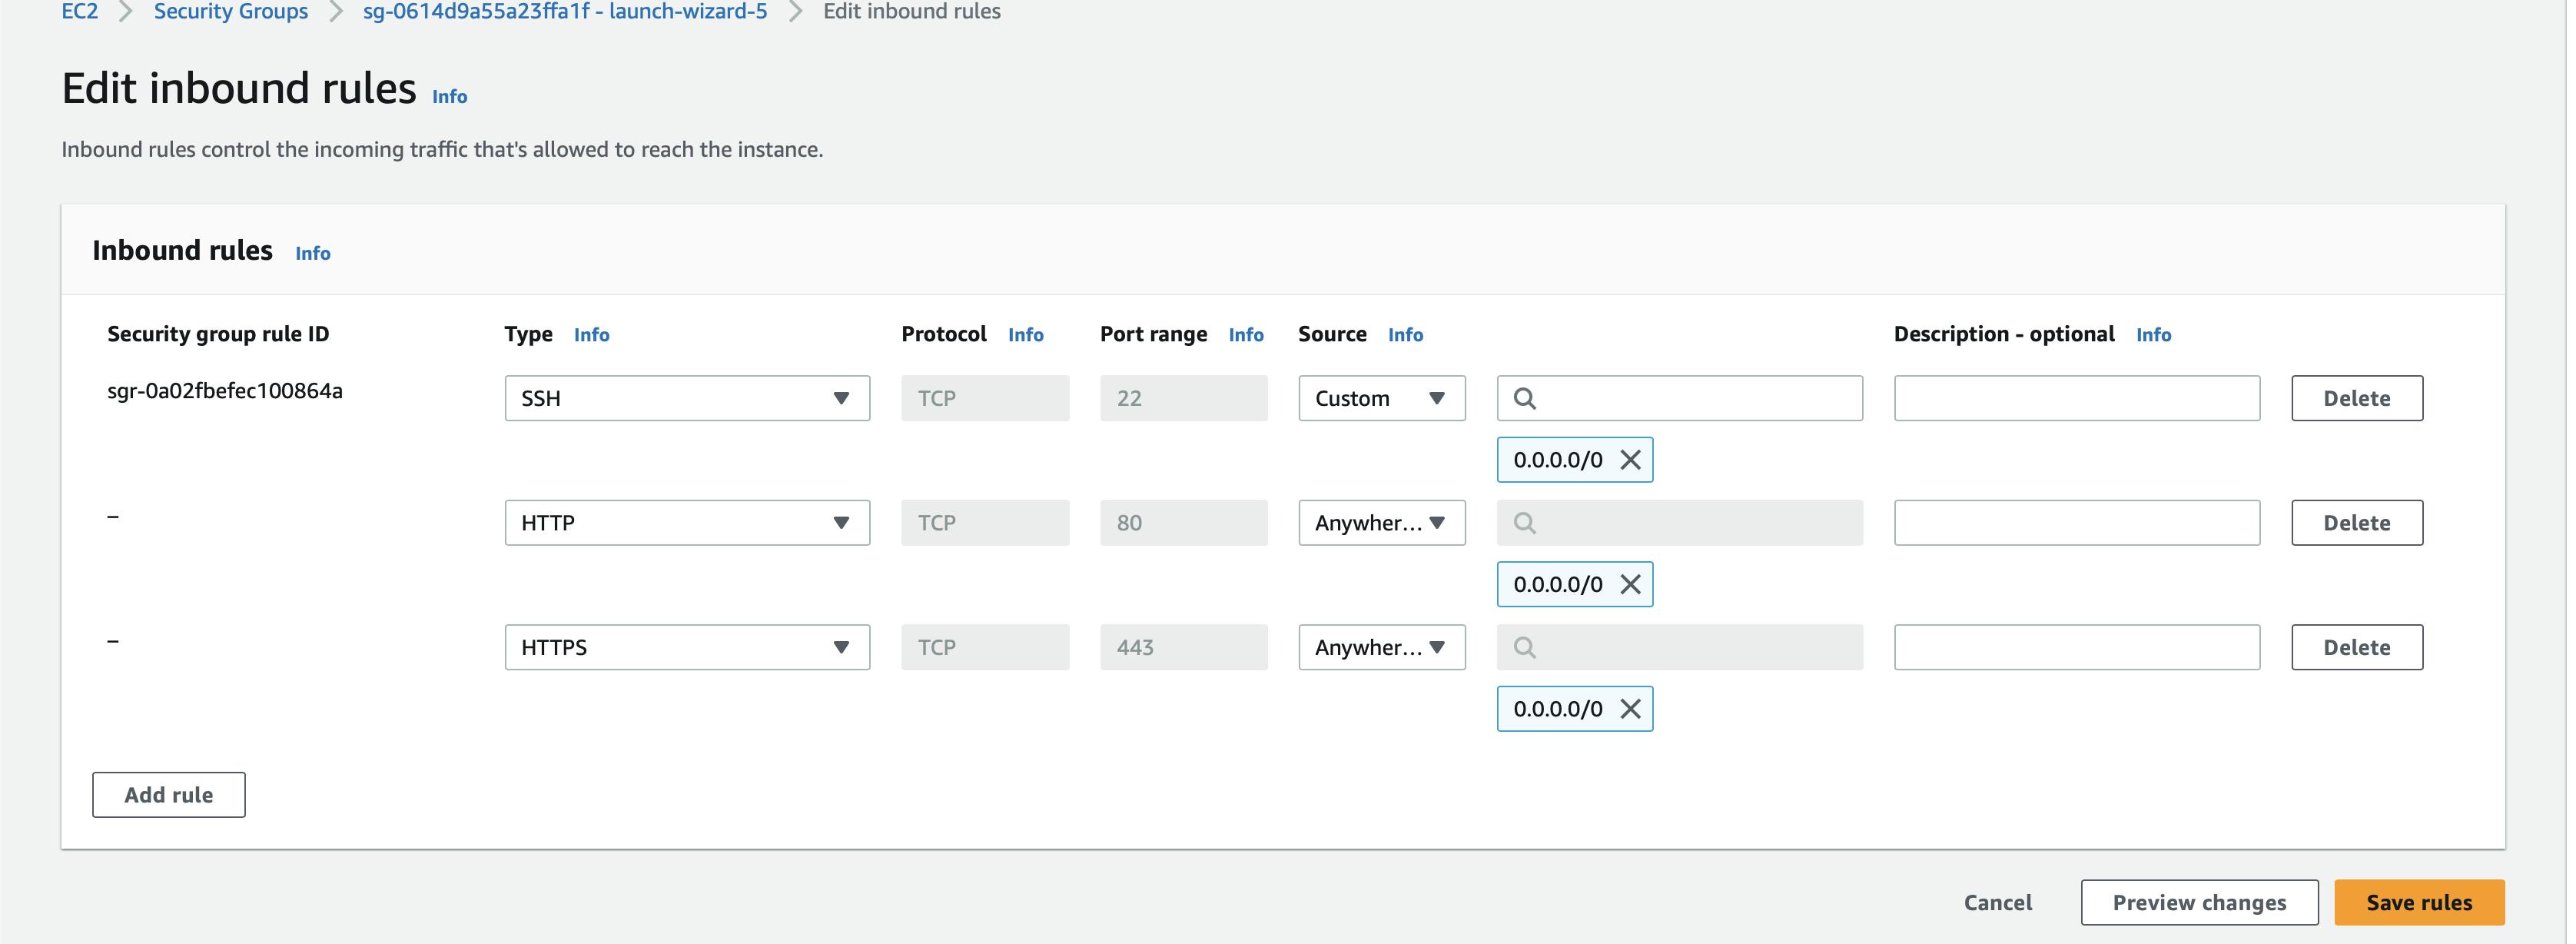
Click on Save rules
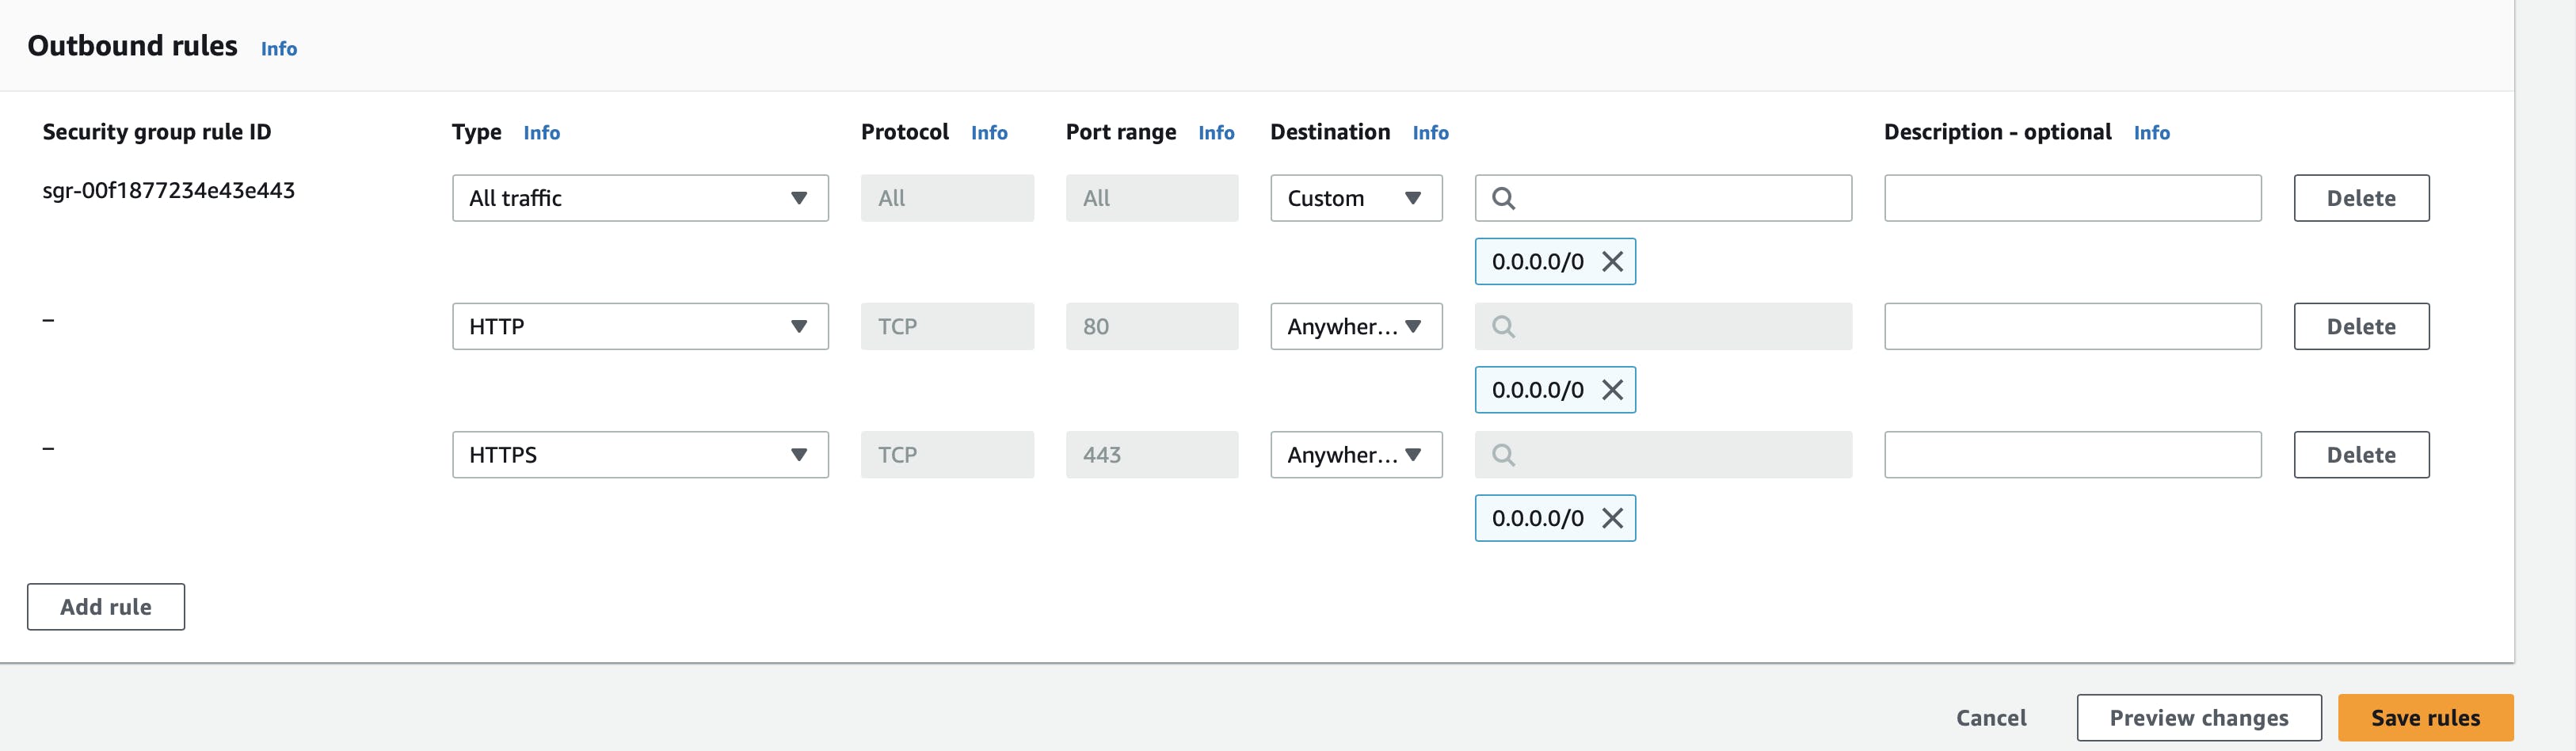
Done with inbound rules now set outbound traffic rules

Click on edit outbound rules > add rules and do the same and http and https rules and save rules
Now go to your github account and go to the specific repository where you want to use self hosted runners
Go to settings tab of your repositort click on setting > Action > runners
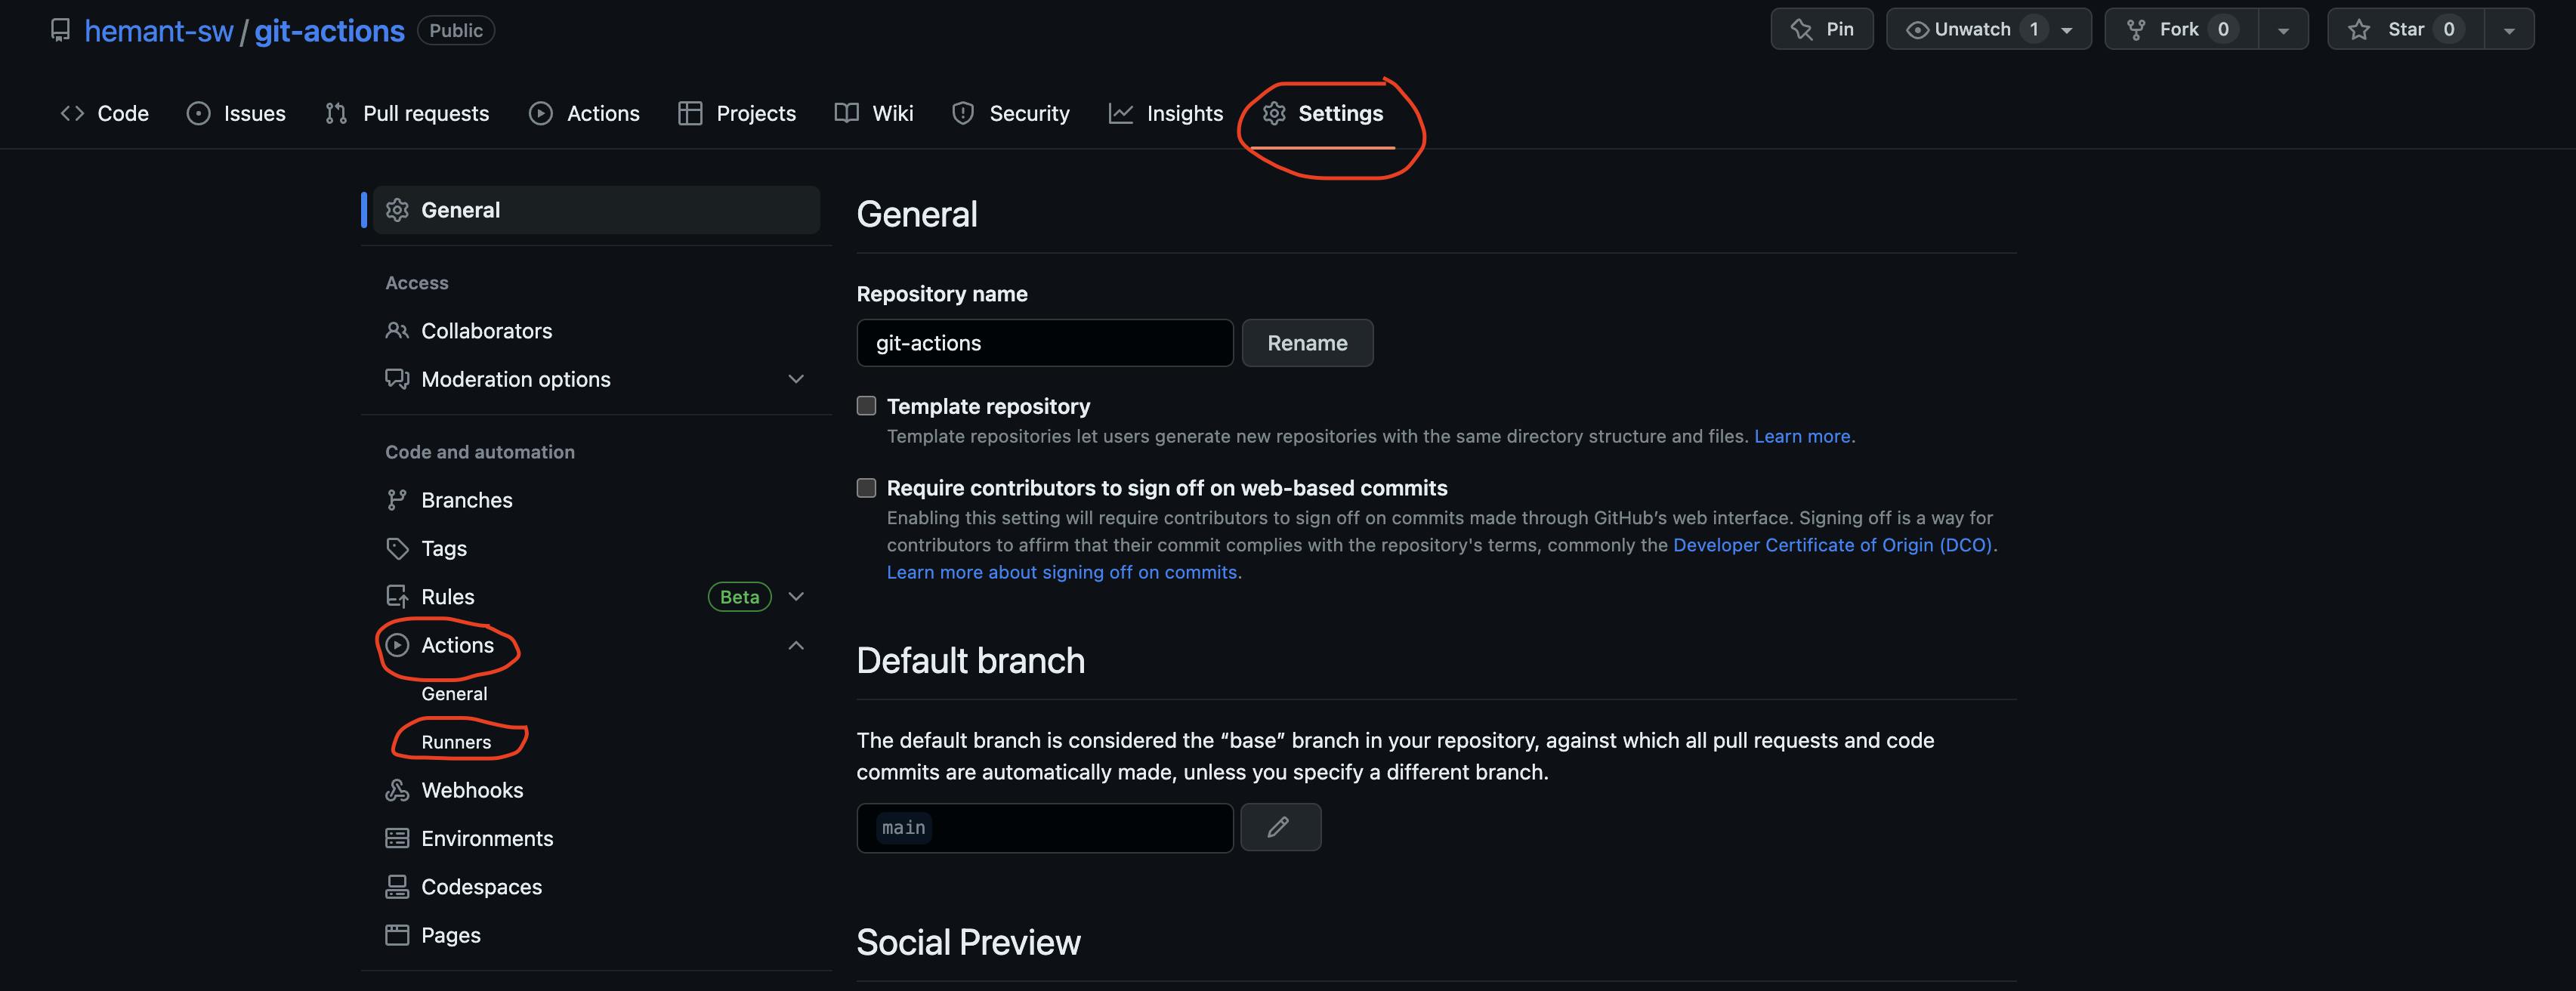
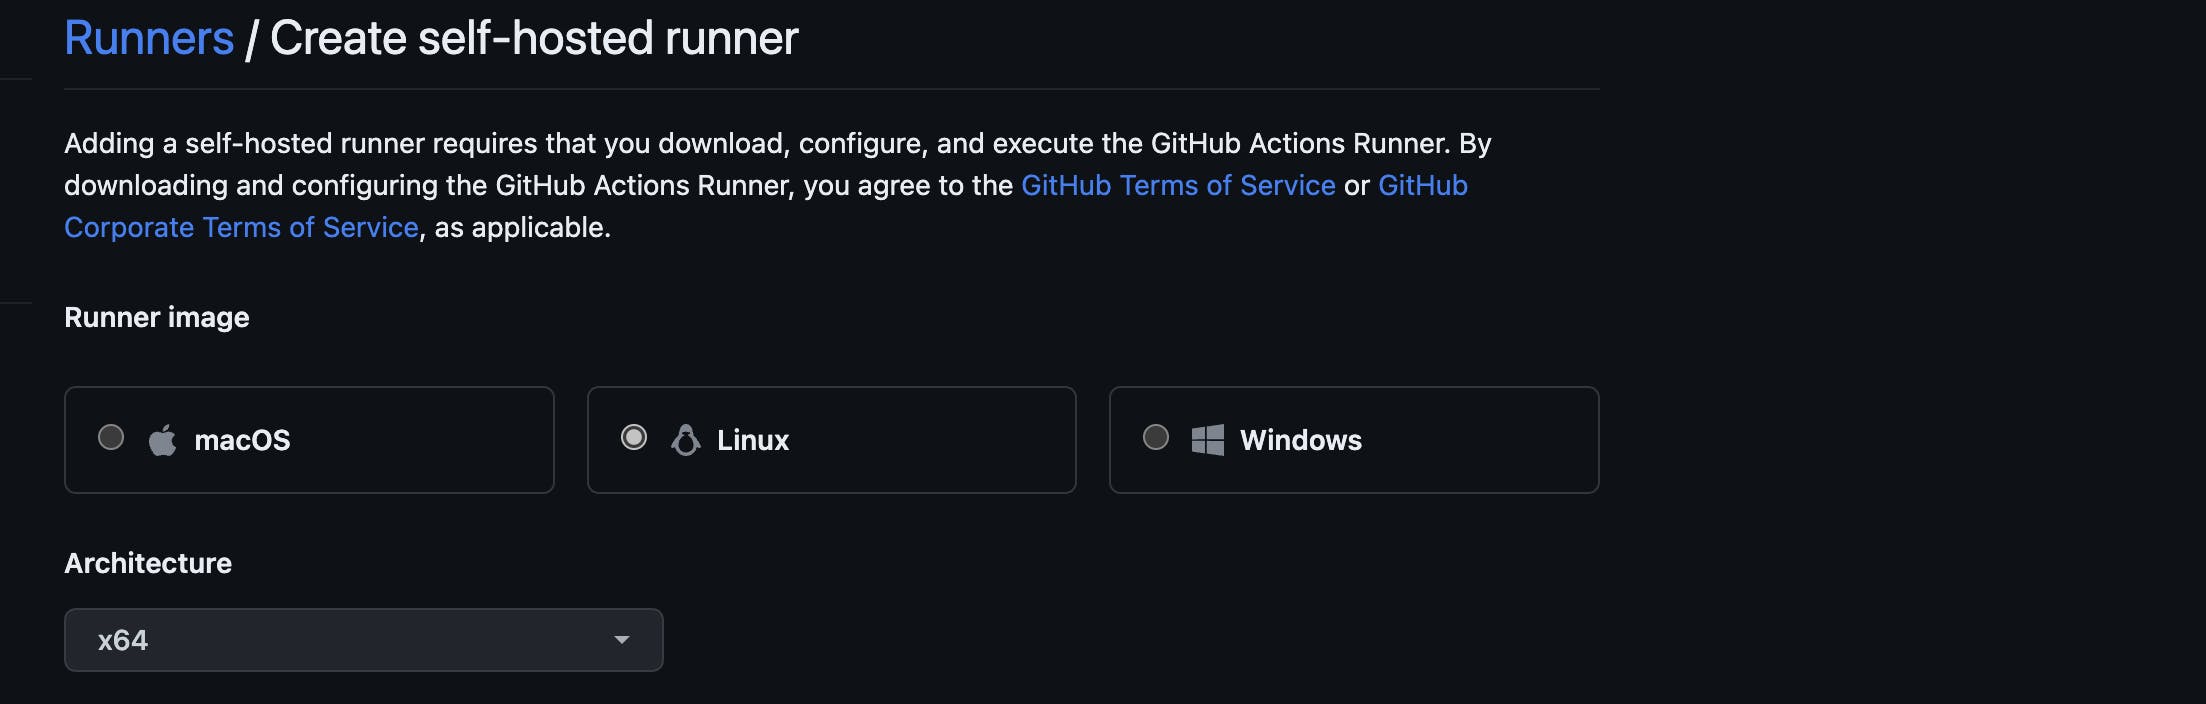
Now click on New self-hosted runner

Select runner image and Architecture In my case :
Runner will be Linux
Architecture will x64
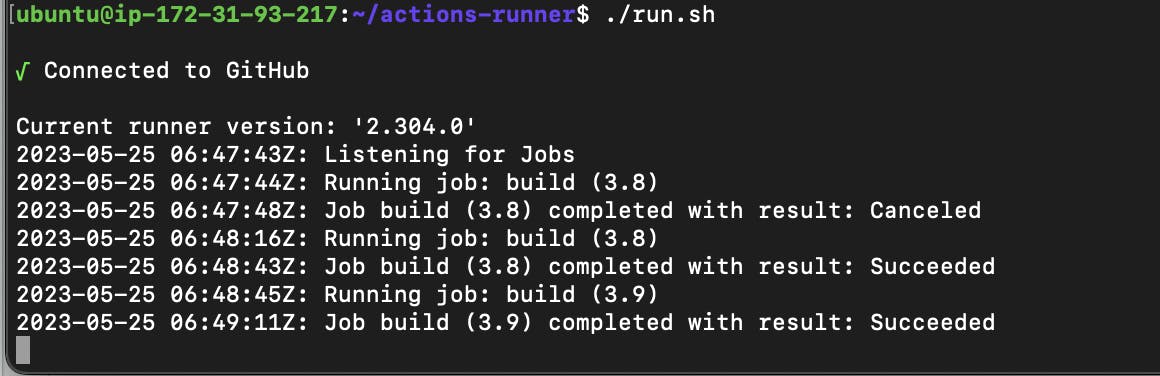
Now run the all below-mentioned step of download configuration in your ec2 instance
This information is sensitive so I am skipping these steps
after running all the commands you will get an output like this

Go to your repository and update the runner tag to
self-hostedin youractions.ymlfile
and commit the changes, when you commit this change now your github is ready to use self-hosted runners
Now GitHub will start actions and when both jobs are successful you see a green tick in your GitHub.

so, that's why we configured both inbound and outbound rules so they can communicate with each other